Page 8
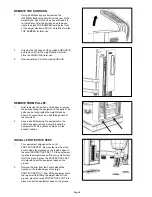
3.
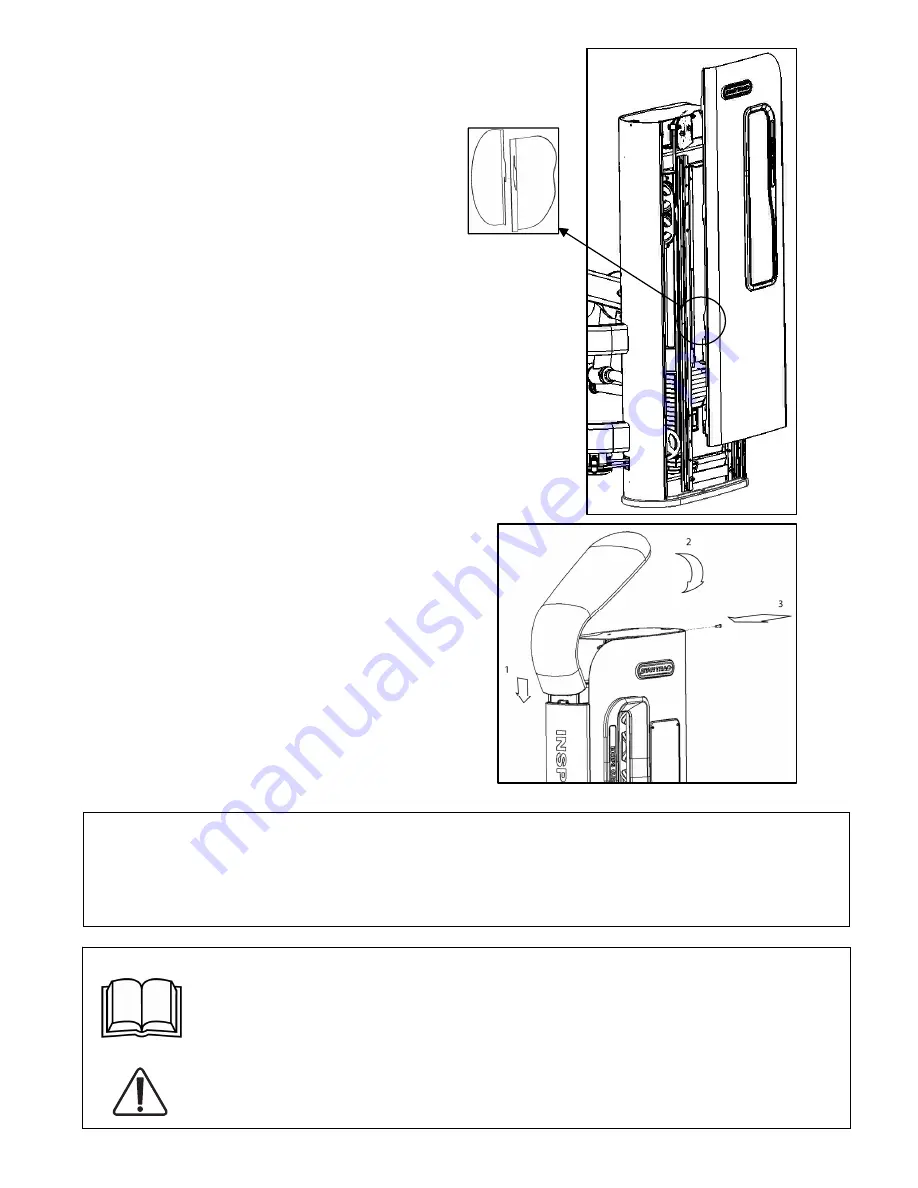
After both shrouds have been installed install the
black TOP BUMPER by first inserting the two tabs
found on the large end of the TOP BUMPER into
the equipment main frame. Now rotate the TOP
BUMPER down until it is sitting flush on top of the
weight frame. Install the (M6,30MM,Button Head
Bolt) through the weight frame into the TOP
BUMPER as shown.
Torque to 1.1 N-m max. Do
not use thread locker on this bolt.
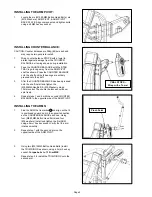
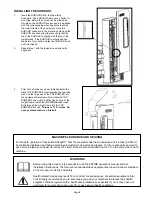
INSTALLING THE SHROUDS:
1.
Insert the SHROUDS from the top sliding
downward. The SHROUDS have seven hooks for
mounting. Before the shroud can be slide down
into place, the SHROUD hooks need to be aligned
with the corresponding mounting holes found on
the weight frame of the equipment. Once the
SHROUD hooks are in the mounting holes and the
SHROUD has been slid into place verify that the
top of the SHROUD is aligned with the top of the
weight stack. If the SHROUD is not aligned use
the palm of your hand and tap the SHROUD down
until it is aligned.
2.
Repeat step 1 with the inside shroud and verify
alignment.
Before using this product, it is essential to read the ENTIRE operations manual and ALL
installation Instructions. The Owner’s manual describes equipment setup and instructs members
on how to use it correctly and safely.
Health related injuries may result from incorrect or excessive use of exercise equipment. Star
Trac strongly recommends you to encourage you and your members to discuss their health
program or fitness regimen with a health care professional, especially if you or they have not
exercised for several years, are over 35, or have known health conditions.
WARNING!
MACHINE CLEARANCE AND SPACING
For the safe operation of Inspiration Strength™ Star Trac recommends that a clearance of 24 inches (60.96cm)
be maintained between and behind machines including moving arms and levers. To insure safe entry and exit to
each unit a walkway of at least 36 inches (91.44cm) inches is recommended front of, or on the entry side of each
machine.
Summary of Contents for IP-S4305
Page 1: ...SHOULDER PRESS IP S4305 INSTALLATION INSTRUCTIONS...
Page 9: ...Page 9...


