background image

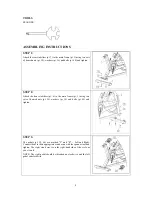
TOOLS 

SPANNER: 


ASSEMBLING INSTRUCTIONS 

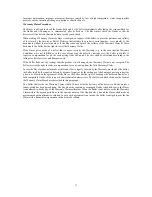
STEP 1: 

Attach the rear stabilizer (pt. 7) to the main frame (pt. 1) using two sets 
of domed nuts (pt. 28), washers (pt. 16) and bolts (pt. 69) and tighten. 


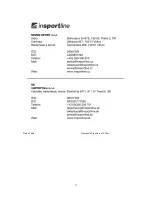
STEP 2: 

Attach  the  front  stabilizer  (pt.  6)  to  the  main  frame  (pt.  1)  using  two 
sets  of  domed  nuts  (pt.  28),  washers  (pt.  16)  and  bolts  (pt.  69)  and 
tighten. 


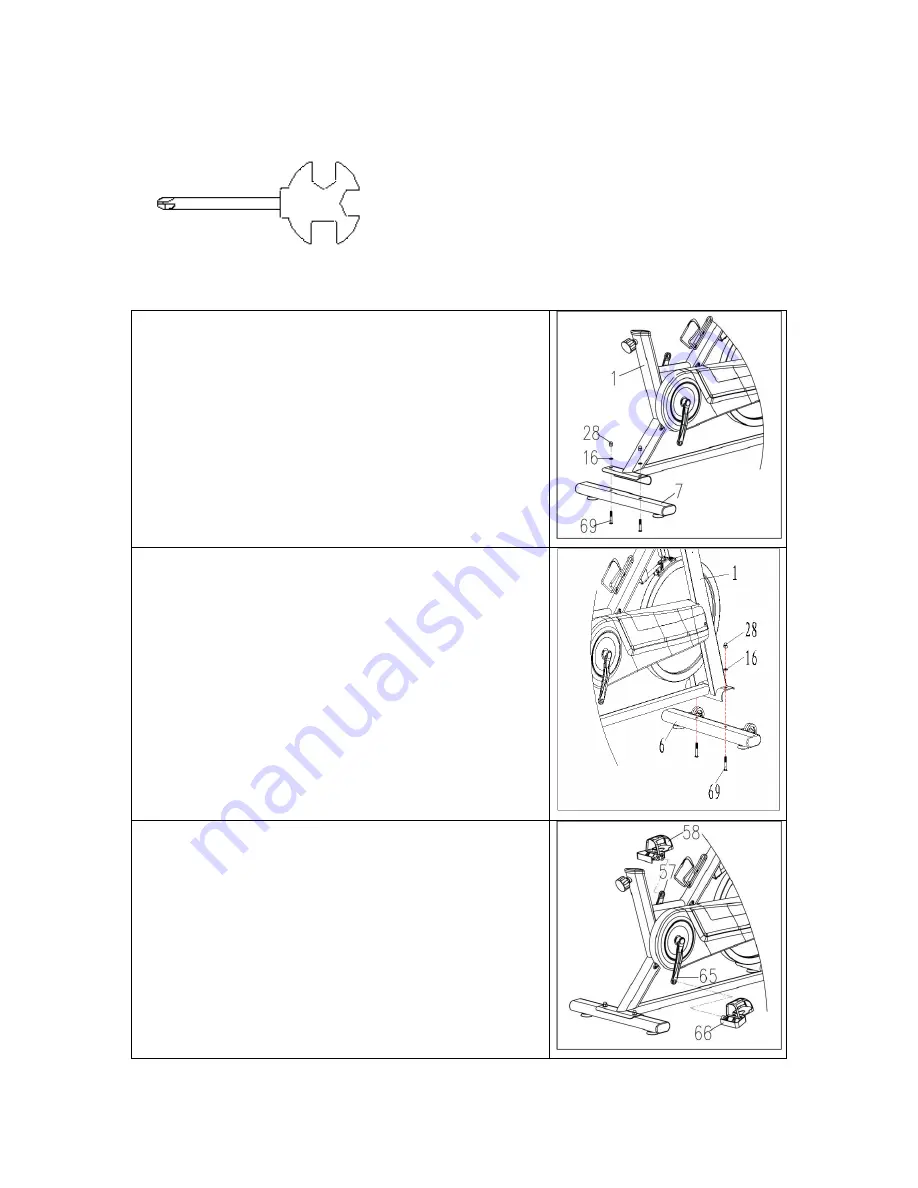
STEP 3: 

The  pedals  (pt.  58,  66)  are  marked  "L"  and  "R"  –  Left  and  Right. 
Connect them to their appropriate crank arms with the spanner tool and 
tighten.  The  right  crank  arm  is  on  the  right-hand  side  of  the  cycle  as 
you sit on it. 

NOTE:  The  right  pedal  should  be  threaded  on  clockwise  and  the  left 
pedal anticlockwise. 


Summary of Contents for IN 9361 Baraton

Page 1: ...1 USER MANUAL EN IN 9361 Spinning Bike inSPORTline Baraton...

Page 2: ...2 CONTENTS IMPORTANT SAFETY INFORMATION 3 EXPLODED VIEW A 4 EXPLODED VIEW B 5 PARTS LIST 6 ASSEMBLING INSTRUCTIONS 8 TERMS AND CONDITIONS OF WARRANTY WARRANTY CLAIMS 10...

Page 3: ...lat level surface with a protective cover for your floor or carpet For safety space the equipment should have at least 0 6 meter of free space all around it 6 Before using the equipment check the hand...

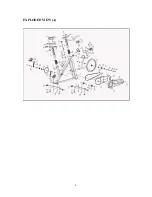
Page 4: ...4 EXPLODED VIEW A...

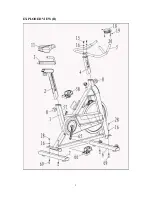
Page 5: ...5 EXPLODED VIEW B...

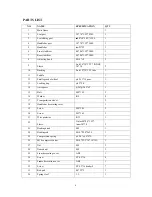
Page 6: ...wheel 65 13 16 gear 1 13 Locking ring 42 5 0 1 14 Axis spacer 26 20 2 6T 1 15 Bolt M8 16L 2 16 Washer 8 8 17 Transportation wheel 2 18 Handlebar decorating cover 1 19 Screw M4 10L 2 20 Screw M3 16L 2...

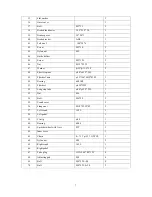
Page 7: ...2 2 22L 1 49 Flywheel axis 15 146 M12 P1 25 1 50 Bearing 6001RS 2 51 Flywheel 450 35W 1 52 Long step tube 20 12 2 25L 1 53 Nut M6 2 54 Bolt M6 50 2 55 Crank cover 2 56 Flange nut M10 P1 25 8T 2 57 Lef...

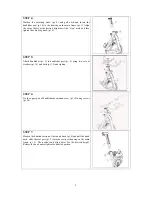
Page 8: ...zer pt 6 to the main frame pt 1 using two sets of domed nuts pt 28 washers pt 16 and bolts pt 69 and tighten STEP 3 The pedals pt 58 66 are marked L and R Left and Right Connect them to their appropri...

Page 9: ...ttach handlebar pt 5 to handlebar post pt 4 using two sets of washers pt 16 and bolts pt 15 and tighten STEP 6 Fix the upper part of handlebar decoration cover pt 18 using screws pt 20 STEP 7 Slacken...

Page 10: ...The Buyer who is not the End Customer is a Businessman that buys Goods or uses services for the purpose of using the Goods or services for his own business activities The Buyer conforms to the Genera...

Page 11: ...rding to the valid price list of services and transport costs If the Seller finds out by testing that the product is not damaged the Warranty Claim is not accepted The Seller reserves the right to cla...

Page 12: ...12 Date of Sale Stamp and Signature of Seller...

Reviews: