Compliance Module
BlastMate III Operator Manual
3–5
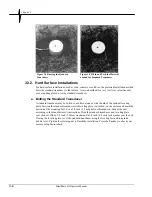
Figure 3.6 Bolting the Standard
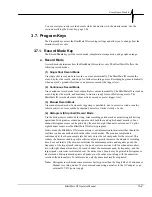
Figure 3.7 Bolting the Standard
Transducer to a Surface.
Transducer to a Surface using the
Leveling
Plate.
b. Sandbagging – For Very Low Velocity Levels Only
Use this method for installations where velocity levels remain very low. The sandbag must be of
sufficient size to cover the entire standard transducer and lay on the surrounding surface around
the standard transducer. A sandbag should contain at least 25 pounds (12 kg) of sand or 1/4”
washed gravel. The optional leveling plate can be used with the method. Press the
Test
key to
check your sensors using Sensorcheck.
3.4. Installing a Microphone
Instantel microphones come with a sectional three foot (one meter) mounting stand. Screw the three
mounting stand pieces together. Locate the mounting stand at the point of interest. The mounting stand
may be inserted into the support bracket located on the front of the BlastMate III or it can be pressed
into the ground. Check that the stand is firmly positioned and installed upright. Insert the microphone
into the mounting bracket on the top of the stand, and attach the windscreen to reduce false triggering
caused by wind. Point the microphone in the direction of the event. Connect the microphone cable to
the BlastMate III. Press the
Test
key to check your microphone and the microphone connection.
NOTE:
The microphone windscreen attenuates the microphone reading by 0.2 dB. In most cases,
this does not have a material impact on results.
WARNING
: Handle the microphone with care. Dropping the microphone or otherwise subjecting
it to impact may damage the microphone element. The windscreen can help to
protect the microphone, and its use is recommended.
3.5. The BlastMate III Keyboard
The integrated keyboard offers convenient access to all the BlastMate III operations. The keyboard has
sixty four keys with additional functions accessed by pressing two keys at the same time. The BlastMate
III provides a confirmation beep when a key is pressed. Refer to the keyboard diagram located in Chapter
1.
You can change the BlastMate III setups using the keyboard or using a personal computer running the
BlastWare III software. This section outlines the procedures to change the setups using the BlastMate III
Summary of Contents for Blastmate III
Page 1: ......
Page 6: ...iv BlastMate III Operator Manual Notes ...
Page 20: ...Chapter 2 2 6 BlastMate III Operator Manual Notes ...
Page 50: ......
Page 74: ...Chapter 6 6 6 BlastMate III Operator Manual Notes ...
Page 77: ...Appendix BlastMate III Operator Manual A 1 Appendix ...
Page 78: ...Appendix A 2 BlastMate III Operator Manual ...
Page 84: ...Appendix A 8 BlastMate III Operator Manual Notes ...
Page 90: ...Index I 6 BlastMate III Operator Manual Notes ...


