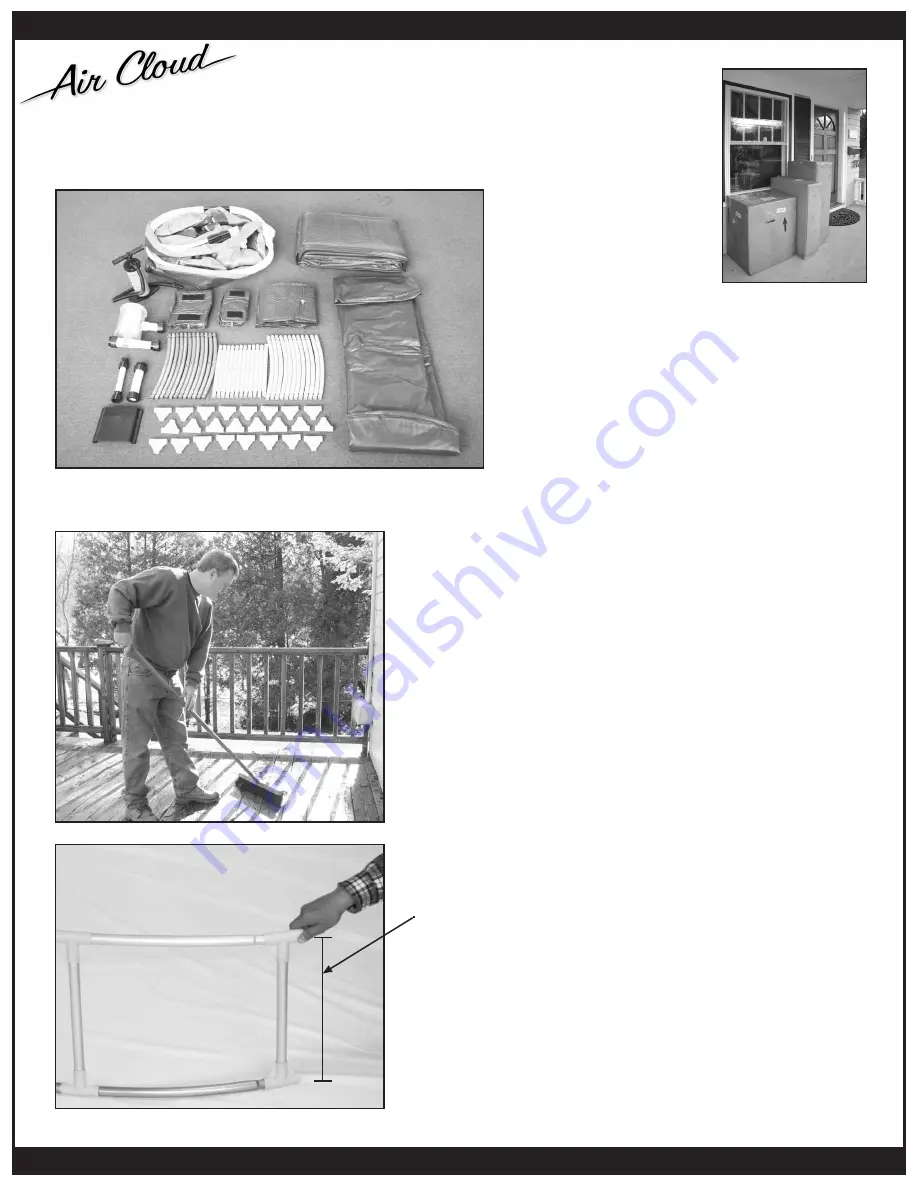
BUILD THE ALUMINUM FRAME
5. Collect the 3 types of aluminum frame tubes (10), (11), & (12).
6. Connect all the “T” connectors (14) to the 12 straight Vertical tubes (11) to create
an “I-Beam”.
Connect the “T”-connectors tight so that the brass retaining bulb pops up through
the retaining hole in the “T”-connector for every tube you connect.
7. Connect a silver aluminum top ring tube(12) to one end of an “I-Beam”. Connect
a blue aluminum bottom ring tube (10) to the other end.
8. Connect another “I-Beam” to the curved tubes. Keep adding more curved tubes
and “I-Beams” as shown.
CHECK COMPONENTS
1. The InstaSPA will be shipped
to your home in 3 boxes.
2. Open boxes and check the contents.
Assembly Instructions
(1) Inner Liner
(2) Vinyl Outer Skirt
(3) Hand Pump
(4, 5, 6) Filter Insulation
(7) Spa Cover
(8) Filter
(9) 2 Threaded Connecting Pipes
(10) 12 Blue Longer Bottom Ring Tubes
(11) 12 Straight Vertical Tubes
(12) 12 Shorter Top Ring Tubes
(13) Intake Cover
(14) 24 “T” Connectors
PREPARE A SITE FOR SPA
3. Before beginning spa assembly, find a flat, level area. Within reach of a grounded
power outlet. Check with electrician if you cannot verify that the receptacle is
grounded.
- Use only 3 wire extension cords that are at least 16 AWG to connect the motor
unit to the power source. Extension cords that are rated less than this, will cause
a voltage drop which may cause damage to the pump motor and controls.
International users should check with a certified electrician to choose a safe
extension cord.
- Do not place cord in heavy traffic area.
- Do not bury power cord.
- Place cords where they will not be damaged by the lawnmower, hedge trimmer
and other cutting tools.
4. Clean area thoroughly. Remove all debris. Make sure there are no sharp pointed
objects, sticks, or stones that could rupture the bottom of the spa.
Step 6, 7, 8
Step 4
(7)
(1)
(4)
(2)
(10)
(3)
(5)
(6)
(12)
(8)
(9)
(11)
(13)
(14)
4
InstaSPA
™
InstaSPA
™
InstaSPA
™


