C.
SIGNAL WIRING
10
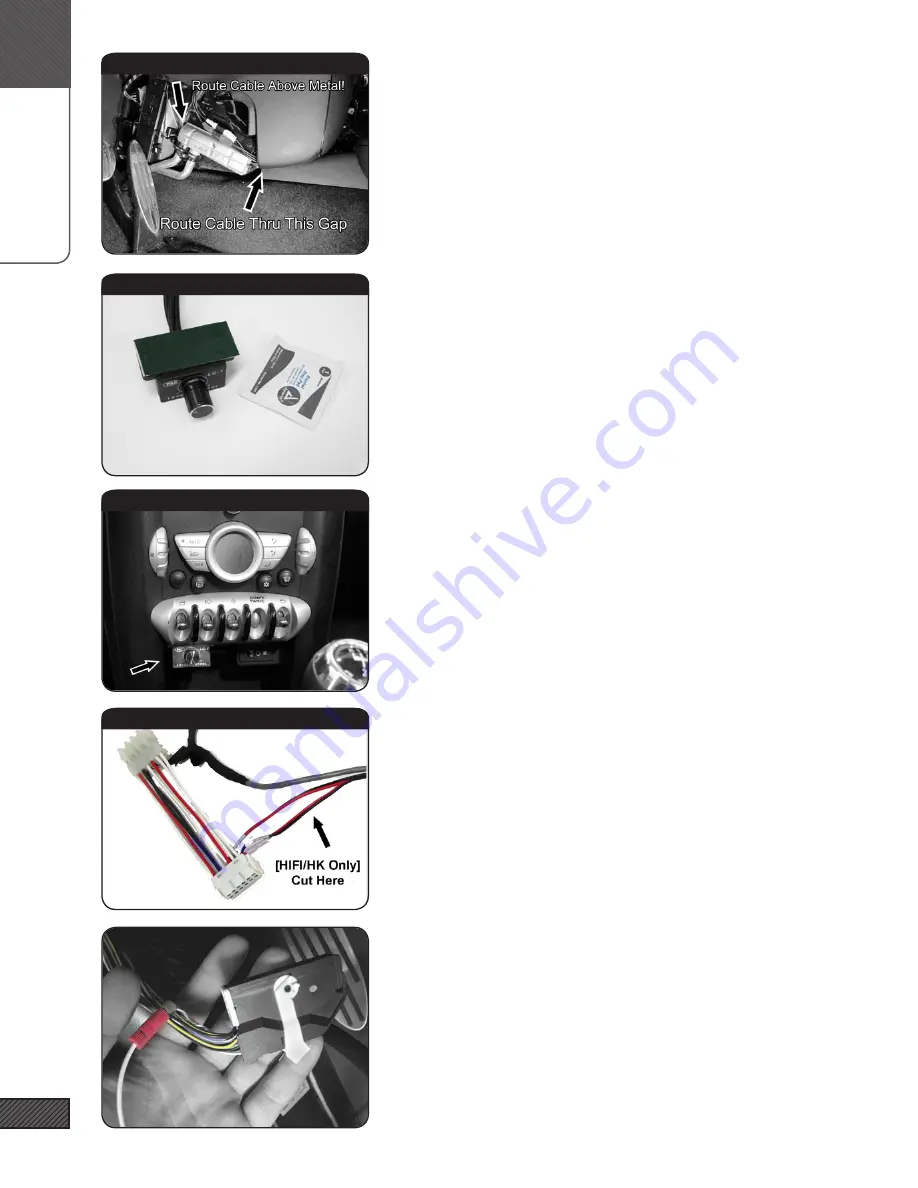
21. ROUTE REMOTE LEVEL CONTROL
[SUB ONLY]
Run the Remote Level Control cable above the metal shown and
then thru the gap under the bottom edge of the center console.
.
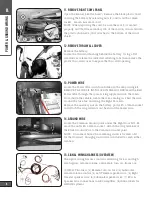
REMOTE LEVEL CONTROL
[SUB ONLY]
Assemble the Remote Level Control by inserting shaft-first into
the housing and fastening with the washers and nut. Slide the
knob over the shaft.
Attach the 3M VHB double-sided adhesive (this is the green 3in
length) to the top of the Remote Level Control housing. Trim ex-
tra length from the VHB, if necessary. Wipe the surface with one
of the Alcohol Prep Pads before applying.
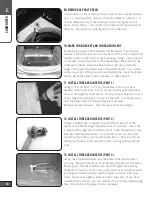
22. MOUNT REMOTE LEVEL CONTROL
[SUB ONLY]
Connect the cable to the Remote Level Control. Mount the Re-
mote Level Control below the toggle switches. Wipe the surface
with the Alcohol Prep Pad before applying.
Do a dry-run to check the placement and be sure you know
exactly where you’d like the control. You will find that you can
place it more toward the front of the recess for easier access, or
toward the rear for a more hidden look.
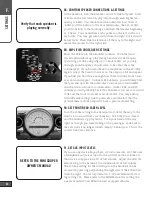
23. CUT & RELEASE MID/MIDWOOFER SPEAKER WIRES
[HIFI/HK ONLY] [HIFI/HK ONLY] [HIFI/HK ONLY] [HIFI/HK ONLY]
For HIFI/HK equipped vehicles ONLY!
Cut the Mid/Woofer Speaker wires at the X9331 T-Harness.
Remove the wires from the rest of the harness bundle UP TO
WITHIN 8 FEET OF THE RCAS at the other end of the harness.
These wires will be used later to connect to the factory wiring
downstream of the HIFI/HK amplifier.
24. REMOTE TURN-ON WIRE
Identify the solid black wire coming out of pin 1 of the X15 con-
nector (from previous step). Locate the 18AWG White Remote
turn-on Lead wire in the signal harness. Unscrew both ends
of the Threadlock wiretap (the tap has a hole in only one end)
Slip the “U”-shaped bottom around the signal wire to be tapped.
Carefully thread the body of the tap onto this and tighten firmly.
Be sure not to cross-thread the tap.
[SUB ONLY]
[SUB ONLY]
[SUB ONLY]
[HIFI/HK ONLY]


