26
Intel Astor II Server Chassis Subassembly Product Guide
Installing the Diskette Drive
1.
Observe the safety and ESD precautions at the beginning of this chapter.
2.
Remove the new 3.5-inch diskette drive from its protective wrapper, and place it component
side up on an antistatic surface. Record the drive model and serial numbers in your equipment
log.
3.
Set any jumpers or switches according to the drive manufacturer’s instructions.
4.
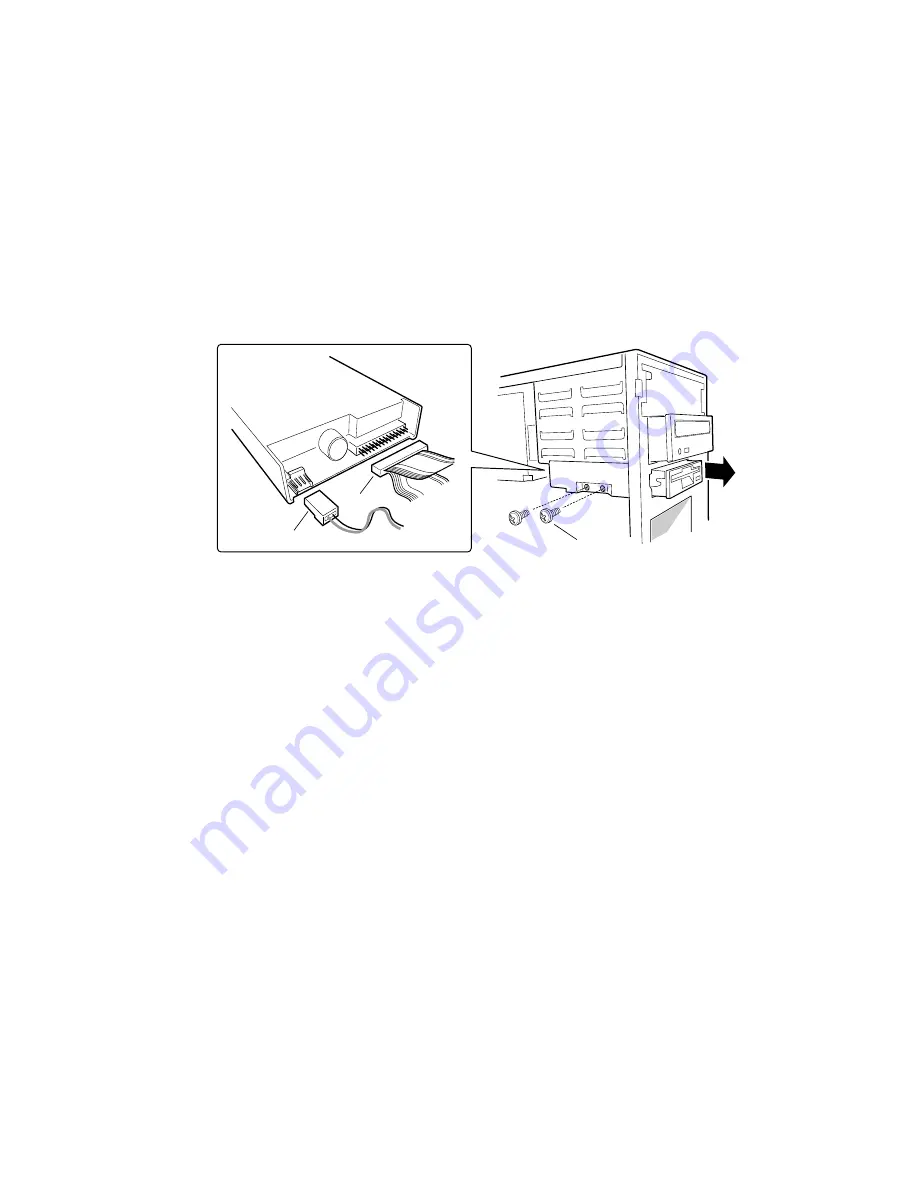
Slide the drive into the chassis.
5.
Secure the drive to the 5.25-inch bay with the screws you removed earlier; tighten the screws
firmly.
6.
Connect the signal and power cables to the drive.
OM07052
C
B
A
Figure 14. Installing the Diskette Drive
A.
Power cable
B.
Signal cable
C.
Chassis screws
Removing the Diskette Drive
1.
Observe the safety and ESD precautions at the beginning of this chapter.
2.
Remove the side cover.
3.
Remove the front cover.
4.
Disconnect the power cable and signal cable from the diskette drive.
5.
Remove and save the screws that secure the diskette drive to the 5.25-inch drive bay.
6.
Slide the drive forward and out of the system and place it component side up on an antistatic
surface. If not reinstalling the same drive, place it in an antistatic protective wrapper.


