21
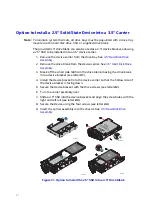
Option to Install a 2.5” Solid State Device into a 3.5” Carrier
Note:
To maintain system thermals, all drive bays must be populated with a drive tray
mounted with a hard disk drive, SSD, or supplied drive blank.
The provided 3.5” drive blank can also be used as a 2.5” device bracket, allowing
a 2.5” SSD to be installed into a 3.5” device carrier.
1. Remove the device carrier from the drive bay. See
.
2. Remove the drive blank from the device carrier. See
.
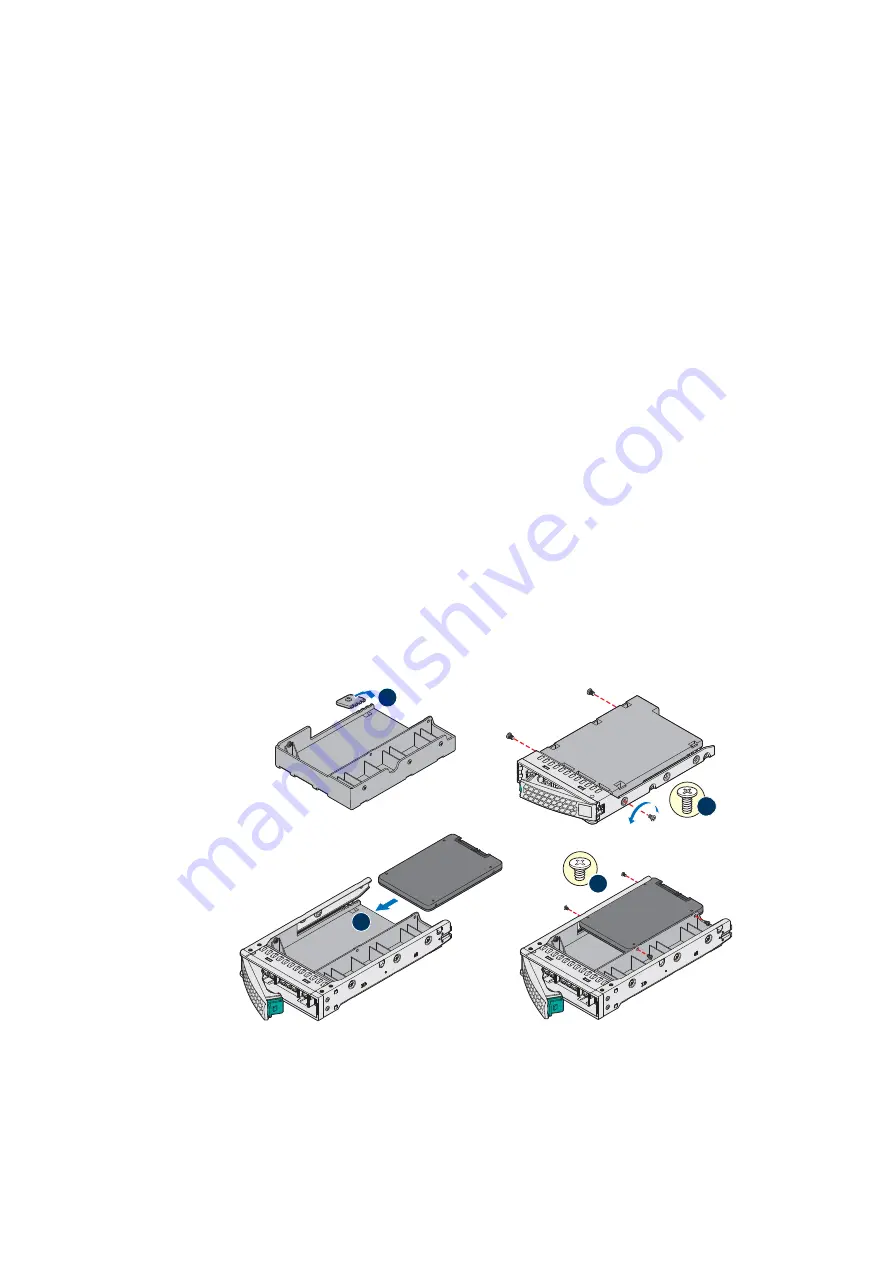
3. Break off the small side tab from the drive blank, making the drive blank
into a device bracket (see letter
d1
).
4. Install the device bracket into the device carrier so that the hollow side of
the device bracket is facing down.
5. Secure the device bracket with the three screws (see letter
d2
).
6. Turn the carrier assembly over.
7. Slide a 2.5" SSD into the device bracket and align the screw holes with the
right and left rail (see letter
d3
).
8. Secure the device using the four screws (see letter
d4
).
9. Insert the carrier assembly into the chassis. See
.
Figure 31. Option to Install the 2.5” SSD into a 3.5” Drive Blank
AF006499
d1
AF006502
TO
P
INST
ALL
THIS SIDE UP
d2
AF006500
SSD
d3
d4
AF006501
SSD


