background image

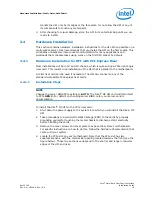
5. Remove the Intel

®

 OP HFI from the anti-static bag. Hold the card by the top

horizontal section of the bracket, and the top rear corner of the card. Be careful

not to touch any of the components on the printed circuit card.

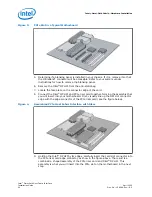
6. Without fully inserting, gently align and rest the gold fingers of the HFI on top of

the motherboard's PCIe slot.

7. Insert the card by pressing firmly and evenly on the top of the horizontal bracket

and the top rear corner of the card simultaneously. The card should insert evenly

into the slot. Be careful not to push, grab, or put pressure on any other part of the

card, and avoid touching any of the components.

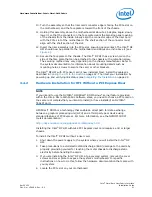
8. Secure the face plate to the chassis. The Intel

®

 OP HFI has a screw hole on the

side of the face plate that can be attached to the chassis with a retention screw.

The securing method may vary depending on the chassis manufacturer. Refer to

the system documentation for information about mounting details such as

mounting holes, and screws to secure the card or other brackets.

Next, install the cables, as described 

Cabling the HFI to the Switch

 on page 22. Then

test your installation by powering up the system (see 

Completing the Installation

 on

page 22).

Cabling the HFI to the Switch

Follow the recommendations of your cable vendor for cable management and proper

bend radius.

To install the cable(s):
1. Check that you have removed the protector plugs(if any) from the cable connector

ends.

2. Different vendor cables might have different latch mechanisms. Determine if your

cable has a spring-loaded latch mechanism.

If your cable is spring-loaded, grasp the metal shell and pull on the plastic

latch to release the cable. To insert, push and the cable snaps into place. You

will hear a short "click" sound from the cable connector when it snaps in.

If your cable latch mechanism is not spring-loaded, push on the metal case,

then push the plastic latch to lock the cable in place.

3. Connect the other end of the cable to a switch.

Completing the Installation

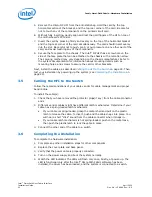
To complete the hardware installation:
1. Complete any other installation steps for other components.
2. Replace the cover plate and back panel.
3. Verify that the power cable is properly connected.
4. Turn on the power supply and boot the system normally.
5. Watch the LED indicator. The LEDs will flash only once, briefly, at power-up. The

LED is functional only after the Intel

®

 Omni-Path Fabric software has been

installed, the driver has been loaded, and the system is connected to a switch.

3.5  

3.6  

Intel

®

 Omni-Path Fabric—Hardware Installation

Intel

®

 Omni-Path Host Fabric Interface

Installation Guide

April 2020

22

Doc. No.: H76466, Rev.: 8.0

Summary of Contents for Omni-Path

Page 1: ...Intel Omni Path Host Fabric Interface Installation Guide Rev 8 0 April 2020 Doc No H76466 Rev 8 0...

Page 2: ...out notice The products described may contain design defects or errors known as errata which may cause the product to deviate from published specifications Current characterized errata are available o...

Page 3: ...to Hardware Installation for HFI Without a PCI Express Riser Added a Note with a pointer to upgrading HFI firmware to Hardware Installation Checklist December 2016 4 0 Added the section Cluster Config...

Page 4: ...llation Checklist 15 3 0 Hardware Installation 16 3 1 Hardware Installation Requirements 16 3 1 1 Hardware 16 3 1 2 Cabling and Switches 16 3 2 Safety with Electricity 17 3 3 Unpacking Information 17...

Page 5: ...tel Omni Path Host Fabric Interface x16 18 3 PCIe Slot in a Typical Motherboard 20 4 Assembled PCIe Host Fabric Interface with Riser 20 Figures Intel Omni Path Fabric Intel Omni Path Host Fabric Inter...

Page 6: ...Tables 1 HFI Model and Related Platforms 16 Intel Omni Path Fabric Tables Intel Omni Path Host Fabric Interface Installation Guide April 2020 6 Doc No H76466 Rev 8 0...

Page 7: ...Path publications are available at the following URL under Latest Release Library https www intel com content www us en design products and solutions networking and io fabric products omni path downlo...

Page 8: ...set of fabric management tools designed to simplify and optimize common fabric management tasks The management tools consist of Text based User Interface TUI menus and command line interface CLI comm...

Page 9: ...Performance Administrator Using NVMe over Fabrics on Intel OPA Configuring Non Volatile Memory Express NVMe over Fabrics on Intel Omni Path Architecture Application Note Describes how to implement a s...

Page 10: ...el com Text in bold font indicates user interface elements such as menu items buttons check boxes key names key strokes or column headings For example Click the Start button point to Programs point to...

Page 11: ...use of 48 bit CRC when the peak bandwidth is not critical in the fabric Due to the improved detection of failing cables provided by 10 8 2 0 firmware it is possible that failing cables that were not p...

Page 12: ...e software until you have carefully read and agree to the terms and conditions of the license agreement s By loading or using the software you agree to the terms of the license agreement s If you do n...

Page 13: ...arget operating systems This document does not contain all the information you need to use basic Linux commands or to perform all system administration tasks For this information see the software docu...

Page 14: ...e or more managed Intel Omni Path switches Use a host based subnet manager such as the Intel Omni Path Fabric Suite Fabric Manager as a part of the Intel Omni Path Fabric Suite download Intel Omni Pat...

Page 15: ...tricity on page 17 Unpack the HFI Unpacking Information on page 17 and verify the package contents 4 Install the HFI by following the instructions in Hardware Installation on page 19 5 Cable the HFI t...

Page 16: ...s Intel Model Number Platform Plugs Into Intel Omni Path Host Fabric Interface PCI Express systems x8 PCI Express slot x16 PCI Express slot If the installation of the HFI requires the use of a riser c...

Page 17: ...imes Inserting or removing components while standby is active can damage them Use normal precautions to prevent electrostatic discharge which can damage integrated circuits Unpacking Information This...

Page 18: ...n unpacking the HFI 1 When unpacking ground yourself before removing the Intel OP HFI from the anti static bag 2 Grasping the Intel OP HFI by its face plate pull the HFI out of the anti static bag 3 3...

Page 19: ...rds Installation Steps NOTE Change the server BIOS PCIe setting to AUTO The Intel OP HFI card will train itself to PCIe GEN 3 For details on changing server BIOS refer your server vendor documentation...

Page 20: ...into your motherboard First visually line up the HFI slot connector edge with the edge connector of the PCIe riser card see the figure below Figure 4 Assembled PCIe Host Fabric Interface with Riser 9...

Page 21: ...Installation on page 22 Hardware Installation for HFI Without a PCI Express Riser NOTE If you intend to use the NVIDIA GPUDirect RDMA Linux kernel feature provided within the Intel Omni Path Fabric S...

Page 22: ...the Switch Follow the recommendations of your cable vendor for cable management and proper bend radius To install the cable s 1 Check that you have removed the protector plugs if any from the cable c...

Page 23: ...LED functions are as follows Link Down Off Link Up Initialized On solid green Link Up Active No Traffic On solid green Link Up Active Slow Packet rate 10K S BLINK 384ms On 384ms Off Link Up Active Fas...

Reviews: