Hardware Installations and Upgrades
Intel® Entry Server Chassis SC5299-E DP/WS/BRP User Guide
35
3. Remove the left side cover. For instructions, see
“Removing the Left Side Cover”
.
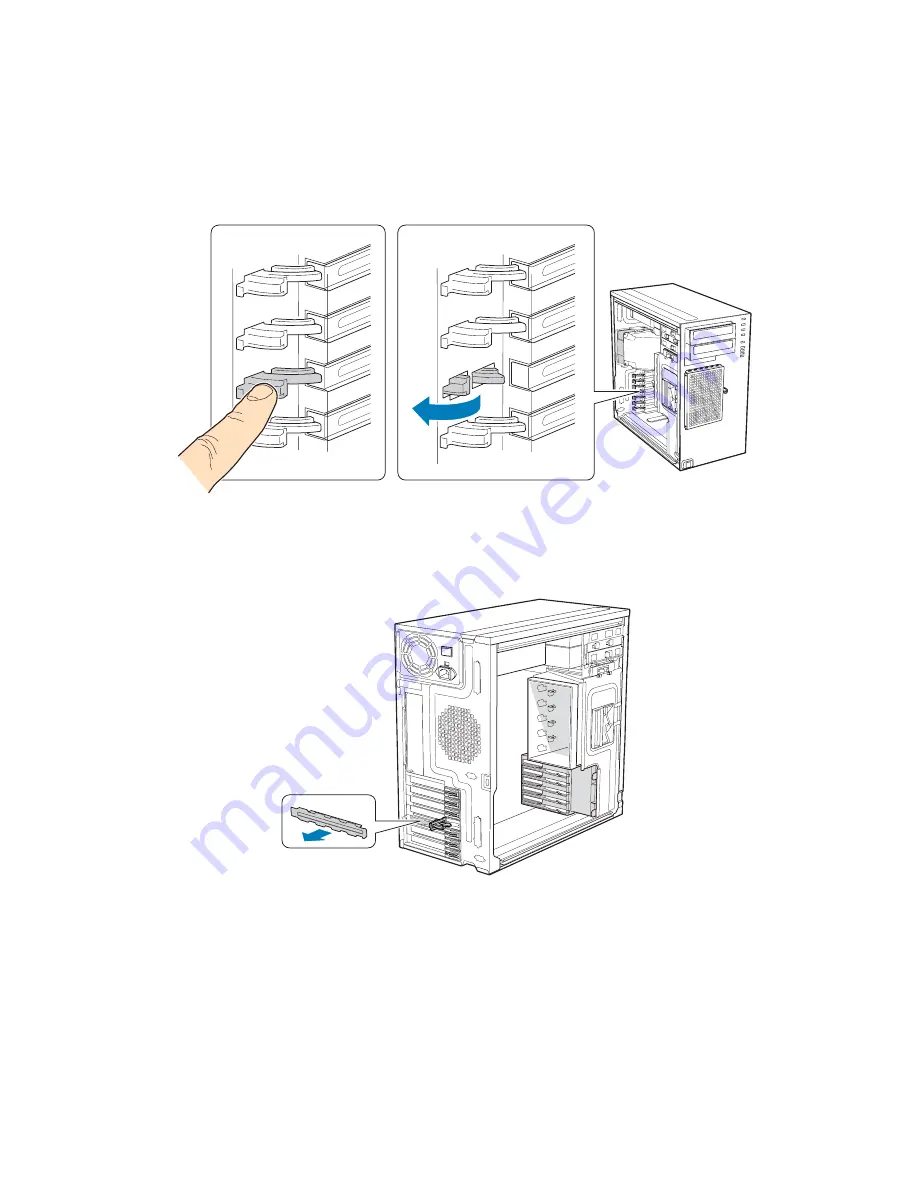
4. Open the back panel PCI Add-in Card Retention Device by pressing open from the
inside of the chassis.
Figure 39. Opening PCI Add-in Card Retention Device
5. Remove the PCI slot shield, if it has not already been removed, by pushing the shield
out from the inside of the chassis.
Figure 40. Removing PCI Slot Shield
6. Remove a PCI add-in board from its protective wrapper. Be careful not to touch the
components or gold-edge connectors. Place board on an anti-static surface. Record the
type and serial number of the add-in board in your equipment log. Set jumpers or
switches on the board according to the manufacturer’s instructions.
TP02049
TP01744
Summary of Contents for SC5299-E BRP
Page 8: ...Preface viii Intel Entry Server Chassis SC5299 E DP WS BRP User Guide...
Page 16: ...xvi Intel Entry Server Chassis SC5299 E DP WS BRP User Guide...
Page 18: ...xviii Intel Entry Server Chassis SC5299 E DP WS BRP User Guide...
Page 108: ...Technical Reference 90 Intel Entry Server Chassis SC5299 E DP WS BRP User Guide...
Page 133: ...Safety Information Intel Entry Server Chassis SC5299 E DP WS BRP User Guide 115 ITE ITE 5V...
Page 134: ...Safety Information 116 Intel Entry Server Chassis SC5299 E DP WS BRP User Guide...
Page 136: ...Safety Information 118 Intel Entry Server Chassis SC5299 E DP WS BRP User Guide...
Page 152: ...Getting Help 134 Intel Entry Server Chassis SC5299 E DP WS BRP User Guide...
Page 160: ...Warranty 142 Intel Entry Server Chassis SC5299 E DP WS BRP User Guide...


