DC Servo Gripper
2
Installation Guide
7.
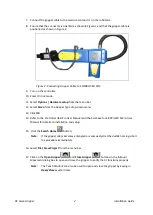
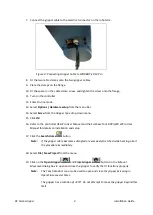
Connect the gripper cable to the electrical connector on the robot arm.
8.
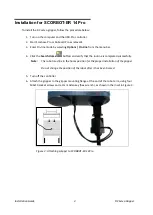
Ensure that the connector is oriented as shown in Figure 1 and that the gripper cable is
positioned as shown in Figure 2.
Figure 2: Connecting Gripper Cable to SCORBOT-ER 9Pro
9.
Turn on the controller.
10.
Enter On-line mode.
11.
Select
Options | Hardware setup
from the menu bar.
12.
Select
Servo
from the
Gripper Type
drop-down menu.
13.
Click
OK
.
14.
Refer to the Controller USB-Pro User Manual and the Scorbase for ER 9Pro/ER 14Pro User
Manual for details on installation and setup.
15.
Click the
Search Home
button.
Note:
If the gripper cable becomes entangled or excessively stretched while homing, abort
the procedure immediately.
16.
Select
File | New Project
from the menu bar.
17.
Click on the
Open Gripper
and
Close Gripper
buttons in the
Manual
Movement
dialog box to open and close the gripper to verify that it functions properly.
Note:
The Teach Pendant can also be used to open and close the gripper by keying in
Open/Close
several times.

