Figure 2
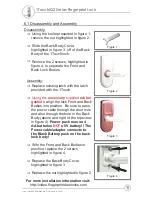
Disassembly:
m
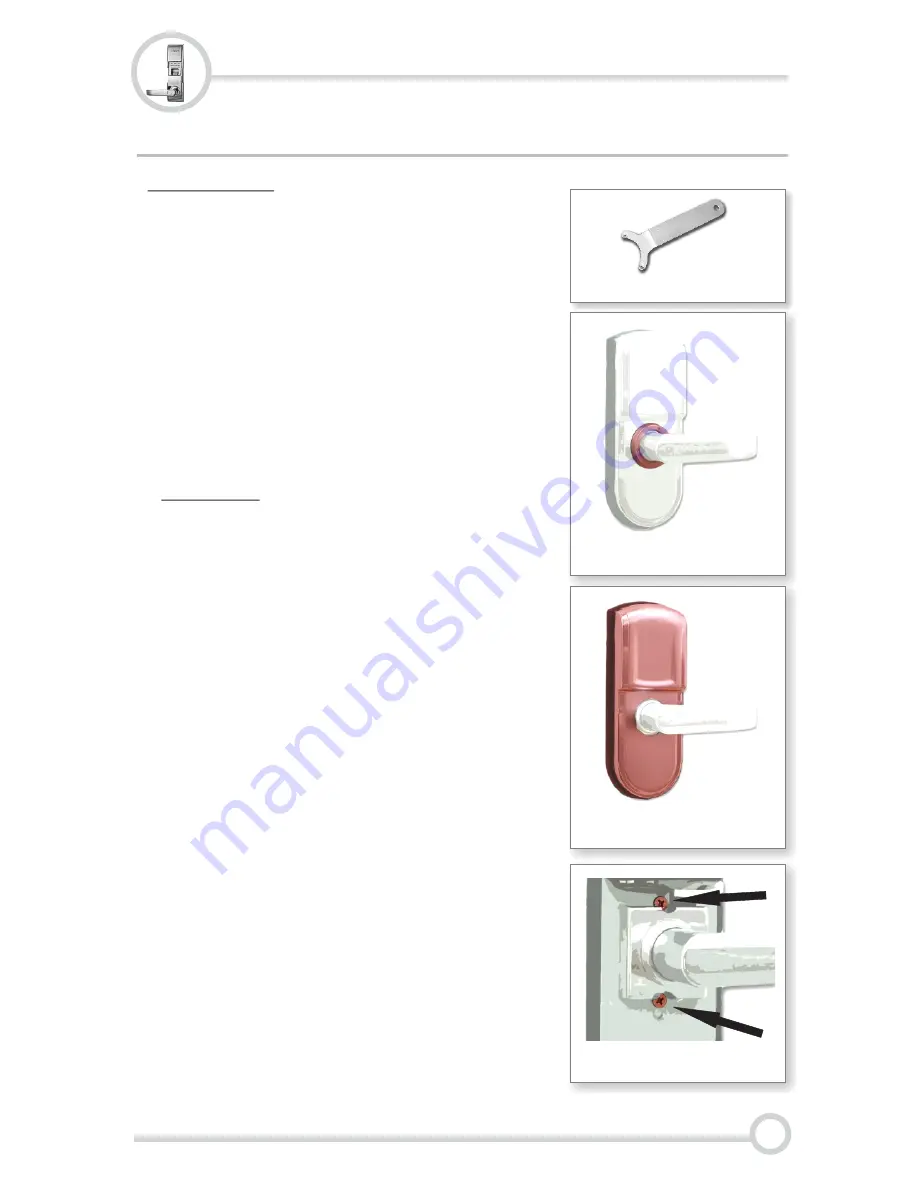
Using the tool represented in figure 1,
remove the nut highlighted in figure 2.
m
Slide the Back Body Cover,
highlighted in figure 3, off of the Back
Body of the 1Touch lock.
m
Remove the 2 screws, highlighted in
figure 4, to separate the Front and
Back Lock Bodies.
Assembly:
m
Replace existing latch with the latch
provided with the 1Touch
m
, align the lock Front and Back
Bodies into position. Be sure to pass
the power cable through the door hole
and also through the hole in the Back
Body (above and right of the top screw
in figure 4).
Power pack runs on 4
AA batteries
a 9V battery!! The
Power cable/adapter connects to
the Black Battery pack on the back
lock body!
m
With the Front and Back Bodies in
position, replace the 2 screws
highlighted in figure 4.
m
Replace the Back Body Cover
highlighted in figure 3
m
Replace the nut highlighted in figure 2
For more installation information visit:
http://video.fingerprintdoorlocks.com
Using the
necessary
supplied
rubber
gaskets
NOT
Figure 3
Figure 4
Figure 1
6.1 Disassembly and Assembly
11
1TouchIQ2 Series Fingerprint Lock
Intelligent Biometric Controls, Inc.

