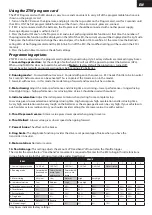
This step is already done from the factory and does not need to be done before driving. When changing radio or
receiver, a new calibration needs to be done. If the radio has a end-point-adjustment on the throttle, it has to be set at
100%.
1. Turn the ESC of and turn on the radio.
2. Press and hold the ”Set” button on the ESC and then turn on the power. Hold the button approx. 4 seconds until the
orange LED shines with a steady light.
3. Input full throttle and the red LED will begin to flash. Hold until there is a ”beep” sound.
4. Input full brake and the orange LED will begin to flash. Hold until there is two ”beep” sounds.
5. Let go of throttel input and place in neutral and the red LED will begin to flash. Wait until there is three ”beep” sounds.
6. The LED will stop to shine. Turn off the power and restart the ESC to check that throttle and reverse was calibrated
correctly. If not - repeat the steps above.
Throttle range calibration
Features
1. Communication with sound and LED
2. Low-voltage protection (LiPo)
3. Over heating protection
4. Normal and Crawler mode
40A ESC for brushed models
Specifications
1. Suitable for 1/10 buggy or truck
2. 2cells LiPo / 5-6cells NiMH
3. 40A continuous current (340A burst)
4. BEC 5,6V/2A
5. Size 42x27x22mm
6. Weight 38g
Programmable options
When describing functions of sound on ESC. We use “•” as a symbol for a short beep and “-” is a symbol for a longer beep.
1. Low-voltage protection:
The ESC comes as factory default with this setting turned off. When using LiPo batteries,
this setting must be activated. This setting protects the batteries from being discharged to low.
To identify if protection is activated or not:
Turn on power to ESC. If motor sounds ”• - - - ” it means the protection is
not activated. If motor sounds ”• • - - - ” it means the protection is activated.
How to turn protection on:
Turn the power off. Press and hold the white “setup” button on ESC and then turn power
on. After the motor has sounded two short beeps “• •”, let go of button and it will give three more longer beeps “- - - “.
How to turn protection off:
Turn the power off. Press and hold the white “setup” button on ESC and then turn power
on. After the motor has sounded one short beeps “• “, let go of button and it will give three more longer beeps “- - - “.
2. Normal or Crawler mode:
The ESC comes as factory default in Normal mode. This means the model can drive
forward, brake and go in reverse. If you activate the Crawler mode, the ESC work the same way, but when letting go of
the throttle input to neutral, the ESC will active a motor brake. This is useful when doing precision driving on hills.
To identify setting:
Turn on the power to ESC. Normal mode is activated if red LED is flashing.
Crawler mode is activated if the red LED is ON.
To change from Normal to Crawler mode:
Turn on power to ESC. Then press the white “setup” button.
The motor will sound ”• •” which means the Crawler mode is activated.
To change from Crawler to Normal mode:
Turn on power to ESC. Then press the white “setup” button.
The motor will sound ”•” which means the Normal mode is activated.
3. Over heating protection:
This is activated no matter which setting is used.
ZTW 45A ESC for brushless models
Features:
· Enhanced throttle response, excellent acceleration, strong
brakes and throttle linearity.
· Possible to program ESC using LED card (option).
· Built in protection: Low-voltage protection (LiPo),
over heating protection and throttle signal loss protection.
Function
LED
LED status
Low voltage in battery
Red LED
Flashes
Over heating protection activated (+95°C)
Orange LED
Flashes
Sensor based motor
Red and Orange LED
ON
Sensorless motor
Orange LED
ON
Specifikation
1. Suitable for 1/10 buggy or truck
2. 3cells LiPo / 6-8cells NiMH
3. 45A continuous current (400A burst)
4. BEC 5,6V/2A
5. Size 30x28x35mm
6. Weight 40g
LED
When the ESC is connected to a battery it automatically determines which type of motor is connected
(sensor/sensorless and communicates this with LED.
EN
Summary of Contents for ST410
Page 1: ...INTELLITEC 1 10 SERIES Svensk manual English instruction XB410 ST410...
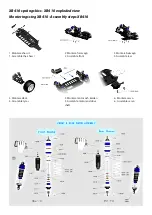
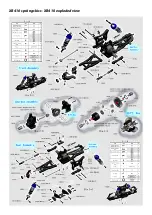
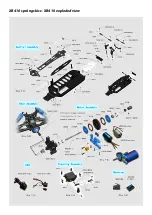
Page 11: ...XB410 spr ngskiss XB410 exploded view...
Page 12: ...XB410 spr ngskiss XB410 exploded view...
Page 13: ...XB410 spr ngskiss XB410 exploded view...
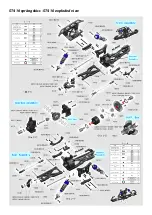
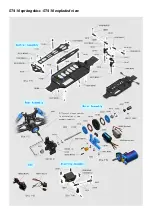
Page 15: ...ST410 spr ngskiss ST410 exploded view...
Page 16: ...ST410 spr ngskiss ST410 exploded view...
Page 17: ...ST410 spr ngskiss ST410 exploded view...
Page 18: ...XB410 ST410 reservdelar spare parts...
Page 19: ...XB410 ST410 reservdelar spare parts...
Page 20: ...XB410 ST410 reservdelar spare parts...
Page 21: ...XB410 ST410 reservdelar spare parts...
Page 22: ...XB410 ST410 reservdelar spare parts...
Page 23: ...XB410 ST410 reservdelar spare parts...
Page 25: ...XB410 ST410 optiondelar option parts...
Page 26: ...ST410 unika reservdelar unique spare parts...
Page 27: ...Anteckningar Notes ST410 unika reservdelar unique spare parts...


