40
OPERATION AND ASSEMBLY
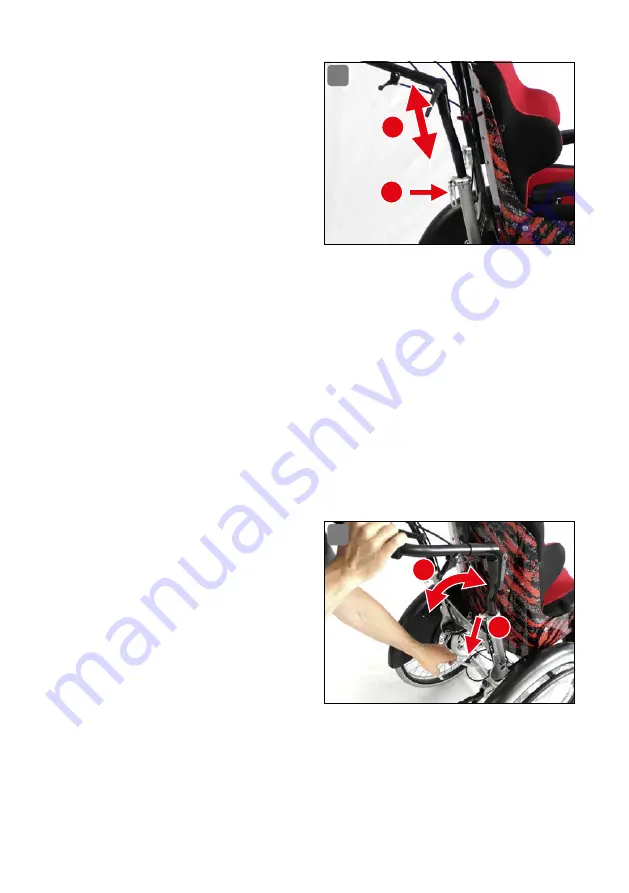
In order to adjust the height of the
push bar (Fig�
14
), proceed as follows:
First, loosen the quick-release
fasteners (
1
) on the fork tubes
by opening the two quick-
release levers outwards�
Then adjust the push bar to
the desired height (
2
)� To do
this, pull or press the push bar
to the desired height�
Secure the push bar in posi-
tion by tightening the quick-release connectors� To do this, tilt the lever on
the quick-release fasteners back in�
If the clamping pressure is not sufficient (push bar not secured in place), then
turn the screw across from the quick-release fastener clamp lever (with le-
ver in open position) counter-clockwise, until sufficient clamping pressure is
achieved by closing the clamp lever� Repeat this step, as necessary�
7
.
3
.
3
Adjusting the inclination of the back unit with push bar
(Here, the back unit, including push bar, is folded back�)
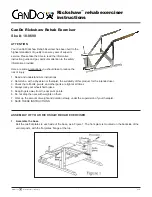
In addition to the adjustment options described above, it is also possible to swivel
the push bar backwards by up to
30
° (in
5
° increments) (Fig�
15
)�
This can become necessary, for ex-
ample, if a seat shell is being used
with a seat angle of more than
90
°�
This enables the gap between the
back of the seat shell and the push
bar to be as uniformly small as pos-
sible� This adjustment option is not
intended for individual customiza-
tion to the person being pushed�
In order to adjust the inclination of
the push bar, proceed as follows:
Loosen the spring-loaded locking system for the folding mechanism on the
push bar by pressing down on the central cable system (
1
) connecting the
two perforated plates to the bottom of the two back posts and simultane-
ously swiveling the push bar backwards (
2
)�
14
15
1
2
1
2


