29
Expanding the System
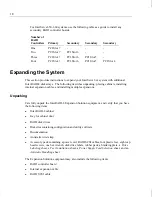
This section provides instructions to expand your InterServe 6x system or InterServe 6xx
system with additional InterRAID-12 disk arrays. The following describes unpacking,
placing cabinets, setting up, and connecting the InterRAID-12 Expansion Solution to your
system.
Unpacking
Carefully unpack the InterRAID-12 Expansion Solution equipment, and verify that you have
the following items:
u
InterRAID-12 cabinet
u
Key for cabinet door
u
RAID disk drives
u
Diskettes containing configuration and utility software
u
Documentation
u
Antistatic wrist strap
u
Accessory pack containing a power cord, RAID SCSI cables, four plastic feet, eight cap
head screws, one hex wrench, disk drive labels, rubber pads, a blanking plate, a Drive
Labeling sheet, a Feet Installation sheet, a Power Supply Cord Selection sheet, and an
Antistatic Handling sheet
The Expansion Solution equipment may also include a RAID controller board.
CAUTION
Do not remove the RAID disk drives from the antistatic bags until you are ready to install the
drives in the cabinet. Do not handle the RAID disk drives unless you connect an antistatic
wrist strap to your wrist and to a bare metal surface on the cabinet.
Retain all packaging materials. You must return the system in the original packaging to
obtain warranty service. Refer to the instructions in the back of this guide for returning
equipment to Intergraph.
Placing Cabinets
To place the cabinets side-by-side:
1. Place the feet on the bottom of the cabinet as described in the Feet Installation sheet.
2. Set the cabinet a few inches away from the existing cabinets.
Summary of Contents for InterRAID-12
Page 1: ...InterRAID Hardware User s Guide January 1997 DHA018210 ...
Page 4: ......
Page 121: ...106 ...
Page 157: ...142 ...
Page 163: ...148 ...
Page 171: ...156 ...

