background image


TruVision 12/32 Series IP Camera Configuration Manual 

61 

Camera operation 

This chapter describes how to use the camera once it is installed and configured.  

Logging on and off 

You can easily log out of the camera browser window by clicking the Logout button on 
the menu toolbar. You will be asked each time to enter your user name and password 
when logging in.  

You can change the language of the interface from the drop-down menu in the top right 
corner of the window. 

Live view mode  

Once logged in, click “Live View” on the menu toolbar to access live view mode. See 
Figure 1 on page 6 for the description of the interface.  


Start/stop live view

: You can stop and start live view by clicking the 

Start/stop live view button on the bottom of the window. 


Record

: You can record live video and stored it in the directory you 

have configured. In the live view window, click the 

Record

 button at the 

bottom of the window. To stop recording, click the button again. 


Take a snapshot

: You can take a snapshot of a scene when in live 

view. Simply click the 

Capture

 button located at the bottom of the 

window to save an image. The image is in JPEG format. Snapshots are 
saved on the hard drive. 

Playing back recorded video 

You can easily search and play back recorded video in the playback interface. 

Note

: You must configure the NAS or insert an SD card in the dome camera to be able 

to use the playback functions. See “Storage devices” on page 49 for more information. 

To search recorded video stored on the camera’s storage device for playback, click 

Playback

 on the menu toolbar. The Playback window displays. See Figure 25 on page 

62. 

Summary of Contents for TruVision TVB-1201

Page 1: ...TruVision 12 32 Series IP Camera Configuration Manual P N 1072881 EN REV B ISS 08JAN15...

Page 2: ...may be trademarks or registered trademarks of the manufacturers or vendors of the respective products Manufacturer Interlogix 2955 Red Hill Avenue Costa Mesa CA 92626 5923 USA Authorized EU manufactu...

Page 3: ...vacy masks 24 Picture overlay 25 Motion detection alarms 26 Tamper proof alarms 32 Exception alarms 33 Alarm inputs and outputs 34 Face detection 35 Audio exception detection 37 Cross line detection 3...

Page 4: ...2 TruVision 12 32 Series IP Camera Configuration Manual Camera operation 61 Logging on and off 61 Live view mode 61 Playing back recorded video 61 Searching event logs 64 Operating PTZ control 66...

Page 5: ...MPX IP bullet camera NTSC TVB 1202 3MPX IP bullet camera PAL TVB 3202 3MPX IP bullet camera NTSC TVB 1203 3MPX IP bullet camera PAL TVB 3203 3MPX IP bullet camera NTSC TVD 1201 1 3MPX IP VF mini dome...

Page 6: ...evel 1 In Internet Explorer click Internet Options on the Tools menu 2 On the Security tab click the zone to which you want to assign a web site under Select a web content zone to specify its security...

Page 7: ...e Only authorized users should be able to modify camera settings See User management on page 53 for further information To access the camera online 1 In the web browser enter the camera s IP address d...

Page 8: ...plays current user logged on 7 Logout Click to log out from the system This can be done at any time 8 Display Control Click each tab to adjust the layout and the stream type of the live view You can a...

Page 9: ...ing Click to record live video 14 Digital zoom Click to enable digital zoom 15 PTZ controls Direction actions zoom focus iris light and wiper control Note Direction actions light and wiper control can...

Page 10: ...ere are two main menus in the configuration panel Local configuration Configuration Configuration menu overview Use the Configuration panel to configure the server network camera alarms users transact...

Page 11: ...Region to manually configure the area Region No Select the region ROI Level Choose the image quality enhancing level Region Name Set the desired region name 6 Click Save to save changes Video image on...

Page 12: ...are triggered For example when the rules option is enabled and a face is detected the face will be marked with a green rectangle in live view 4 Image Format Choose the image format for a snapshot JPE...

Page 13: ...ne that is the closest to the camera s location 3 Under Time Sync check one of the options for setting the time and date Synchronize with an NTP server Check the NTP enable box and enter the server NT...

Page 14: ...Address Enter the IPv4 address of the camera IPv4 Subnet Mask Enter the IPv4 subnet mask IPv4 Default Gateway Enter the IPv4 gateway IP address IPv6 Mode Enter the IPv6 mode Manual DHCP or Router Adve...

Page 15: ...ign an available host name to your recorder IPServer Enter the address of the IP Server See page 14 for setup information 4 PPPoE Retrieves a dynamic IP address See page 15 for setup information 5 SNM...

Page 16: ...nd Server port of the camera HTTP Port The default port number is 80 and it can be changed to any port No which is not occupied RTSP Port The default port number is 554 It can be changed to any port n...

Page 17: ...efine the 802 1x parameters 1 From the menu toolbar click Configuration Network 802 1X 2 Check Enable IEEE 802 1X to enable the feature 3 Configure the 802 1X settings including EAPOL version user nam...

Page 18: ...apshots to the FTP server 3 Click Save to save changes To define the UPnP parameters 1 Click Configuration Network UPnP 2 Check the checkbox to enable the UPnP function The name of the device when det...

Page 19: ...user to be notified Receiver2 The name of the second user to be notified Receiver s Address2 The email address of user to be notified Receiver3 The name of the second user to be notified Receiver s A...

Page 20: ...the type of camera and on whether main or sub stream is being used Note Resolutions can vary depending on the camera model Bitrate Type Specifies whether variable or fixed bit rate is used Variable pr...

Page 21: ...ground information is less focused To configure ROI settings 1 From the menu toolbar click Configuration Video Audio ROI 2 Select the desired channel from the drop down list 3 Draw the region of inter...

Page 22: ...e is dark and a lower value to see fast moving object Gain Select the value to adjust the image brightness 3 Focus Settings Focus mode For the camera supports electronic lens you can set the focus mod...

Page 23: ...bled this feature wide dynamic range allows you to see details of objects in shadows or details of objects in bright areas of frames that have high contrast between light and dark areas Default is OFF...

Page 24: ...ble the rotate function when you use the camera in a narrow view scene When installing turn the camera to the 90 degrees or rotate the 3 axis lens to 90 degrees and set the rotate mode as on you will...

Page 25: ...the time and date formats from the Time format and Date format list boxes 7 7 Select a display mode for the camera from the Display Mode list box 8 Display modes include Transparent Not flashing The i...

Page 26: ...e mouse to click and drag the red text in the live view window to adjust the text overlay position 5 Repeat steps 2 to 4 for each extra line of text selecting the next string number Note Remove an ove...

Page 27: ...video window to draw the mask area Note You are allowed to draw up to 4 areas on the same image 5 Click Stop Drawing to finish drawing or click Clear All to clear all of the areas you set without sav...

Page 28: ...rm refers to an alarm triggered when the camera detects motion However the motion alarm is only triggered if it occurs during a programmed time schedule Select the level of sensitivity to motion as we...

Page 29: ...ule during which the system detects motion see Figure 10 item 2 3 Recording schedule Define the schedule during which motion detection can be recorded See Recording schedule on page 50 for further inf...

Page 30: ...rom the drop down menu 4 Click Draw Area Click and drag the mouse on the live video image to draw an area sensitive to motion detection Note You can draw up to 8 motion detection areas on the same ima...

Page 31: ...FTP parameters on page 15 for further information Enable the Upload Type option To upload the snapshot to FTP and NAS when motion detection or an alarm input is triggered you must also enable Enable...

Page 32: ...ou can draw up to eight motion detection areas on the same image 6 Click Stop Drawing to finish drawing Click Clear All to delete all areas marked and restart drawing 7 Move the Sensitivity slider to...

Page 33: ...Snapshot option Upload Snapshot Capture the image when an alarm is triggered and upload the picture to NAS or FTP server Note To upload the snapshot to NAS you must first configure the NAS settings S...

Page 34: ...gger an alarm when the lens is covered and to take an alarm response action Figure 11 Tamper proof alarm window To set up tamper proof alarms 1 From the menu toolbar click Configuration Events Tamper...

Page 35: ...ot together with the email check the Attached Snapshot option Trigger Alarm Output Trigger external alarm outputs when an event occurs Check Select All or each individual alarm output Note This option...

Page 36: ...t is triggered you must also enable Enable Event triggered Snapshot under the snapshot parameters See Snapshot parameters on page 46 for further information Trigger Channel Triggers the recording to s...

Page 37: ...hen an event occurs Check Select All or each individual alarm output Note This option is only supported by cameras that support alarm output 5 Click Save to save changes To define alarm output 1 From...

Page 38: ...with a green rectangle in live view Note If you do not want the detected face marked with the green frame select Disable from Configuration Local Configuration Live View Parameters Rules 4 Configure t...

Page 39: ...S settings See NAS settings on page 48 for further information To upload the snapshot to an FTP you must first configure the FTP settings See To define the FTP parameters on page 15 for further inform...

Page 40: ...hold Sensitivity The smaller the value the larger the change should be to trigger the detection The range is between 1 and 100 Sound Intensity Threshold This option filters the sound in the environmen...

Page 41: ...m output 7 Click Save to save changes Cross line detection This function can be used to detect people vehicles and objects crossing a pre defined line or an area on screen The line crossing direction...

Page 42: ...the plane in both directions it is detected and alarms are triggered A B Only an object crossing the pre defined line from the A to the B side can be detected and trigger an alarm B A Only an object c...

Page 43: ...n page 48 for further information To upload the snapshot to an FTP you must first configure the FTP settings See To define the FTP parameters on page 15 for further information Enable the Upload Type...

Page 44: ...eshold that the object remains in the region If you set the value as 0 the alarm is triggered immediately after the object enters the region The range is between 0 and 100 Sensitivity The sensitivity...

Page 45: ...ad Type option To upload the snapshot to FTP and NAS when motion detection or an alarm input is triggered you must also enable Enable Event triggered Snapshot under the snapshot parameters See Snapsho...

Page 46: ...an event occurs Send Email Sends an email to a specified address when there is a motion detection alarm Note You must configure email settings before enabling this option See To set up the email para...

Page 47: ...tection checkbox to enable the function 3 Configure the sensitivity ranging from 1 to 100 the higher the sensitivity the easier the change of scene can trigger the alarm 3 Click Edit to set the arming...

Page 48: ...rameters below for further information Trigger Channel Triggers the recording to start in the camera Trigger Alarm Output Triggers external alarm outputs when an event occurs Check Select All or each...

Page 49: ...nter the time interval between two snapshots Select the unit of time from the drop down list milliseconds seconds minutes hour or day 6 Set the schedule for when you want snapshots to be taken Click E...

Page 50: ...snapshots that can be taken 7 Click Save to save changes NAS settings You can use a network storage system NAS to remotely store recordings To configure recording settings please ensure that you have...

Page 51: ...e formatting the storage device stop all recording Once formatting is completed reboot the camera otherwise the device will not function properly If Overwrite is enabled the oldest files are overwritt...

Page 52: ...59 55 The pre record time can be configured as No Pre record 5 s 10 s 15 s 20 s 25 s 30 s or Not Limited Post record time The post record time is set to stop recording after the scheduled time or the...

Page 53: ...ection on page 44 for more information 5 If you enable Customize click the day of the week required For period 1 set the start and end times during which you want the camera to begin and end recording...

Page 54: ...hanges RS 485 settings The RS 485 serial port is used to control the PTZ of the camera or connect to light and wiper devices Configuration of these parameters should be done before you connect to any...

Page 55: ...fy permissions and password of each user See Figure 21 below Figure 21 User management window Passwords limit access to the camera and the same password can be used by several users When creating a ne...

Page 56: ...nu toolbar click Configuration Security User 2 Select the Add button The user management window appears 3 Enter a user name 4 Assign the user a password Passwords can have up to 16 alphanumeric charac...

Page 57: ...lick Save to save the changes Modify user information You can easily change the information about a user such as their name password and permissions To modify user information 1 Select the desired use...

Page 58: ...addresses For example the camera is configured so that only the IP address of the server hosting the video management software is allowed to be accessed Figure 23 IP address filter window To define IP...

Page 59: ...3 The password should have least four characters with at least one letter and one number Restore default settings Use the Default menu to restore default settings to the camera There are two options...

Page 60: ...rade the firmware all existing settings are unchanged Only the new features are added with their default settings The camera will select the corresponding firmware file automatically Cookies and data...

Page 61: ...pgrader panel select a device or hold the Ctrl or Shift key to select multiple devices for simultaneous upgrading 2 Click the browse button to locate the firmware file to use If you want the device to...

Page 62: ...ot camera The camera can be easily rebooted remotely To reboot the camera through the web browser 1 In Configuration System click the Maintenance tab 2 Click the Reboot button to reboot the device 3 C...

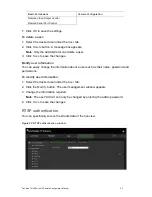
Page 63: ...ve view button on the bottom of the window Record You can record live video and stored it in the directory you have configured In the live view window click the Record button at the bottom of the wind...

Page 64: ...eo files Download captured images 6 Archive functions Click these buttons for the following archive actions Enable digital zoom Capture a snapshot image of the playback video Start Stop clipping video...

Page 65: ...d click the Search button The searched video is displayed in the timeline 2 Click Play to start playback While playing back a video the timeline bar displays the type and time of the recording The tim...

Page 66: ...gs You must configure NAS or insert a SD card in the dome camera to be able to use the log functions The number of event logs that can be stored on NAS or SD card depends on the capacity of the storag...

Page 67: ...tions Date and Time Logs can be searched by start and end recording time Table 7 Types of logs Main log type Minor log types Description of events included Alarm Alarm Input Alarm output Start Motion...

Page 68: ...r Type and Minor Type drop down list select the desired option 3 Select start and end time of the log 4 Click Search to start your search The results appear in the left window Operating PTZ control In...

Page 69: ...support auto focus To set a preset 1 Select a preset number from the preset list 2 Use the PTZ directional buttons to move the camera to the desired position 3 Click to finish the setting of the curr...

Page 70: ...eset tour speed Preset Tour Duration The dwell time The length of time in seconds for which a camera stays at a preset before moving to the next preset Preset Tour Speed The speed the camera moves fro...

Page 71: ...o camera defocus detection alarm 44 link to camera tamper alarm 33 link to cross line detection alarm 41 link to exception alarms 34 link to face detection alarm 37 link to intrusion detection alarm 4...

Page 72: ...gs 51 RS 485 settings 52 RTSP authentification 55 S SDHC card capacity 49 formatting 49 Snapshot 46 Snapshots archive snapshots from recorded files 63 save during live view mode 61 Streaming main sub...

Reviews: