1BChapter 2: Installation
4. If needed, seal all mounting holes so that no moisture can leak into the
mounting surface.
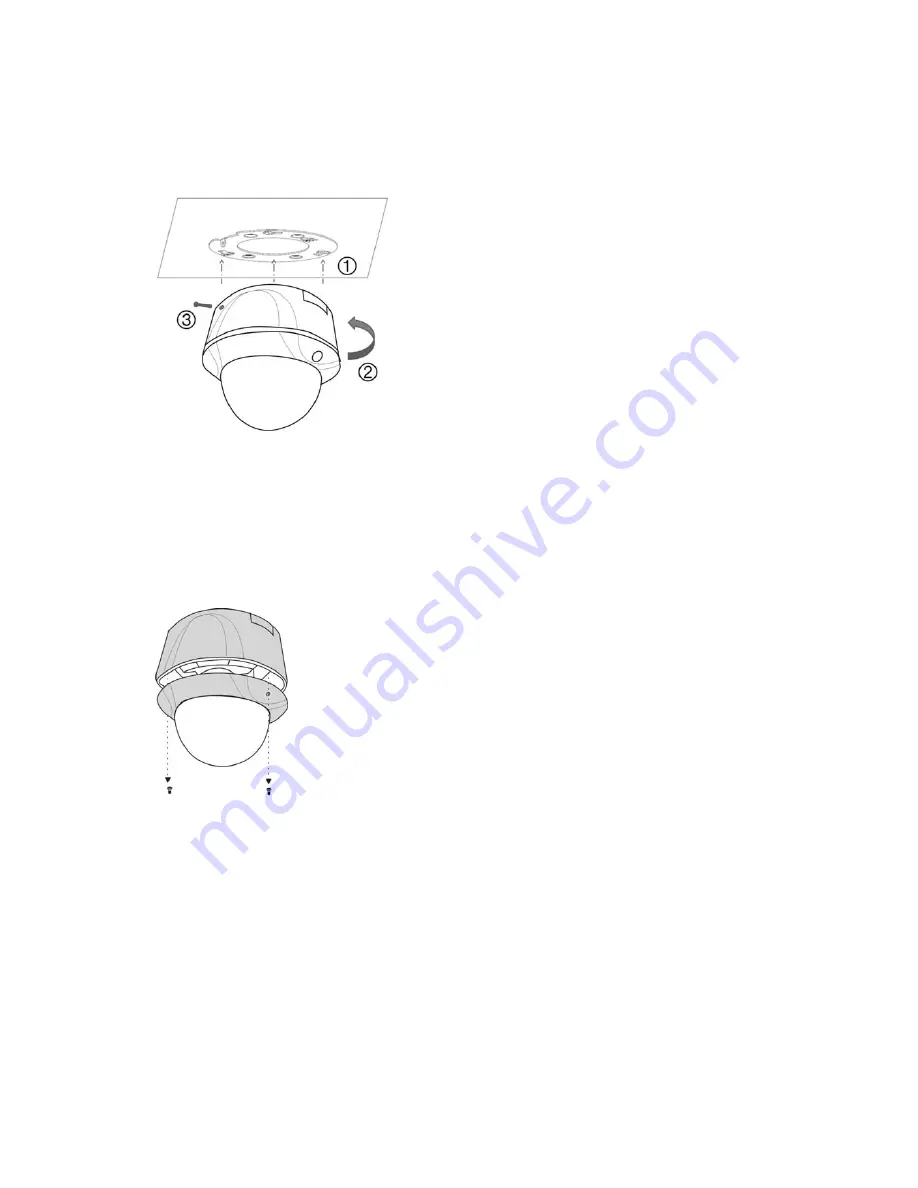
5. Insert the fixation pins of the dome camera housing into the fixation slots in
the mounting plate (1).
6. Rotate the camera enclosure (2) so that the pins are held in place in the
fixation slots.
7. Tighten the locking screw (3) to ensure that the camera is firmly attached to
the bracket.
8. Using the supplied hex wrench, loosen the two fixed screws in the camera
cover and remove the cover.
9. Connect the supplied video cable to the RCA video output connector in the
camera body so that the video image can be seen on a monitor.
While viewing the video on the monitor, adjust horizontally and vertically the
camera pan and tilt. Adjust the lens focus to get optimal video effect.
10
TruVision IP Dome Open-Standards User Manual
Summary of Contents for TruVision TVD-M1210V-2-N
Page 1: ...TruVision IP Dome Open Standards User Manual P N 1076511A EN REV 1 0 ISS 07OCT11 ...
Page 18: ...1BChapter 2 Installation 14 TruVision IP Dome Open Standards User Manual ...
Page 50: ...4BChapter 5 Camera management 46 TruVision IP Dome Open Standards User Manual ...
Page 58: ...5BChapter 6 Camera operation 54 TruVision IP Dome Open Standards User Manual ...
Page 64: ...8BAppendix C Warranty and contact information 60 TruVision IP Dome Open Standards User Manual ...
Page 67: ......
Page 68: ......


