2
Power Tap Installation Guide
Install the Power Tap
1. Disconnect power at the circuit breaker(s) or disconnect the switch(es) before installing.
2. If present, remove the photocontrol or control node from the existing receptacle.
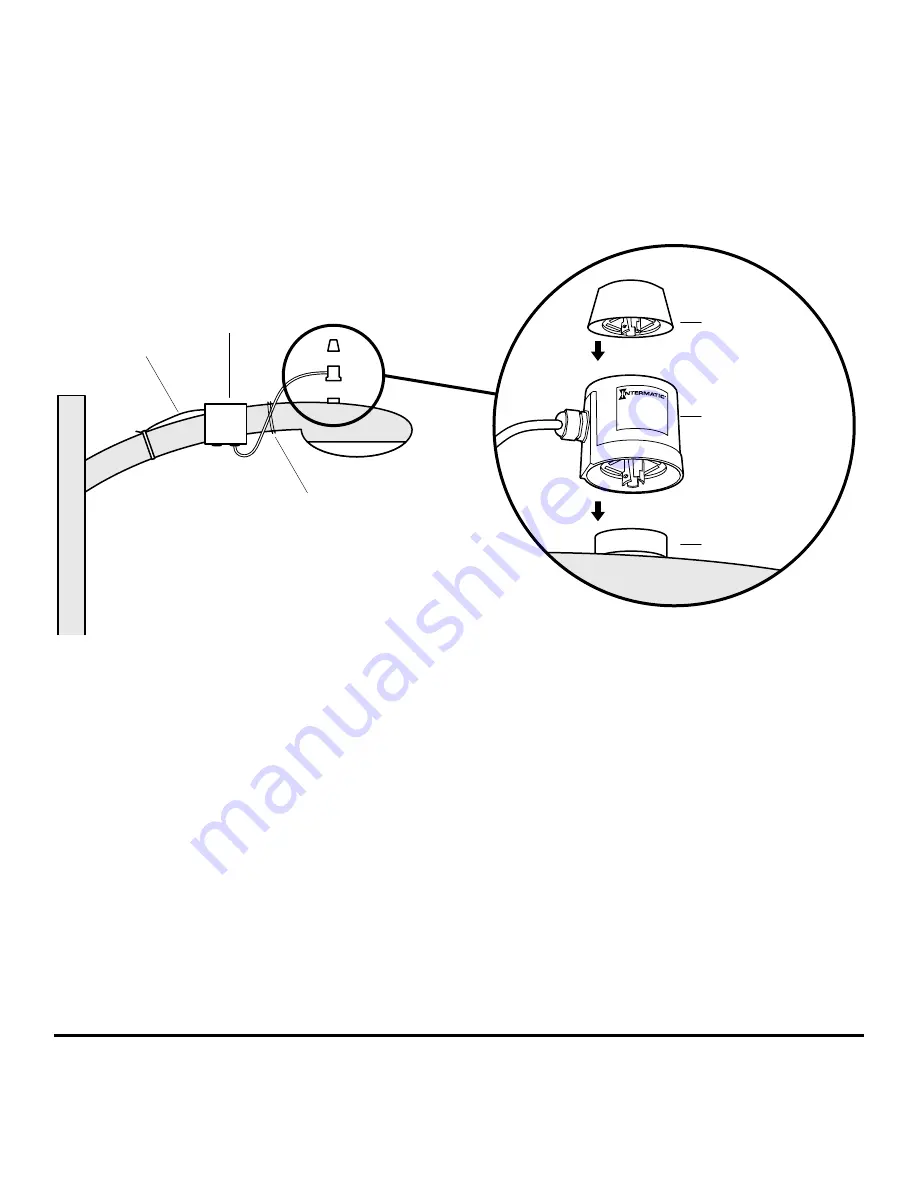
3. Insert the Power Tap into the receptacle by aligning the prongs on the Power Tap with the openings in the receptacle.
Push down on the Power Tap and twist clockwise to lock.
The Power Tap must be locked in place.
4. Re-install the photocontrol, shorting cap, or control node device onto the Power Tap top receptacle.
5. Fasten the Power Tap cable to the light pole or light pole arm (per the regulations appropriate for your application) to
ensure the cable is secure and that no undue stress is placed on the receptacle and light fixture.
6. Reconnect power at the circuit breaker(s), or reconnect the switch(es).
Photocontrol
KPT0170 Power Tap
Receptacle
Grounding
Wire
Properly secure cable
from Power Tap
Device
FIG. 1.
Install Power Tap
LIMITED WARRANTY
Warranty service is available by either (a) returning the product to the dealer from whom the unit was purchased or (b) completing a warranty claim online
at www.intermatic.com. This warranty is made by: Intermatic Incorporated, Customer Service 1950 Innovation Way, Suite 300, Libertyville, IL 60048. For
warranty service go to: http://www.Intermatic.com or call 815-675-7000.
158--02200REF


