Chapter 2 — Installation Process
Vehicle Power Supply Installation Guide
19
This kit contains additional bolts, nuts, and washers should you
need to connect the input power cable directly to a vehicle
battery. Use for these parts is detailed in the instructions that
follow.
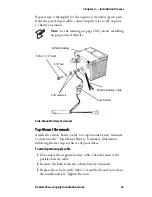
Cable Termination – Overview of Process
You must cut the cable to length, cut off a portion of the outer
cable jacket, and strip the individual wire ends of the cable as
instructed. Heat shrink tubing is furnished in this kit and
must be
slipped onto the cable or wires before terminating them
.
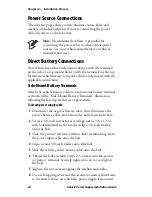
Then, you must install the fuse holder in series with the positive
wires and install a terminal ring on the negative wires.
Finally, you must mechanically complete the connections to the
vehicle power source or battery and electrically connect the shield
wire to the chassis using a self-tapping screw and flat washer.
Preparing the Power Cable
Be sure the power source is disconnected before starting to work
with the cables. All measurements are approximate lengths.
To prepare the power cable
1
Cut the power cable near the power source or battery.
2
Strip the cable jacket back 12-14 inches (30-36 cm).
3
Slide heat shrink tubing over cable jacket.
4
Strip 1/4 inch (0.6 cm) of insulation from individual wires.
5
Twist the white and green (negative) wires together.
6
Twist the red and black (positive) wires together.
7
Twist the shield wire and slide on the 1/8-inch heat shrink
tubing.
Note
: See the warning on page 18 if you are installing
on gas-powered or other 12V vehicles.
Note:
The wire colors may not be the same as those
shown; therefore, verify all wire connections with an
ohmmeter.
Summary of Contents for CV60
Page 1: ...Vehicle Power Supply Installation Guide ...
Page 4: ...iv Vehicle Power Supply Installation Guide ...
Page 10: ...Vehicle Power Supply Installation Guide x ...
Page 20: ...Chapter 1 Introduction 10 Vehicle Power Supply Installation Guide ...
Page 46: ...Chapter 3 Troubleshooting Information 36 Vehicle Power Supply Installation Guide ...
Page 47: ...Chapter 3 Troubleshooting Information Vehicle Power Supply Installation Guide 37 ...


