Running Terminal Emulation
7-29
7
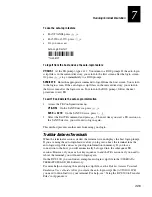
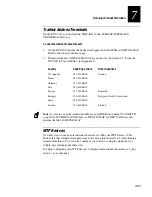
WTP Devices
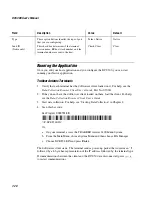
1. Verify that each device has its terminal session configured for Native
communications. For help, see the WTP device’s user’s manual.
2. Start data collection. For help, see “Starting Data Collection” in Chapter 2.
The Native client starts when you turn on the device. WTP devices send a power-up
packet that contains a 2-byte device number followed by the device type.
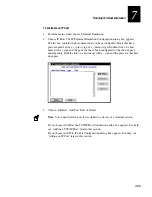
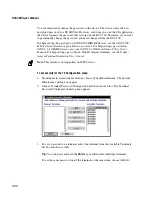
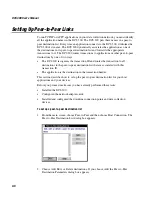
Configuring TE Links
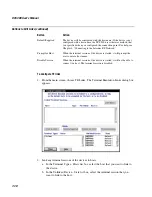
When you configured the downline connection points, you also defined how the data
collection devices know which host they communicate with. The Terminal Emulation
Links dialog box lets you change these links for individual terminal sessions. For 3270
SNA TE links, you can also edit the NAUs. There are three boxes:
Linked Terminal Sessions box
This list box contains the terminal sessions and
devices that are explicitly linked to a host. It contains a new column that identifies the
port name of the Telnet or Native host.
Terminal Types - Hosts list box
This list box contains the host types (5250, Native,
etc.) that you have configured. Telnet hosts and Native hosts are prefixed by a + (plus)
sign or a - (minus) sign. You can double-click on a host with a + sign and the ports that
have been configured for that host appear underneath it. You can double-click on a host
with a - sign and the ports for that host disappear.
Unlinked Device - State list box
This list box contains a list of terminal sessions and
devices that have not been linked to a host. You can select multiple terminal sessions
and devices in this box and link them to a host or apply a state to them.
You can select multiple objects in the Linked Terminal Sessions box and the Unlinked
Device/State box by
•
clicking and dragging to select several sequential objects.
•
selecting one object and then holding down the
Shift
key and selecting another
object. You now have selected all sequential objects from the first clicked object to
the last one.
•
selecting one object and then holding down the
Ctrl
key and selecting another
object. You now have selected two non-sequential objects.
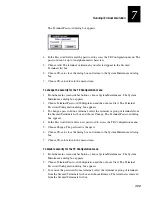
There are four buttons that let you edit the link between the devices and the hosts:
Button
Action
Link to Host
The terminal session of the device is explicitly linked to a host. These
explicit links override the host name that may be defined on the
terminal and the default host link that you defined when you configured
the downline connection point.
Summary of Contents for DCS 300
Page 1: ...P N 067296 005 User s Manual DCS300 ...
Page 4: ...DCS 300 User s Manual blank ...
Page 16: ...DCS 300 User s Manual ...
Page 22: ...DCS 300 User s Manual ...
Page 23: ...Getting Started 1 ...
Page 24: ...DCS 300 System Manual blank ...
Page 42: ...blank ...
Page 43: ...Learning About the DCS 300 2 ...
Page 44: ...DCS 300 User s Manual blank ...
Page 68: ...blank ...
Page 69: ...Connecting to the Upline Network 3 ...
Page 70: ...DCS 300 System Manual 3 2 blank ...
Page 94: ...blank ...
Page 95: ...Connecting to the Intermec RF Network 4 ...
Page 96: ...DCS 300 System Manual blank ...
Page 134: ...blank ...
Page 135: ...Connecting to the 9180 and the Intermec CrossBar Network 5 ...
Page 136: ...DCS 300 System Manual blank blank ...
Page 158: ...DCS 300 System Manual blank ...
Page 159: ...Running Data Collection Browser 6 ...
Page 160: ...DCS 300 System Manual blank ...
Page 171: ...Running Terminal Emulation 7 ...
Page 172: ...DCS 300 System Manual blank ...
Page 209: ...Running Peer to Peer Applications 8 ...
Page 210: ...DCS 300 System Manual blank ...
Page 232: ...blank ...
Page 233: ...Running Terminal Sessions 9 ...
Page 234: ...DCS 300 System Manual blank ...
Page 258: ...DCS 300 System Manual 9 26 blank ...
Page 259: ...Running Screen Mapping 10 ...
Page 260: ...DCS 300 System Manual 10 2 blank ...
Page 269: ...Running Screen Mapping 10 11 10 Screen 3 Screen 4 Main Host Screen Screen 5 ...
Page 333: ...Troubleshooting 11 ...
Page 334: ...DCS 300 System Manual blank ...
Page 372: ...blank ...
Page 373: ...Specifications and Other Helpful Information A ...
Page 374: ...DCS 300 System Manual B 2 blank ...
Page 391: ...Upgrading the DCS 300 and Devices B ...
Page 392: ...DCS 300 System Manual blank ...
Page 411: ...How the DCS 300 Routes Transactions C ...
Page 412: ...DCS 300 System Manual blank ...
Page 430: ...blank ...
Page 431: ...Index I ...
Page 432: ...DCS 300 System Manual I 2 blank ...

