4420 and 4440 Bar Code Label Printer Users Manual
1-8
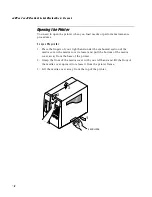
4. Place the fanfold media slightly lower than the slot in the printer back
cover. Align the fanfold media with the label path through the printer.
Insert media through the slot at the rear of the printer and thread it over the
supply roll post.
5. Unscrew the edge guide and slide it to the outer edge of the lower media
guide. Screw it in place.
6. Pull down on the lower media guide to allow easy access to the media path.
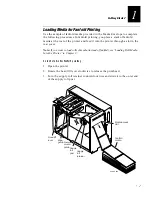
7. Insert the fanfold media through the printer mechanism as shown in the
illustration. The fanfold media passes over the supply roll post and out the
front opening of the printer.
8. Release the lower media guide and adjust the edge guide to position the
media firmly against the inside wall of the printer.
9. Slide the supply roll retainer up to the edge of the fanfold media and turn
the supply roll retainer clockwise until it locks firmly in place. This action
secures the media against the inside wall of the printer.
10. Rotate the head lift lever counterclockwise until it locks to engage the
printhead.
11. Replace the media cover.
12. Press the Feed/Pause button to advance one label through the printer.
The yellow Empty/Pause LED goes out. The printer is now ready to print the
configuration test label.
Note:
If the yellow Empty/Pause LED does not go out, reload the media and try again.
Note:
For your convenience, refer to the label with directions for loading media located
on the inside of the media cover the next time you load media.
Summary of Contents for EasyCoder 4420
Page 1: ...4420and4440BarCodeLabelPrinter P N 066392 001 User s Manual ...
Page 12: ......
Page 13: ...Getting Started 1 ...
Page 14: ......
Page 30: ......
Page 31: ...Operating the Printer 2 ...
Page 32: ......
Page 48: ......
Page 49: ...FG 9pt Italic 1233 Maintaining the Printer 3 ...
Page 50: ...FG 9pt Italic 1233 ...
Page 62: ......
Page 63: ...Troubleshooting 4 ...
Page 64: ......
Page 71: ...Optimizing Printer Performance 5 ...
Page 72: ......
Page 88: ......
Page 89: ...Using Test and Service Mode 6 ...
Page 90: ......
Page 104: ......
Page 105: ...Printer Specifications A ...
Page 106: ......
Page 115: ...Character Sets B ...
Page 116: ......
Page 124: ......
Page 125: ...Communications Reference C ...
Page 126: ......
Page 138: ......
Page 139: ...Glossary G ...
Page 140: ......
Page 149: ...Index I ...
Page 150: ......
Page 156: ......


