4
484 01 3700 01
A05419
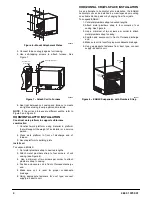
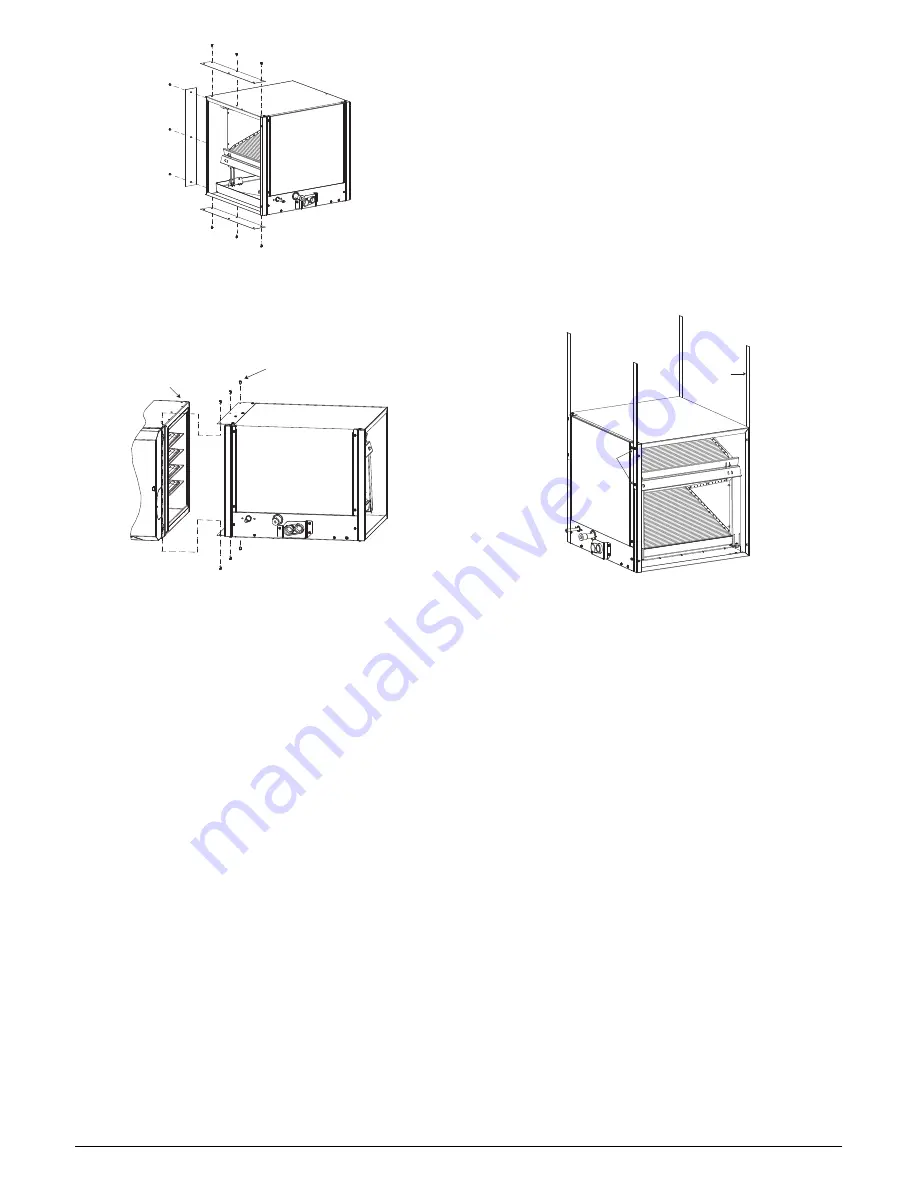
Figure 6 -- Mount Attachment Plates
3. Connect furnace snugly against coil casing.
4. Use self--tapping screws to attach furnace. See
Figure 7.
Self-Tapping Screws
Drill After Coil
Is Installed
A05420
Figure 7 -- Attach Coil to Furnace
5. Seal joint between coil casing and furnace to create
air--tight seal using locally--approved materials.
NOTE
: If the coil and furnace are different widths, refer to
Figure 2 and Figure 3.
HORIZONTAL ATTIC INSTALLATION
Construct work platform to support coil/furnace
combination
1. Construct work platform, using material in platform
that will support the weight of an installer or a service
person.
2. Place work platform in front of discharge end of
furnace.
3. Secure platform to building joists.
Install coil
To suspend ENH4X:
1. Cut metal plumbers strap to desired lengths.
2. Attach metal plumbers strap to four corners of coil
casing (see Figure 8).
3. Use a minimum of two screws per corner to attach
plumbers strap to casing.
4. Position and secure coil in front of furnace discharge
end.
5. Make sure coil is level for proper condensate
drainage.
6. Using appropriate fasteners for duct type, connect
supply--air duct to coil.
HORIZONTAL CRAWL SPACE INSTALLATION
As an alternate to horizontal attic installation, the ENH4X
horizontal coil can be installed in a crawl space by mounting
on suitable blocks, pads or by hanging from floor joists.
To suspend ENH4X:
1. Cut metal plumbers strap to desired lengths.
2. Attach metal plumbers strap to four corners of coil
casing. See Figure 8.
3. Use a minimum of two screws per corner to attach
metal plumbers strap to casing.
4. Position and secure coil in front of furnace discharge
end.
5. Make sure coil is level for proper condensate drainage.
6. Using appropriate fasteners from duct type, connect
supply--air duct to coil.
2 Screws for
Attachment
to Casing
Plumbers
Strap
A05421
Figure 8 -- ENH4X Suspension with Plumbers Strap


