443 06 4003 00
5
Specifications subject to change without notice.
7. Connect the connector harness to gas valve.
NOTE
: Use only propane
−
resistant pipe dope. Do not use
Teflon tape.
8. Insert the gas pipe through the grommet in the casing.
Apply a thin layer of pipe dope to the threads of the pipe
and thread the pipe into the gas valve.
NOTE
: Use a back
−
up wrench on the gas valve to prevent the
valve from rotating on the manifold or damaging the mounting
to the burner box.
9. With a back
−
up wrench on the inlet boss of the gas
valve, finish tightening the gas pipe to the gas valve.
10. Check for leaks after the gas pipe is installed.
NOTE
: If you are converting furnace for use with propane,
attach kit labels and extra parts bag as described in Procedure
3 then proceed to Section II.
Procedure 3 — Label and Extra Parts Bag Attachment
NOTE
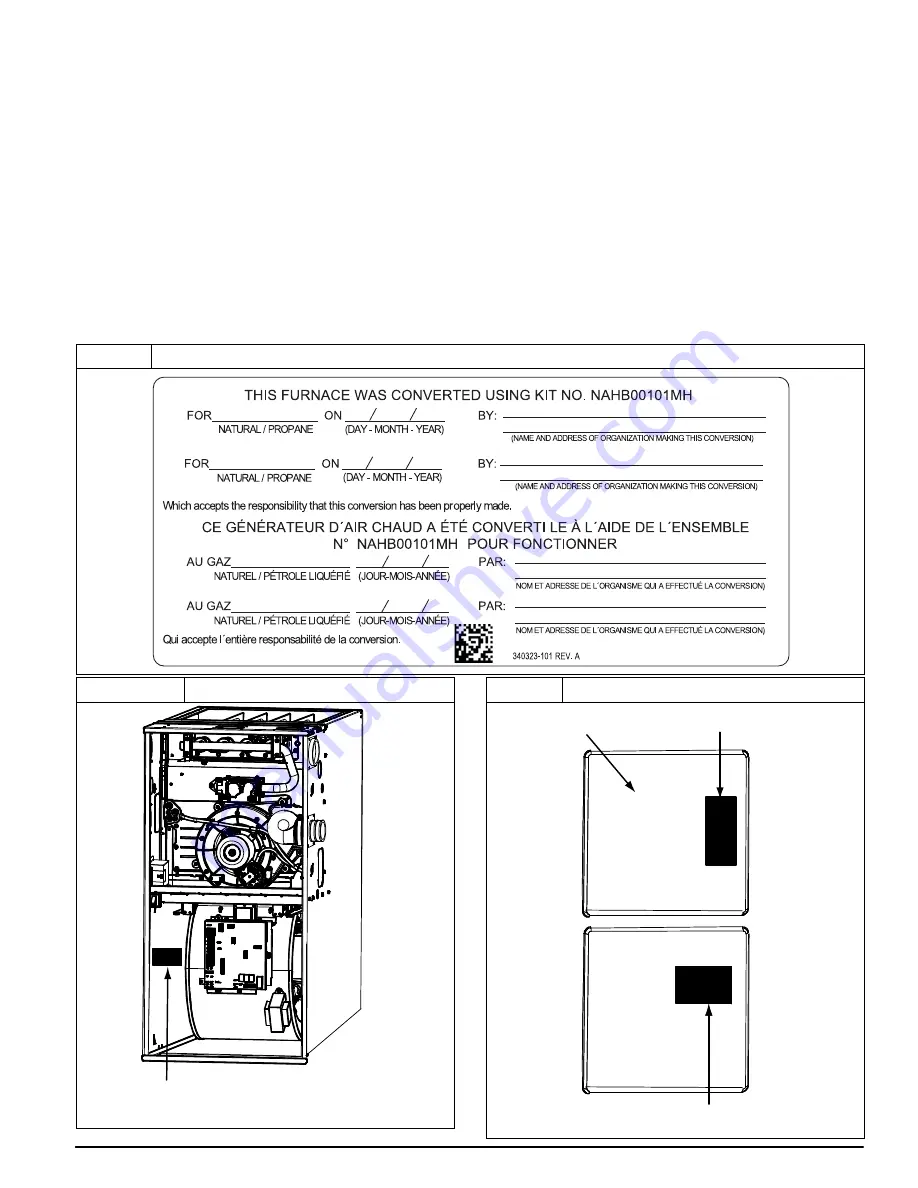
1. Attach Conversion Responsibility Label (340323
−
101)
inside of main furnace door. (See
) Date, name,
and address of organization making this conversion are
required. (See
)
2. Attach Conversion Rating Plate Label (338299
−
101)
inside of lower left
−
hand side of controls compartment
(downflow) as shown in
3. Attach Manufactured (Mobile) Home Installation Label
(322236
−
101) inside of main furnace door. (See
)
4. Attach adhesive pouch (337985
−
101) containing gas
orifices and Installation Instructions to front of main
furnace door or accessible furnace side. (See
or
5. Proceed to
Section II
or
III
for gas type modification and
Input rate adjustment.
Figure 5
Conversion Responsibility Label
Figure 6
Conversion Rating Plate Label Location
FURNACE CONVERSION
RATING PLATE
REPRESENTATIVE DRAWING ONLY, SOME MODELS MAY VARY.
Figure 7
Installation & Responsibility Label Locations
RESPONSIBILITY LABEL
MANUFACTURED (MOBILE)
HOME INSTALLATION LABEL
INSIDE OF DOORS
REPRESENTATIVE DRAWING ONLY, SOME MODELS MAY VARY.


