

50
User Manual
unit is connected to a chart plotter equipped with software capable of displaying
the Radar functions. To select the Radar menu, first select one of the pages re-
lated to the Radar:
[PAGE] + move the cursor up/down + [ENTER]
Once the Radar page is selected, access the Radar menu by pressing:
[MENU]
For more information see the specific User Manual.
NOTE
The Radar display page is available only if the Radar is connected and powered On.
4.12 SYSTEM INFORMATION
To see details about the software and cartography data installed.
[MENU] + "SETUP" + [ENTER] + "SYSTEM INFORMATION" + [ENTER]
Opens the System Information page.
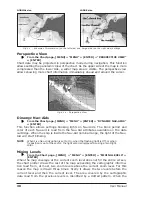
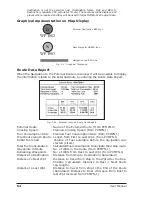
WORLD BACKGROUND CHARTS
The internal background charts can be updated to include the MAX A and B level
charts which provide improved marine data, rivers, lakes, terrestrial data (major
streets , highways , railways, etc...), Nav-Aids, depth areas, territorial water ar-
eas, etc... by reading them from a special data C-CARDs (contact your local dealer).
All units must have the WorldWide Background upload function that is activated
from the system.
Worldwide Background Update
The System Update menu is entered from the About page. To select this menu:
Plug the special data C-CARD + [MENU] + "SETUP" + [ENTER] + "SYSTEM
INFORMATION" + [ENTER] + [MENU] + "Update Worldwide Charts" +
[ENTER]
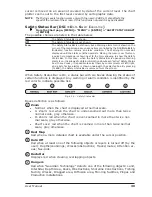
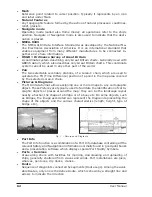
4.13 VIDEO INPUT
FOR CM 11CV+/CM 11CVS+
By accessing this menu it is possible to see images on the chart plotter display
captured from an external video signal source, if connected to the chart plotter.
Not all color chart plotters are connectable to the external video signal. Please
make sure that your chart plotter is equipped with a video input connection port.
[MENU] + "SETUP" + [ENTER] + "VIDEO INPUT" + [ENTER]
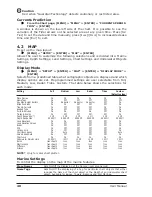
Switching Timeout
: Select the timeout for the Auto Switch option among 5, 10, 30 seconds, 1, 5,
10 minutes.
Restore Defaults
: Restores default values of Contrast, Brightness, Backlight, color saturation and
Hue phase. After pressing [ENTER] on the screen a window is shown containing
three options: INPUT 1, INPUT 2, ALL. If INPUT 1 or INPUT 2 is selected, their
relative settings are set to the default values and the message "OK" is shown
to the selected item. If the option ALL is selected, both the settings for INPUT
1 and INPUT 2 are restored to the default values and the message "OK" is shown
next to INPUT 1, INPUT 2 and ALL.
Summary of Contents for Chart Master 169CSI
Page 14: ...16 User Manual...
Page 34: ...36 User Manual...
Page 54: ...56 User Manual...
Page 72: ...74 User Manual...
Page 78: ...80 User Manual...
Page 81: ...83 User Manual INSTALLATION AND REMOVING EXTERNAL WIRING...
Page 84: ...86 User Manual...
Page 86: ...88 User Manual Dimensions...