background image


17


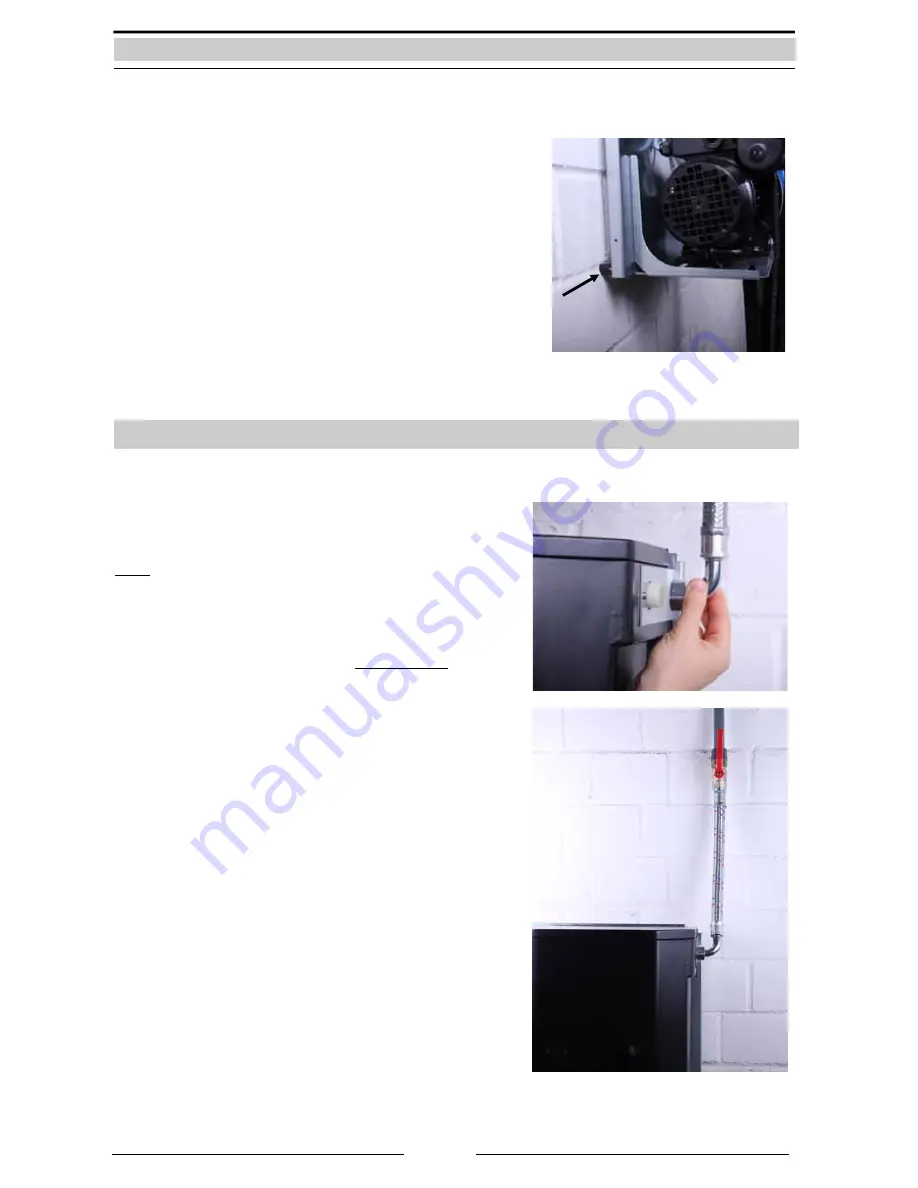
The provided rubber clamping device is to be fit on the back 

side of the unit in the lower corners.   
The  unevenness  of  the  wall  can  be  balanced  by  various 

screwing depths. 


6.2  Connection to the mains water line 

 
The connection to the mains water supply is done  with the provided flexible hose and stopcock. 
 
Screw the gland screw into the container connection and 
carefully tighten with a fixed spanner. 

 
Note:  
The  flexible  hose must  not be overtightened  as this  may 
interfere with the internal float valve, on the opposite side of 

the connection. All provided flexible hoses have gland screws 
with flat 

washers.  

The rubber 

washers 

must 

be 

present. Additional sealing material  must  not  be  used  on 

gland nuts! 


Screw the gland screw on the other end of the flexible pipe 
into the stopcock mounted on the mains water line. 


Summary of Contents for RAINMASTER Favorit

Page 1: ...0 RAINMASTER Favorit Installation and user manual WATER WE RE IN OUR ELEMENT www intewa com New Zealand Distributor info aloaqua co nz...

Page 2: ...ing 16 6 2 Connection to the mains water line 17 6 3 Installation on the intake side 18 6 3 1 Installation of a protective conduit pipe 18 6 3 2 Layout of the intake line 19 6 3 3 Intake line connecti...

Page 3: ...is 15 m The RM Favorit is compatible with the following combinations Toilet Urinal You can connect several toilets and urinals Washing machine You can connect several washing machines Garden Cleaning...

Page 4: ...witched to mains water mode and the house is continuously supplied with mains water from the supplemental supply container inside the RM Favorit In both working modes the pump is switched on and off b...

Page 5: ...tion regulations Only the original provided packaging is to be used for transportation of the equipment The emergency overflow of RM Favorit must always be connected Installation of the mains water li...

Page 6: ...of delivery RAINMASTER Favorit unit Wall mounting material and installation and user manual Standard accessory A Mains water connection Standard accessory B Pressure line set Standard accessory C Flo...

Page 7: ...in 110 l min Noise level ca 60 dBa ca 65 dBa Intake height self priming see intake diagram see intake diagram Pump start up pressure 1 0 2 2 bar adjustable factory setting 1 5 bar 1 0 2 2 bar adjustab...

Page 8: ...controller 3 Vent cock 4 Pressure shut off valve 3 4 female 5 Pump controller 6 Supplemental supply container 7 Stopcock for mains water 3 4 female 8 Mains water floating valve 9 Electronic 3 2 way b...

Page 9: ...mp optional accessory RMF LP is used to ensure the intake process proceeds reliably and with sufficient safety Note The charging pump boosts the water intake pressure so that an intake level of up to...

Page 10: ...d the warranty This equipment specifically fulfils the requirements of the following EU directives EC directives for machines 89 392 EWG in accordance with 91 368 EWG EC Low voltage directives 73 23 E...

Page 11: ...that only experienced professionals use the pressure setting option The pump on pressure is set to 1 5 bar by default That means the pump switches on when the system pressure falls below 1 5 bar Anti...

Page 12: ...ronic components of the RM Favorit are connected along with the motor condenser position 2 required for starting the motor On the side of the terminal box is the mode selection switch I II position 3...

Page 13: ...14 15 16 17 18 19 20 21 22 SS PE PU PE LP PE NE br SS brn SS bl KH schw KH gr n KH rt LP bl LP brn Protective conductor floating switch Protective conductor pump Protective conductor charge pump L1 M...

Page 14: ...13 5 2 Components of the multistage pump Expanded view of RM Favorit 20 40 centrifugal pump...

Page 15: ...s 48 O RING CAPACITOR BOX COVER 1 pcs 1 pcs 383 TERMINAL BLOCK 1 pcs 1 pcs 1 pcs 1 pcs 60 SCREW GROUND 1 pcs 1 pcs 1 pcs 1 pcs 61 WASHER GROUND SCREW 1 pcs 1 pcs 1 pcs 1 pcs 62 WASHER GROUND SCREW PLA...

Page 16: ...body 5 The floating valve incorporates a protective sieve 5 4 Components of the electronic 3 2 way ball valve The motorised ball valve selects between rainwater intake and mains water intake The buil...

Page 17: ...et The lid and lateral distances indicated should be adhered to when mounting to provide clear maintenance access The RM Favorit is fixed horizontally with 10 mm raw plugs and screws The RM Favorit is...

Page 18: ...Screw the gland screw into the container connection and carefully tighten with a fixed spanner Note The flexible hose must not be overtightened as this may interfere with the internal float valve on...

Page 19: ...can be accessed freely at any time In order to avoid water accumulating in the conduit it must be installed with 1 slope back towards the tank In general all lines carried in the protective pipe shoul...

Page 20: ...ning no joins Warning instructions The internal diameter of the intake hose must be at least D 26 mm in order to obtain full volume flow No water filter may be used in the intake line since the gasket...

Page 21: ...The accessory product SAUGSAGF 1 Article No 21 01 30 is designed for this requirement The rainwater is drawn from just below the water surface where the water is the cleanest The integrated non return...

Page 22: ...connected to the pump controller The flexible hose and the shut off valve then connect to the pressure line set and the pressure line 6 5 Connecting the emergency overflow The RM Favorit has an emerge...

Page 23: ...Favorit The position of the backwater level determines the type of line a Backwater level above the emergency overflow drainage height of the supplemental supply container Connection of the emergency...

Page 24: ...d by means if the built in cable gland The intake line is installed in such a way that the floating ball just touches the bottom of the empty tank see Chapter 6 3 4 The float switch counter weight A i...

Page 25: ...e pump primed with water automatically over the mains water tank In this case the pump don t filled up with water by hand 3 Close the pressure shut off valve 4 Open the air vent hold a bucket of water...

Page 26: ...t successful on the first attempt for example if mains water is not available then the pump must be primed with approx one liter of water before initial start up This is done via the filling screw at...

Page 27: ...e shut off valve and release the air from the house line e g by pressing the toilet flush several times or open the garden tap 6 Close all the consumers The pump will now automatically switch off when...

Page 28: ...switch both of which are indicated by the display of the motorized valve see chapter 5 4 Rainwater mode Rainwater tank is full Float switch remains floating upright in the tank Mains water mode Rainw...

Page 29: ...he intake hose is bent c The suction line or the lines are not sealed d no switchover to mains water since float switch is incorrectly positioned or is defective a clean intake filter b check intake l...

Page 30: ...Floating valve for supplemental supply container 8 RMF NSP 3 2 way ball valve 9 RMF KH Float switch 15m RMF SCHW15 Spare part for centrifugal pump see chapter 5 2 11 Optional Accessories RMD 24 Art N...

Page 31: ...e kindly contact INTEWA GmbH directly quoting your product s model and identification numbers and the purchase invoice details at INTEWA GmbH J licher Stra e 336 52070 Aachen Tel 0049 241 96605 0 Fax...

Page 32: ...31 INTEWA GmbH Version 2 8c Subject to technical changes...

Reviews: