background image

EN-V233 

– 5019 – AA Installation and use of built-in Visio call panel 02-0166-EN  

Page 1 / 12 

INSTALLATION AND CONNECTION OF 

THE BUILT-IN Visio call panel 


General points 

 
The built-in Visio call panel (ref.: 02-0166-EN) is a multifunctional call panel which transmits 
an image of the visitor to the resident's telephone. 
This call panel is available in a 

"Stainless-steel" 

coloured finish and is 

flush

-

mounted

. It 

is configured using the following website: 

www.intratone.com 

in the "management 

website" tab 
 
It must be connected to the following "real-time" 

central units

  2 to 4 doors  (ref.: 03-0101-EN) 

  1 door  

(ref.: 03-0102-EN)  

 
Ideal for installation near an entrance gate; four opening methods are possible: 

  By using an authorised badge 

  By typing in a specific code 

  By calling a resident using the call panel, who then opens the gate using a key on 

his/her telephone 

  Using a "mobilekey". 


Product description: 
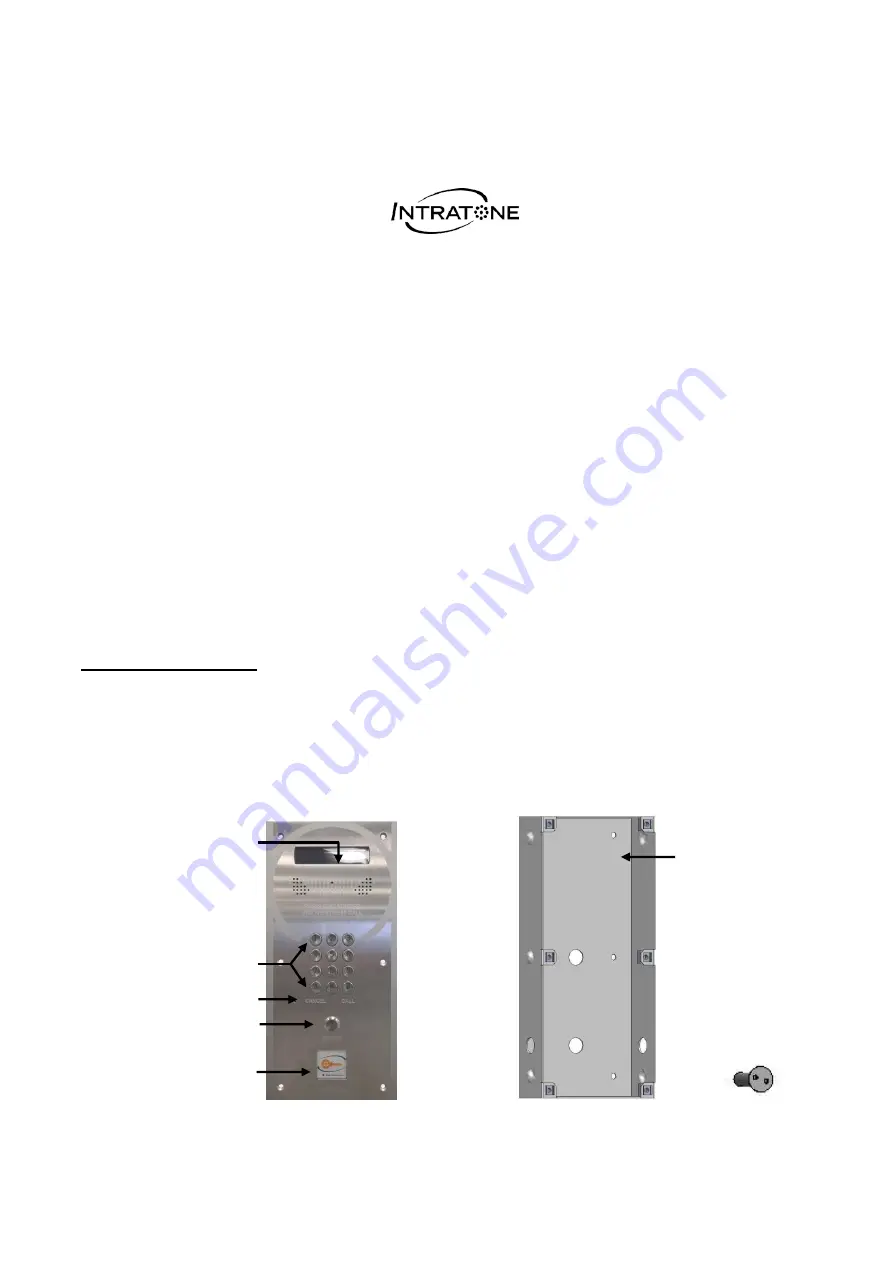
The Visio telephone intercom with scrolling name-display consists of: 

  A 12-keys keypad and backlit LCD screen  


A “Trade” call button available on time range 

  A proximity reader. 

  A miniature camera for use in video calls 

  Built-in speech synthesiser: "Call in progress"; "Door open", etc. 


Screws  
X 6 

LCD display 

Proximity reader 

Keypad 

Trade button 

Cancel / Call buttons 

Built-in wall 

box 

Summary of Contents for Visio 02-0166-EN

Page 1: ...ing real time central units 2 to 4 doors ref 03 0101 EN 1 door ref 03 0102 EN Ideal for installation near an entrance gate four opening methods are possible By using an authorised badge By typing in a specific code By calling a resident using the call panel who then opens the gate using a key on his her telephone Using a mobilekey Product description The Visio telephone intercom with scrolling nam...

Page 2: ...SCENARIO OF CONNECTING AN ENTRANCE GATE WITH THE 2 TYPES OF CENTRAL UNITS 6 E SCENARIO OF CONNECTING AN ENTRANCE GATE PLUS A BUILDING 6 EQUIPMENT CONFIGURATION 7 A GENERAL POINTS 7 B CONFIGURATION WITH A RESIDENTIAL CENTRAL UNIT 03 0101 EN 7 C CONFIGURATION WITH AN INTRACODE 03 0102 EN CENTRAL UNIT 8 POST FITTING CHECK 9 A ON THE PANEL 9 B DOOR CONNECTION 9 C CALLS 9 D KEYPAD CODE 9 DIAGNOSIS IN T...

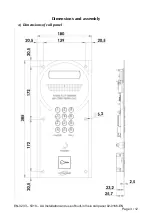
Page 3: ...EN V233 5019 AA Installation and use of built in Visio call panel 02 0166 EN Page 3 12 Dimensions and assembly A Dimensions of call panel ...

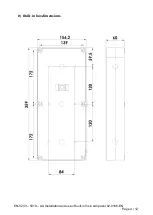
Page 4: ...EN V233 5019 AA Installation and use of built in Visio call panel 02 0166 EN Page 4 12 B Built in box dimensions ...

Page 5: ...work if the call panel is installed with a 3G or 3GIP unit B For AUDIO calls only Connect the following terminals up to the central unit Terminal Detail Pair Qty Power supply 1 D D Data 1 A A Audio 1 C For VIDEO calls Also connect the following terminals up to the V V VIDEO 1 terminals on the 3G OR 3GIP unit Terminal Detail Pair Qty V V Video 1 03 0102 EN 17 0101 D D D D V V A A Power supply 12 24...

Page 6: ...cenario of connecting an entrance gate plus a building It is mandatory to use an 03 0101 EN central unit with in this example an extension board Scenario Audio and Video calls from the entrance gate Only Audio calls can be made from the building entrance 4 2 6 6 6 Add an extension board doors 3 and 4 6 6 2 2 2 In this example door 4 remains available 41 49 and CRT Connections in red refer to Visio...

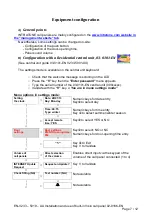
Page 7: ...y then the Enter password menu appears o Type the serial number of the 03 0101 EN central unit 000xxxxx o Validate with the V key You are in menu settings mode Menu options in settings mode Setting the clock Date 28 01 13 Day Monday Numeric keys for date entry Key to select day Time 09 15 Type winter Numeric keys for time entry Key to select summer winter season Accept remote time YES Key to selec...

Page 8: ...ntracode 03 0102 EN central unit Presets selection is performed by switches actuation on the Central unit card on the right hand side of the battery Sw 1 to 3 NA Switch 4 and 5 combination graduate the opening time Sw4 on 5 sec On 10 sec Off 20 sec Sw5 on off on Switch 6 select door open PB type Sw6 on NO off NC ...

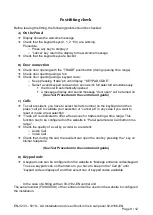
Page 9: ...e central unit guide C Calls To call a resident you have to select his flat s number on the keyboard and then press call pb to validate your selection or cancel pb in any case if you want to reset or make a new selection Trade pb is dedicated to offer a free acces for trades during a time range This function has to be configured on the website in Panel parameters Call button time range Check the q...

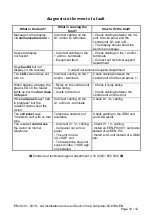
Page 10: ...nals Check cabling between the central unit and the call panel When swiping a badge the green LED on the reader lights up but the door does not open Relay on the central unit not working Cable to the door Check if relay sticks Check cabling between the central unit and the door If the call panel says Call in progress but the resident cannot hear the visitor Incorrect cabling on the A and or A term...

Page 11: ... telephone network standards TS 103 021 and TR 103 000 Cabling The cables connected to the central unit must not be placed in the vicinity of other sources of electrical power e g mains power supply Operating warranty The call panel is guaranteed for a temperature range of between 20 C and 70 C and for relative humidity not exceeding 70 End of life product recycling The panel and its accessories m...

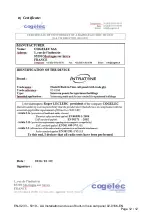
Page 12: ...EN V233 5019 AA Installation and use of built in Visio call panel 02 0166 EN Page 12 12 B Certificate ...

Reviews: