30
31
A
B
C
36
3 cm mini
10 mm
!
!
37
A
35
B
A
C
D
34
2.6.3 Safety equipment and options
- Posture belt
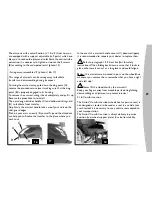
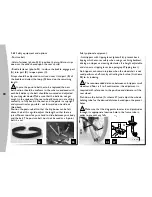
• Velcro fastener (photo 344) : position the two Velcro strips
one over the other based upon the user’s build.
• Buckle fastener (photo 35) : to close the buckle, engage part
(A) into part (B), to open press (C).
Straps should be adjusted to suit user, insert into part (B) of
the buckle and adjust the loop (D) based on the remaining
length.
!
In case the posture belt has to be replaced, the new
belt fixation should be conform to the scheme enclosed with
each belt delivery; the belt should be mounted and adjusted
by your regular dealer. Make sure that the belts do not get
caught in the spokes of the rear wheel. Ensure you are sitting
correctly, i.e. fully back in the seat, and the pelvis is as upright
and symmetrical as possible - not forward on one side or
tilted back.
Position the posture belt so that the hip bones can be felt
above the belt. As a guide, adjust the length so that there is
just sufficient room for your hand to slide between your body
and the belt. The posture belt must not be used as a 3-point
belt in a car.
Safety optional equipment :
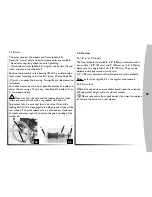
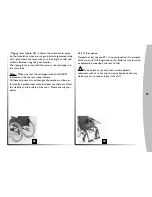
- Anti-tippers with tipping lever (photo 36) : prevent back
tipping which ensures safety when using a reclining backrest,
driving on slopes or crossing obstacles. It is height adjustable
and also act as tipping lever (see paragraph Tipping lever)
Anti-tippers can remain in place when the wheelchair is not
used; perform a half-turn by activating the button (A schema
38) to its indexing.
!
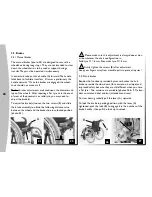
The recommended distance between anti-tippers small
wheels and floor is 3 to 5 centimetres ; this adjustment is
required with reference to the position and diameter of the
rear wheel.
Push down the button (A schema 37) and adjust the wheels
holding tube for the desired distance based upon the preset
holes.
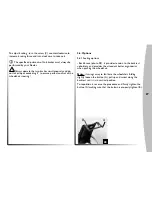
!
Make sure that the dog points locates in and protrudes
through its appropriate location hole in the frame tube in
order to prevent any falls.


