background image

Tyre pressure

The pressure is shown on the tyre and must
never be exceeded.  Remember that the tyre
pressure on both wheels should be the same
to ensure perfect steering.

In case of a puncture, the tyre has to be
removed from the rim. Press the valve to let all
the remaining air out of the inner tube. Pull the tyre off the rim.
Repair or replace the inner tube. Put the tyre back on the rim. Inflate
the tyre to the required pressure.

- NB: It may be necessary to use one or two tyre removal tools (not
supplied).

Handrims

- The handrims are used by the user to drive the wheelchair.

- NB: As the handrims are in contact with your hands, make sure that
they are not damaged and that the surface has no parts which might
cause injury to the hands.

- Adjustment: No adjustment is required for the handrims.

Axles

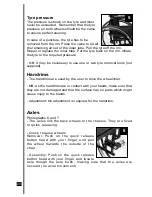
Photographs 6 and 7
- The axles link the back wheels to the chassis. They are fixed
or quick releasing.

- Quick release wheels 
Removal: Push on the quick release
button head with your finger and pull
the wheel towards the outside of the
chair.

- Assembly: Push on the quick release
button head with your finger and locate
axle though the axle bush, making sure that the axles are
secured (no axial movement).

20

5

6

Summary of Contents for Blade Plus

Page 1: ...User Guide Blade Invacare R...

Page 2: ...before trying out your new Blade so that you may truly enjoy your new independence We recommend to have your wheelchair inspected and serviced by an authorised INVACARE dealer at least once a year It...

Page 3: ......

Page 4: ......

Page 5: ......

Page 6: ......

Page 7: ......

Page 8: ...e information set out in this manual may be modified without prior notice This manual contains copyright information All rights are reserved No part of this document may be photocopied or reproduced w...

Page 9: ...from a wheelchair 4 1 3 Transferring to other seats 7 1 4 Tilting the wheelchair 9 1 5 Kerbs 10 1 6 Stairs 11 1 7 Upward and downward slopes 12 2 Use 13 2 1 Folding and unfolding the wheelchair 13 2...

Page 10: ...12 Footrests 22 13 Backrest Extension 23 14 Rear Anti tippers 24 15 Transit kit 24 16 Safety belt 25 17 Spoke guards 25 18 Tipping Lever 25 19 Adjusting Recliner Backrests 26 20 Hub Brakes 26 21 Rout...

Page 11: ...t for the Blade is 89kg This weight includes accessories such as a compact oxygen cylinder or other equipment required by the user However the wheelchair users degree of activity is important For exam...

Page 12: ...heel base Figure 2 Lock the manual brakes on the rear wheels Leaning forwards Figures 3 4 and 5 Move the wheelchair as close as possible to the object you wish to reach Only reach out to take what is...

Page 13: ...position Leaning to one side Figure 8 This is the most dangerous manoeuvre as it is easy to tip sideways To move up to the object and lean over you must use the castors as a means of keeping the wheel...

Page 14: ...advisor who should consider your level of disability and type of wheelchair When transferring either to get out of or return to your wheelchair make sure That the gap between the two seats is as small...

Page 15: ...back the footrest supports to the side to clear the way Figure 13 If possible remove the armrests on the side between the wheelchair and the other seat Figure 14 N B Never stand up on the footplates...

Page 16: ...a wheelchair user needs assistance in tilting the chair the assistant must know how to use their body correctly Keep your back straight and bend at the knee to tilt the wheelchair Never exert too muc...

Page 17: ...astors gently onto the pavement Push the wheelchair until the rear wheels touch the kerb Lift and push until the rear wheels have mounted the kerb Do not lift by the handles on the backrest Method 2 F...

Page 18: ...brium One helper at the back holds the wheelchair up against the first step gripping the handles firmly to lift The second helper holding firmly a fixed part of the front frame lifts the wheelchair ab...

Page 19: ...lopes otherwise the wheelchair might overturn Figure 21 Upward slopes Lean the upper part of the body forward and push the chair forward with short quick thrusts on the handrims to maintain speed and...

Page 20: ...you are going up or down a slope avoid turning sharply and never try to go up or down diagonally 2 Use 2 1 Folding and unfolding the wheelchair Wheelchair with fabric upholstery To fold Lift the foot...

Page 21: ...ding frame footrest supports or leg rests etc 2 2 Propelling the wheelchair The wheels of your wheelchair are fitted with handrims Figure 27 and qualified personnel will be able to advise you on the m...

Page 22: ...chair using the manual brakes Do not tilt the wheelchair without assistance from a third person when negotiating obstacles more than 30 mm high Do not use an escalator for moving a wheelchair from one...

Page 23: ...other parts are mounted The rear wheel comprises of the wheel axle and handrim The rear wheels provide contact with the ground and are driven by turning the handrims The front castors comprise of the...

Page 24: ...17 Backrest Armrest Seat Rear Wheel Front Castor Swingaway Footrest Support Footplate Manual Brake...

Page 25: ...seat upholstery is screwed onto the seat tubes of the folding cross brace Adjustment This model requires no adjustment Just check regularly that the screws A are tight If the washers B are loose these...

Page 26: ...n this series of wheelchair Folding cross brace The folding cross brace has two members which enable the wheelchair to be folded Adjustment No adjustment is required To fold or unfold your wheelchair...

Page 27: ...pplied Handrims The handrims are used by the user to drive the wheelchair NB As the handrims are in contact with your hands make sure that they are not damaged and that the surface has no parts which...

Page 28: ...o immobilise the wheelchair in a stationary position They are not intended for slowing down and should not be used when the wheelchair is moving They should be applied together Use The brakes are oper...

Page 29: ...lever Rotate the support carefully to the outside of the wheelchair To return the support repeat the operations in the reverse order Check that the release mechanism has automatically locked To remov...

Page 30: ...push handles of the backrest by a qualified technician When refitting make sure that it is firmly fixed onto the locations fitted to the backrest tubes Raise the head rest assembly to remove it from...

Page 31: ...hem Just depress the button spring and rotate the entire anti tipper unit a half turn 180 DO NOT twist or turn the Anti Tipper when withdrawing it from the frame NB The anti tippers are not to be used...

Page 32: ...le system A qualified advisor must show you how to position the strap according to your needs 17 Spoke guards The spoke guards must be assembled by a qualified technician The spoke guards do not requi...

Page 33: ...tions provided by manual brakes the optional hub brakes provide slow down for example on a slope and improve safety because they are still efficient when you have a flat tyre To slow down gradually pu...

Page 34: ...nd even X X X X Check that nuts bolts and screws are tight X X X Check that the angle of the front forks is correct X X X Check that the castors are both in contact with ground at the same time If the...

Page 35: ...ly locked X X 9 Handrims Check for rough patches X X 10 Spokes Inspect the spokes in case any are bent broken or slack X X 11 6 or 8 castors Check the axle to ensure that it is correctly tightened by...

Page 36: ...a headrest it should always be used during transportation 5 Invacare recommend that the wheelchair be secured by 4 Point webbing tie down systems as manufactured by Unwin Safety Systems or Koller Safe...

Page 37: ...ry rights under the Consumer Protection Act are not affected Limitation of liability This warranty does not extend to the consequential costs resulting from fault clearance in particular freight and t...

Page 38: ...San s r l Via dei Pini 62 I 36016 Thiene VI Tel 39 0445 38 00 59 Fax 39 0445 38 00 34 italia invacare com Nederland Invacare BV Celsiusstraat 46 NL 6716 BZ Ede Tel 31 0 318 695 757 Fax 31 0 318 695 7...

Reviews: