Settings and Adjustments
gives the user more room for the shoulder area while position
B
gives more room for the bottom.
Determine if the user needs more space in the shoulder area or in
the bottom area. The design of the backrest tubes with different
angles allows for these adjustments.
1.
Loosen and remove screws on both sides.
2.
Turn the backrest.
3.
Reinsert the screws.
4.
Make sure to fasten properly.
The user can not sit in the chair when the backrest tubes
are removed.
The backrest tubes have a width adjustment of 25 mm. The upper and
lower parts of the tubes can be adjusted individually to accommodate
for different needs. The outward movement will embrace the user
and offer lateral support.
Backrest positioning
Angle the backrest- and seat tilt a couple of degrees in order to
obtain a stable seating position for the user.
A
B
A
B
A
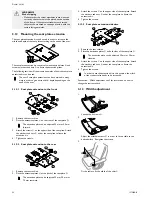
Position A — The longer angle of the backrest is turned
upwards.
B
Position B — The longer angle of the backrest is turned
downwards.
A
A
A
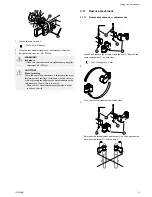
Screws for adjustment of the backrest tubes.
Tools: 5 mm Allen Key
3.3.3
Angle adjustment — Tension adjustable
backrest
0
1
2
3
4
0
1
2
3
4
A
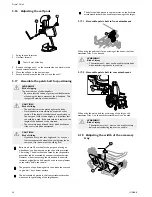
The backrest tubes can be angled individually, the indication labels
A
on the backrest tubes are a help in order to get the same angle
on both sides.
0
1
2
3
4
0
1
2
3
4
1
2
3
4
0
1
2
3
4
0
1
2
3
4
0
1
2
3
4
0
1
2
3
4
0
1
2
3
4
0
1
2
3
4
0
1
2
3
4
0
1
2
3
4
0
1
2
3
4
0
1
2
3
4
0
1
2
3
4
0
1
2
3
4
0
1
2
3
4
1.
Move the user from the chair.
2.
Remove the backrest cover and loosen the velcro® straps - the
straps should slack about 5 cm.
3.
Loosen the backrest tubes and adjust them in order to fit the
shape of the user.
4.
Re-tighten the screws after adjustment.
3.4
Positioning the headrest/neckrest to the
front
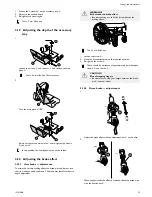
This additional depth adjustment will move the headrest
another 7 cm forward.
A
C
D
E
A
C
D
You can also adjust the angle and depth by turning the
attachment for the headrest / neckrest.
1572308-B
17

