Settings and Adjustments
1.
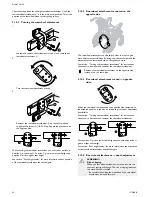
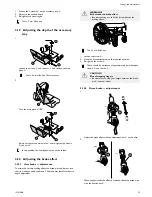
Loosen the 2 screws
B
on the accessory tray
A
.
2.
Adjust to the desired depth.
3.
Re-tighten the screws again.
Tools: 5 mm Allen key
3.19
Adjusting the depth of the accessory
tray
1.
A
B
C
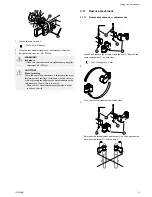
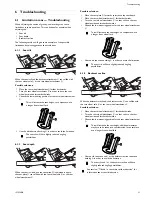
Loosen the screws
B
and the nuts
C
and remove the main
plate
A
.
Tools: 5 mm allen key, 13 mm spanner
2.
A
Turn the main plate
A
180º.
B
A
C
Re-mount the turned main plate
A
and re-tighten the screws
B
and nuts
C
.
In this position, the anti-tip device can not be folded.
3.20
Adjusting the brake effect
3.20.1
User brake — adjustment
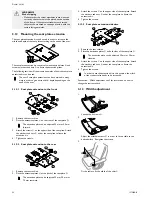
To attain the correct braking effect, the brake pin should press into
the tire when you apply the brake. The brake may therefore require
depth adjustment.
WARNING!
Risk of reduced brake effect
–
Incorrect setting or use of the brake reduces the
braking effect.
A
B
C
Tool: 5 mm Allen key
1.
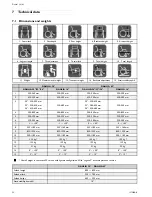
Loosen the screw
A
.
2.
Move the brake attachment to the required position.
3.
Re-tighten the screw
A
.
There should be a distance of approximately 6 mm between
the pin
B
and the tire
C
.
CAUTION!
Risk of trapping fingers
–
Be careful not to trap your fingers between the brake
pin
B
and rear wheel.
3.20.2
Drum brake — adjustments
1.
A
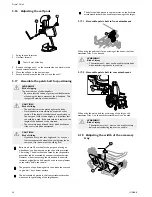
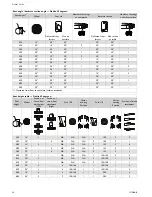
Adjust the brake effect with the adjustment nut
A
on the wire.
2.
B
B
When the desired brake effect is achieved, fixate the brake wire
with the fixation nut
B
.
1572308-B
25


