SECTION 7—ASBA SEAT
Part No. 1125075
65
Pronto® Series
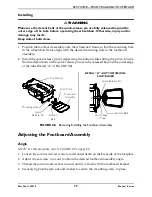
4. Install the accessories, if necessary. Refer to Accessories on page 128.
FIGURE 7.5
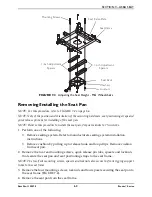
Removing/Installing the Seat Frame
Adjusting the Seat Position
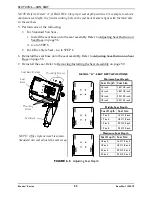
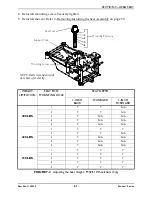
NOTE: For this procedure, refer to FIGURE 7.6 on page 66.
NOTE: The seat is shipped from the factory in the standard position. The seat can be moved 1-inch
forward or 1-inch rearward. See Detail “A”).
1. Remove the four mounting screws, washers and locknuts securing the seat frame plate
and 1-inch adjustment spacers* to the seat pivot.
*NOTE: M61 wheelchairs may have up to two sets of 1-inch adjustment spacers between the seat
frame plate and the seat pivot.
2. Reposition the seat frame plate, 1-inch adjustment spacers* and seat pivot to align the
mounting holes with the desired seat adjustment position (Detail “A”).
3. Secure the seat frame plate and 1-inch adjustment spacers* to the seat pivot using the
four mounting screws, washers and locknuts. Torque to 13 ft-lbs ± 20%.
Locknuts
Hex Screws
Seat Frame Plate
Seat Frame
Accessory Tube


