4
REA BELLIS
C
A
B
A
B
C
A
E
F
I
H
J
G
K
C
E
N
M
L
1.
2.
1.
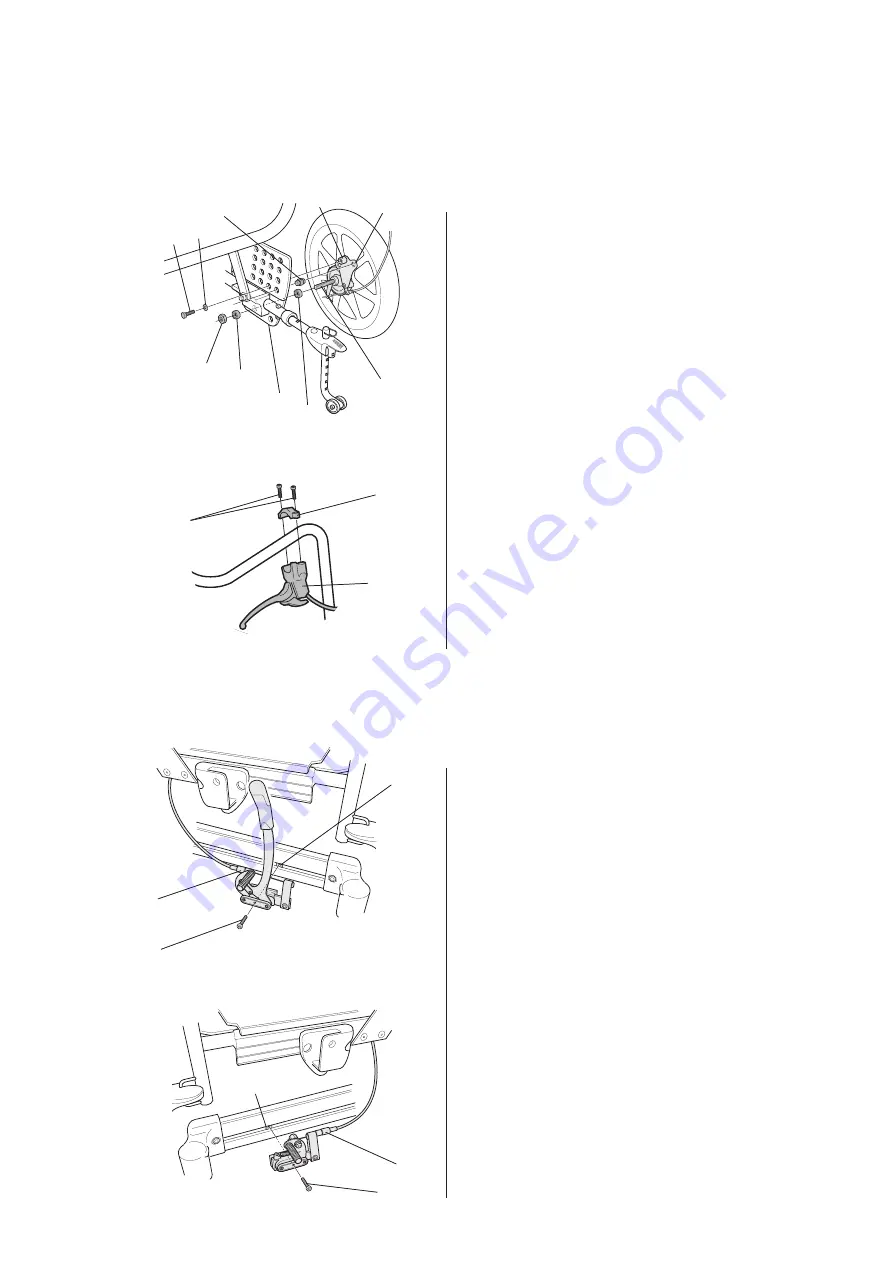
Start by fi tting transport plate (A). Unscrew the
screws on the drive wheel plate. The transport
plate is screwed securely into the same holes
and with the same screws as the drive wheel
plate.
The transport wheel is then attached by inserting
the axle (C) into the transport plate (A) with
spacers (E) on both sides. The axle is attached
securely with nut (F). The lock pin (G) is attached
securely with washer (H) and screw (I). Lock
spacer (J) is placed between the drive wheel plate
and attachment plate (K).
2.
In order to fi t the push handle, you hold handle (L)
on the underside of the push handle/push bar and
clamp (M) on the upper side. Then attach these
together securely using the screws (N).
Start by removing the standard rear wheel brake.
Attach the one-arm brake to the suitable side of
the chair by tightening screw (A) in the existing
square nut (B).
Adjust the braking effect when necessary by tightening/
loosening the wire (C). Attach the wire to a suitable
point on the underside of the chair using cable ties
to keep it out of the way.
Tools: 5 mm Allen Key
19 mm fixed spanner
Tools: 5 mm Allen Key
16” transport wheel
Fitting a one-arm brake
Summary of Contents for rea Bellis
Page 1: ...Rea Bellis assembly instructions accessories English...
Page 2: ...2 REA BELLIS...
Page 23: ......


