7
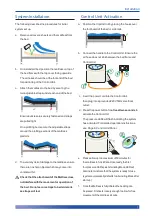
The following describes the procedures for initial
system set up.
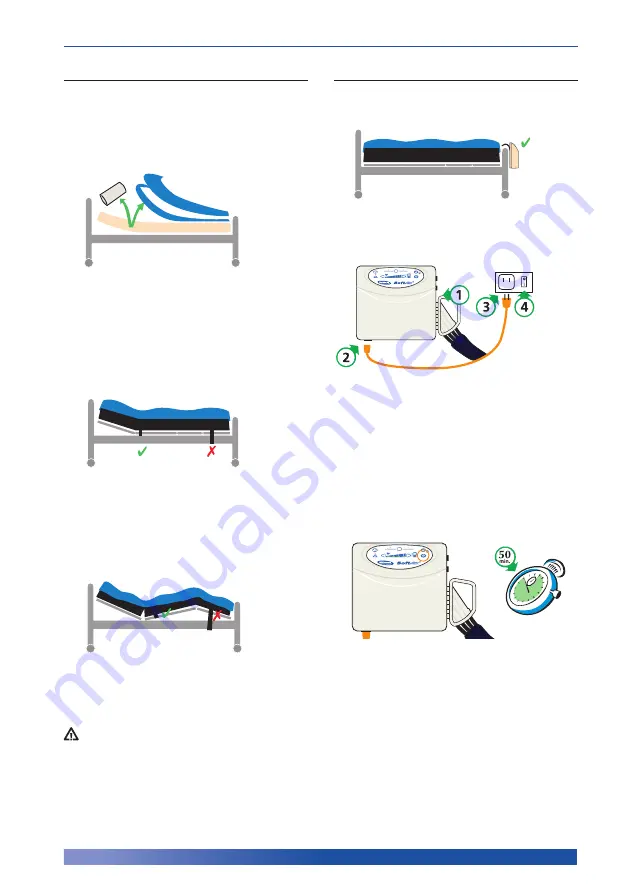
a. Remove all covers, sheets and the mattress from
the bed.
b. On a standard bed, position the mattress on top of
the bed frame with the top cover facing upwards.
The air hoses should be at the foot end of the bed
for positioning of the Control Unit.
c. Attach the mattress to the bed by securing the
two adjustable straps under each end of the bed.
Ensure buckles are securely fastened and straps
are pulled
tight.
On a profiling bed, secure the adjustable straps
around the profiling sections of the mattress
platform.
d. To avoid any risk of damage to the mattress ensure
there are no sharp objects which may come into
contact with it.
Check that the attachment of the Mattress does
not interfere with the movement or operation of
the bed. Do not secure straps to bed side rails
as straps will tear.
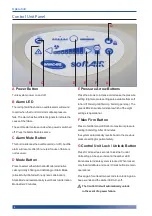
a. Position the Control Unit by placing the hooks over
the foot board of the bed or side rails.
b. Connect the handle to the Control Unit. Ensure the
air hose does not kink between the bed frame and
Control Unit.
c. Insert the power cord into the Control Unit,
then plug into a grounded 220V 50Hz electrical
outlet.
d.
Press the power button for
at least two seconds
to
activate the Control Unit.
The pressure LEDs will flash indicating the system
has activated. For detailed operation instructions,
see Page 8: Control Unit Panel.
e. Please allow up to a maximum of 50 minutes for
the mattress to fully inflate. Once ready, the first
four pressure LED’s plus Alternating Mode LED will
illuminate to indicate that the system is ready for use
(system automatically defaults to Alternating Mode after
start-up)
f. Once the Mattress is fully inflated the bedding can
be placed. Fit sheets loosely enough to allow for free
movement of the mattress air cells.
Installation
System Installation
Control Unit Activation


