SECTION 8—BASE FRAME
60
SECTION 8—BASE FRAME
Removing/Installing Seat
NOTE: Before removing the seat assembly, note the position and orientation of the mounting
position and hardware.
Jr. Size Seats
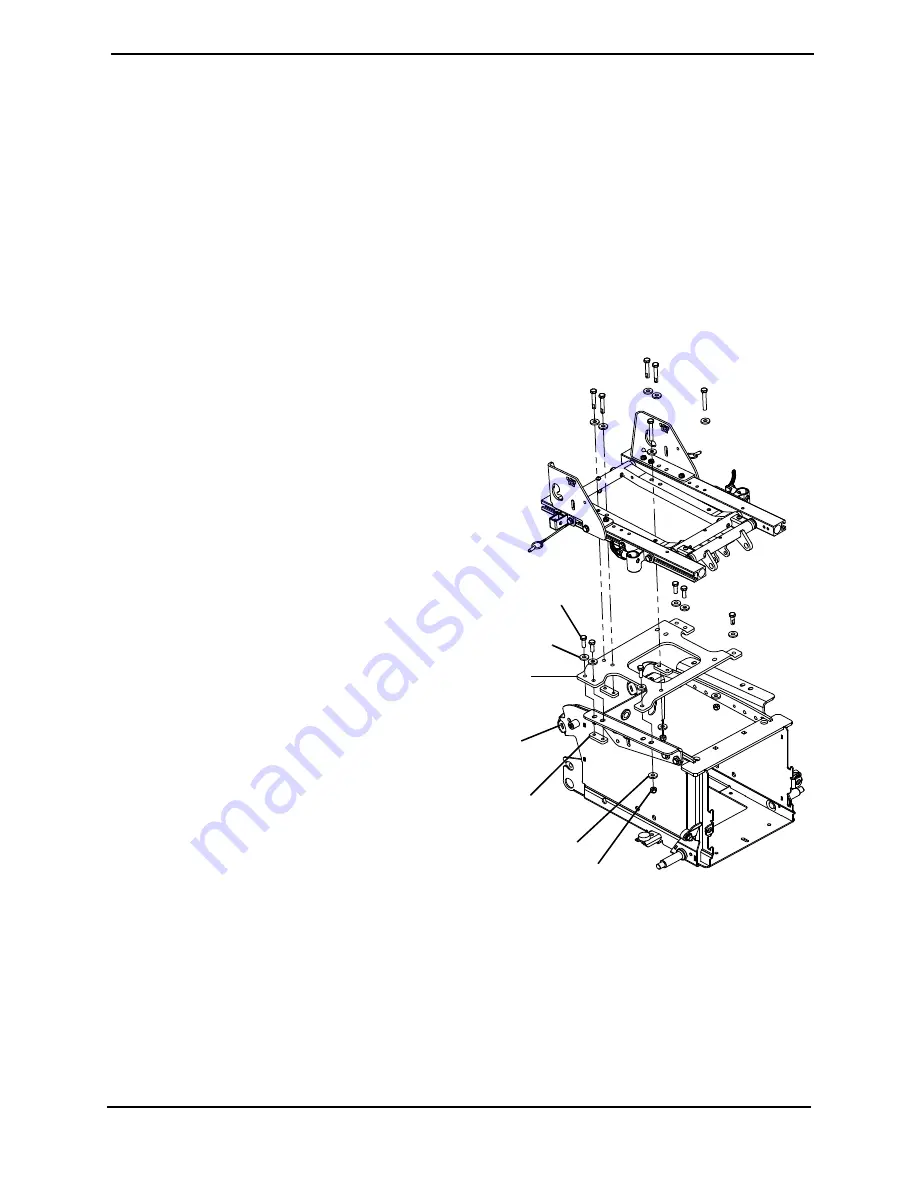
NOTE: For this procedure, refer to FIGURE 8.1 on page 60.
Removing
1. Remove the four rear 5/16-18 x .88 hex
head screws, 8.4 washers and two
5/16-18 plates that secure the rear of the
seat bracket to the base frame.
2. Remove the two front 5/16-18 x .88 hex
head screws, four 8.4 washers and two
5/16-18 locknuts securing the front of
the seat bracket to the base frame.
3. Lifting up, remove the seat assembly
from the base frame.
Installing
1. Position the seat assembly onto the
base frame.
2. Using the four rear 5/16-18 x .88 hex
head screws, 8.4 washers and two
5/16-18 plates, secure the rear of the
seat bracket to the base frame. Torque
to 13 ft-lbs ± 20%.
3. Using the two front 5/16-18 x .88 hex
head screws, four 8.4 washers and two
5/16-18 locknuts, secure the front of the
seat bracket to the base frame. Torque
to 13 ft-lbs ± 20%.
FIGURE 8.1
Removing/Installing Seat - Jr.
8.4 Washers
5/16-18 Plates
Seat
Bracket
Base
Frame
NOTE: Seat frame shown separated from seat
bracket for clarity.
5/16-18 locknuts
5/16-18 x .88
Hex Head Screws
8.4 Washers


