


12
13
OPERATION
OPERATION
12
13
aV ALD ventilation device | Operating and cleaning instructions
aV ALD ventilation device | Operating and cleaning instructions
Cleaning recommendations
The measures and intervals listed here are recommended by inVENTer GmbH to maintain the
functionality and performance of the aV ALD ventilation devices.
Depending on requirements and/or air quality, your personal cleaning plan may differ from these
recommendations.
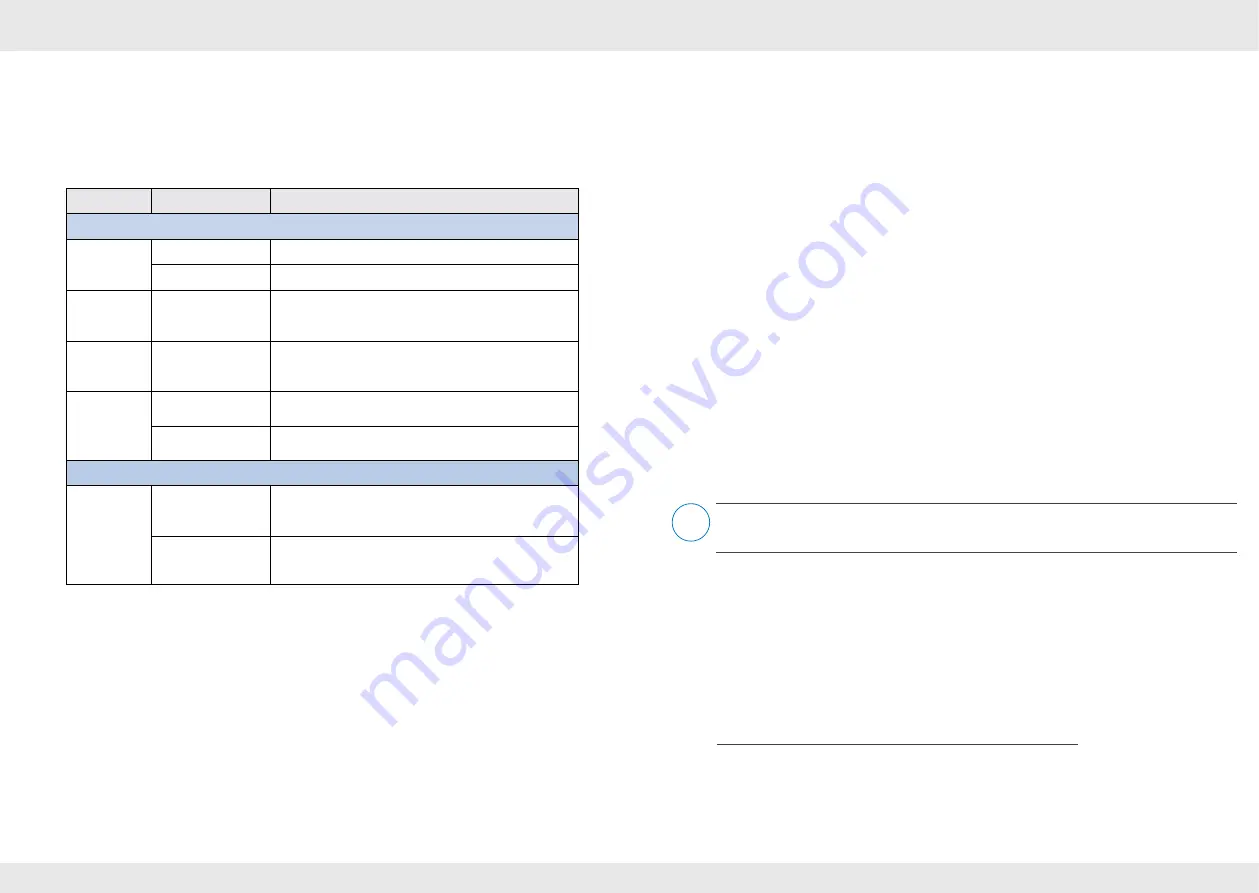
Interval
Module
Cleaning measure
Cleaning from the interior room
Monthly
Pollen filter
Replace the used filter.
Inner cover
Clean the surface of the cover with a damp cloth.
Quarterly
Dust filter
Wash the dust filter in warm water.
Or
Replace worn dust filters.
Half-yearly
Sound insulation
lining made of
Inventin
®
Wipe the sound insulation lining with a slightly damp,
soft cloth.
Replace worn or defective sound insulation linings.
Yearly
Filter cartridge
Wash the filter cartridge with warm water and deter
-
gent.
Inner
cover base plate
Clean the surface of the base plate with a damp cloth.
Cleaning from the outside
Yearly
Exterior closure of
the weather protec
-
tion hood
Clean the surface of the cover and the protective grid at
the outlet opening with a damp cloth.
Flat duct
Remove the reveal grille. Clean the inside of the flat
duct with a damp cloth. Screw the reveal grille back
onto the flat duct.
Brief summary of cleaning
To clean and check the components of the ventilation device, first remove the inner cover panel.
Removal of the components is otherwise not possible.
1 Remove the inner panel's cover.
2 Remove the
• filter cartridge,
• sound insulation lining and/or Inventin
®1)
.
3
Clean the washable dust filter (the pollen filter cannot be washed).
Allow the filter to dry again completely afterwards.
4
Insert the cleaned or a new dust filter into the filter cartridge.
5
Wipe the interior of the wall sleeve with a damp cloth.
6
Insert the components in the reverse order back into the wall sleeve:
• Inventin® and/or sound insulation lining
1)
,
• Filter cartridge.
7 Close the inner cover
8
Set the air flow.
On the following pages you will find detailed descriptions for cleaning the individual components
of the ventilation device. Read these carefully before cleaning each component and pay particular
attention to additional information that is not included in the brief summary.
1)
Sound insulation lining and/or Inventin
®
only available on the aV160 ALD and aV200 ALD
i


