51
OPERATION AND SETUP WITH THE APP
inVENTer Connect controller platform | Operating instructions
4.3 "Device overview" menu
Once all the desired components have been linked to the controller and thus integrated into the
system (for component pairing see
3.3), they are displayed in the device overview.
Requirements:
• The controller is included and available in the app.
►
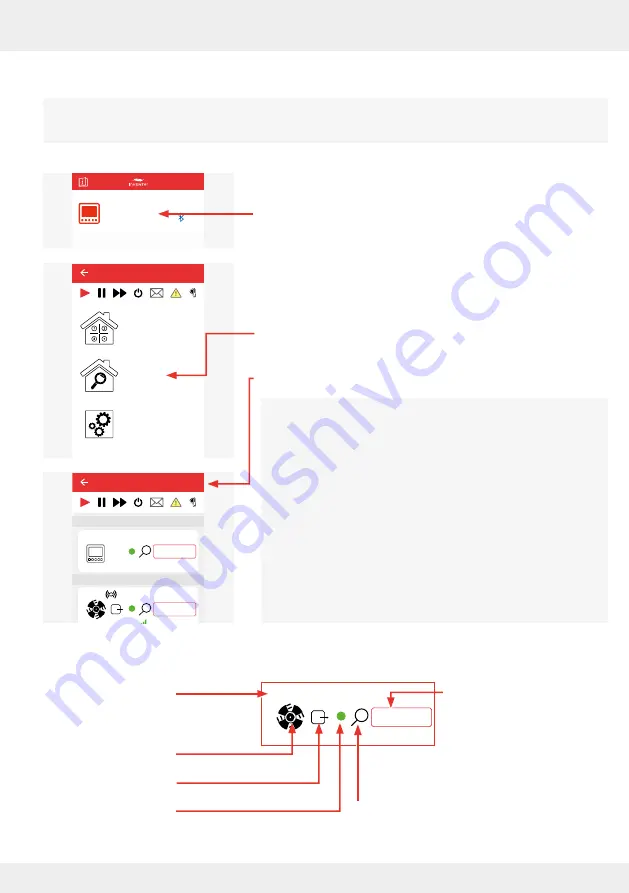
Press the "EasyConnect e16" button; your individual product
name may be displayed here.
The Start menu opens.
►
Press the "Device overview" button.
The "Device overview" window opens.
The "Device overview" menu item can be opened at any time
to obtain information on the paired components.
The controller, as the central control unit, is always displayed
as the first device and is automatically assigned to ventilation
zone 1.
The devices are displayed in the order in which they were
paired and are designated device 1, device 2, device 3, etc.
This numbering corresponds to the numbering stuck on them
during the pairing process and makes allocation easier.
The following informations are displayed for each device:
Device name
(initially "Device", this
can be changed later)
Device symbol
Device status
Availability
Easy Connect e16
Controller
Device
available
Advanced settings
Device overview
Ventilation zone
overview
Easy Connect e16
26°C
26%
Device 5
25,4°C
22,1%
20,4°C
44,1%
CO2
Device 0
Device 1
Device 2
Device 3
Device 6
Ventilation zone 1
Ventilation zone 1
Ventilation zone 1
Ventilation zone 1
Ventilation zone 1
Ventilation zone 1
Lorem ipsum
Device 4
Ventilation zone 1
Easy Connect e16
Controller
Device/Sensor
Device 2
Ventilation zone 1
Allocated ventilation zone
(Text in black if the ventilation
zone can be changed, grey if
the ventilation zone is set by
the system)
Device identification


