20
21
INSTALLATION AND ASSEMBLY
INSTALLATION AND ASSEMBLY
iV-Compact ventilation system
•
Installation and operating instructions
iV-Compact ventilation system
•
Installation and operating instructions
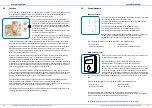
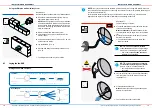
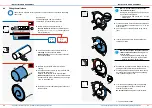
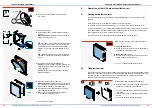
►
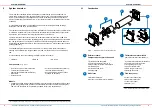
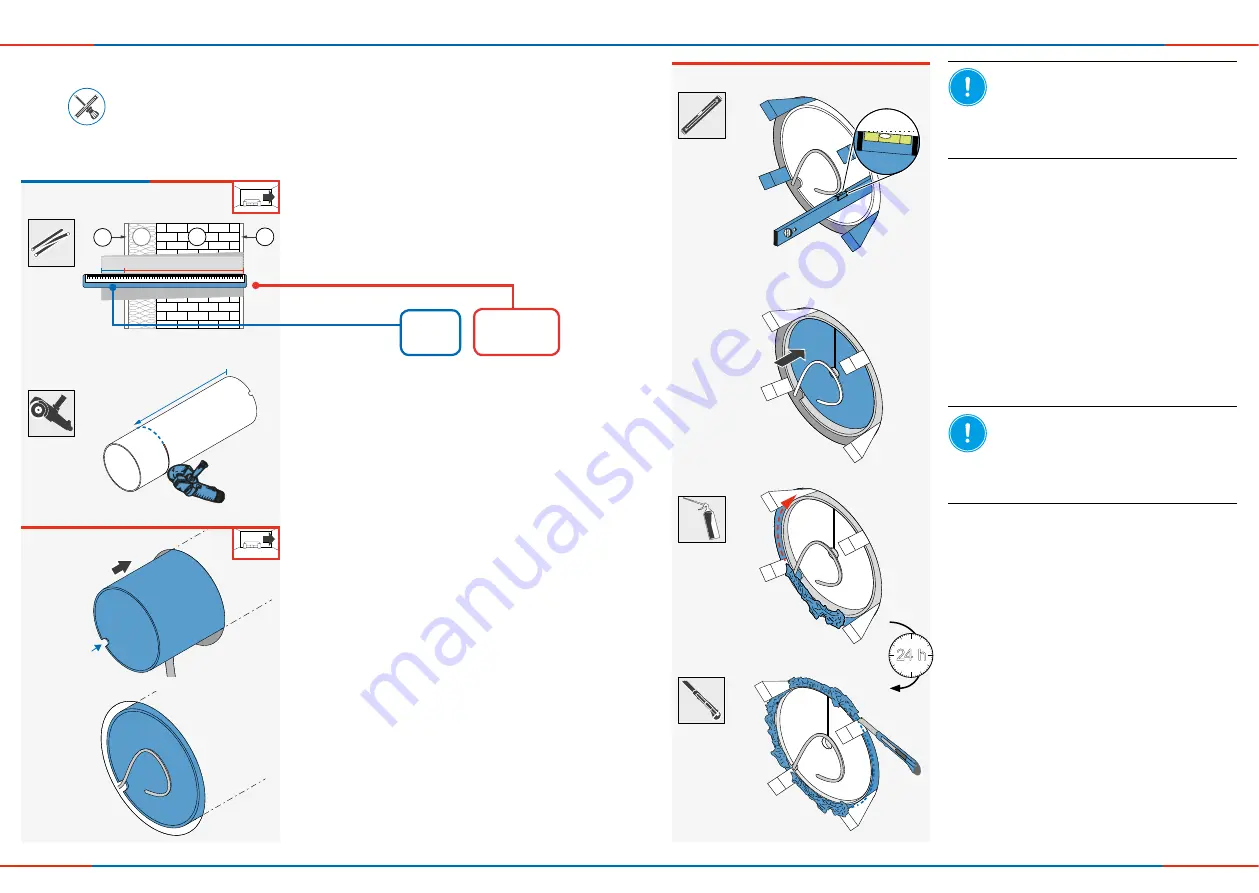
Determine the exact wall thickness X.
Be sure to add
the thickness of exterior render
(D) and
optional insulation (C)
, masonry (B) and
interior plaster (A).
►
Cut the wall sleeve to the exact dimension
X +
overhang Y
on the exterior wall side.
Make sure that
you do not cut off the recess for
the controller cable.
X
+ Y
►
Remove the protective discs from the wall
opening.
►
Insert the wall sleeve in a way, that it is flush with
the finished interior wall.
Observe the thickness of the interior plaster.
Make sure that th
e recess for the controller cable
is situated in the interior wall side and at an angle
of 45° to the bottom left.
►
Route the controller cable through the recess into
the wall sleeve.
X = ?
Y
D
A
B
C
4.4
Fitting the wall sleeve
tape measure, abrasive cutter, spirit level, non-pressurised 2 components expanding
foam, cutter
Requirements:
The wall opening Ø 180 mm is finished.
The fan-BUS (controller cable)is in place.
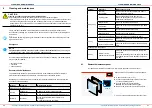
Y =
45 mm
X =
A+B
+[C]
+D
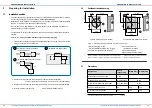
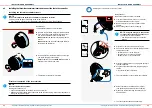
NOTE:
Accumulation of condensate
inside the wall sleeve.
Damage to the exterior wall and masonry as
well as the building fabric!
• Fix wall sleeve with a slope of 1 – 2° to the
exterior wall.
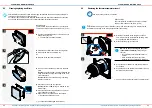
►
Fix the wall sleeve in place inside and outside with
mounting wedges to create a slope of 1 – 2° to the
exterior wall.
►
Check the slope of the wall sleeve using a spirit
level.
►
Stabilise the wall sleeve before filling with foam by
sliding in suitable material to retain the shape.
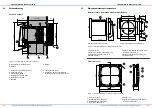
►
Fill the gap between the wall sleeve and masonry
all round with non-pressurised 2-part expanding
foam suitable for outdoor use.
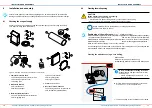
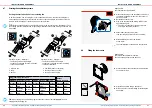
NOTE:
Interruption of the thermal insu-
lation composite system.
Damage to the
building fabric!
• After installing the wall sleeve, bring the
wall structure back up to the wall sleeve.
• Observe necessary barrier levels.
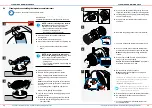
►
Insert protective discs into the wall sleeve from
outside and inside.
►
Trim the 2-part expanding foam and protruding
mounting wedges until they are flush with the
external and interior wall.
Be careful not to
damage the controller cable.
Ö
The wall sleeve is fitted.
1 – 2°
24 h


