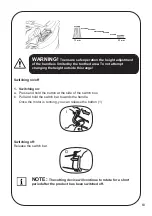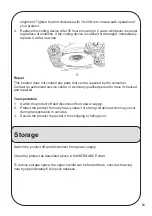
Assemble
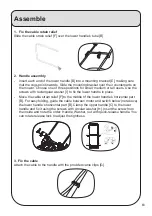
1. Fix the cable retain relief
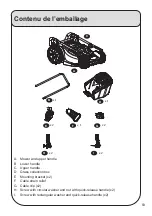
Slide the cable strain relief [F] over the lower handle’s tube [B] .
2. Handle assembly
- Insert each end of the lower handle [B] into a mounting bracket [E], making sure
that the cogs point inwards. Slide the mounting bracket over their counterparts on
the mower. Choose one of three positions for small, medium or tall users. Use the
screws with rectangular washer [I] to fix the lower handle in place.
- Move the cable strain relief [F] to the middle of the lower handle’s horizontal part
[B]. For easy folding, guide the cable between motor and switch below (not above)
the lower handle’s horizontal part [B]. Clamp the upper handle [C] to the lower
handle and fix it using the screws with circular washer [H]. Insert the screw from
the inside and note the order: Handle, Washer, nut with quick-release handle. You
can rotate release lock to adjust the tightness.
3. Fix the cable
Attach the cable to the handle with the provided cable clips [G].
1
2
61
Summary of Contents for INV E1334 P
Page 25: ...Eclatés pièces de rechange E1334P 25 ...
Page 27: ...Schéma de câblage électrique E1334P 27 ...
Page 28: ...Eclatés pièces de rechange E1637P 28 ...
Page 30: ...Schéma de câblage électrique E1637P 30 ...
Page 76: ......

