10
12-1
12-2
12-3
12-4
12-7
12-5
12-6
12-8
12-8
12-9
12-9
8
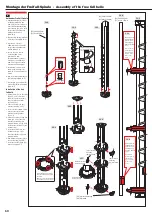
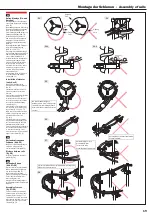
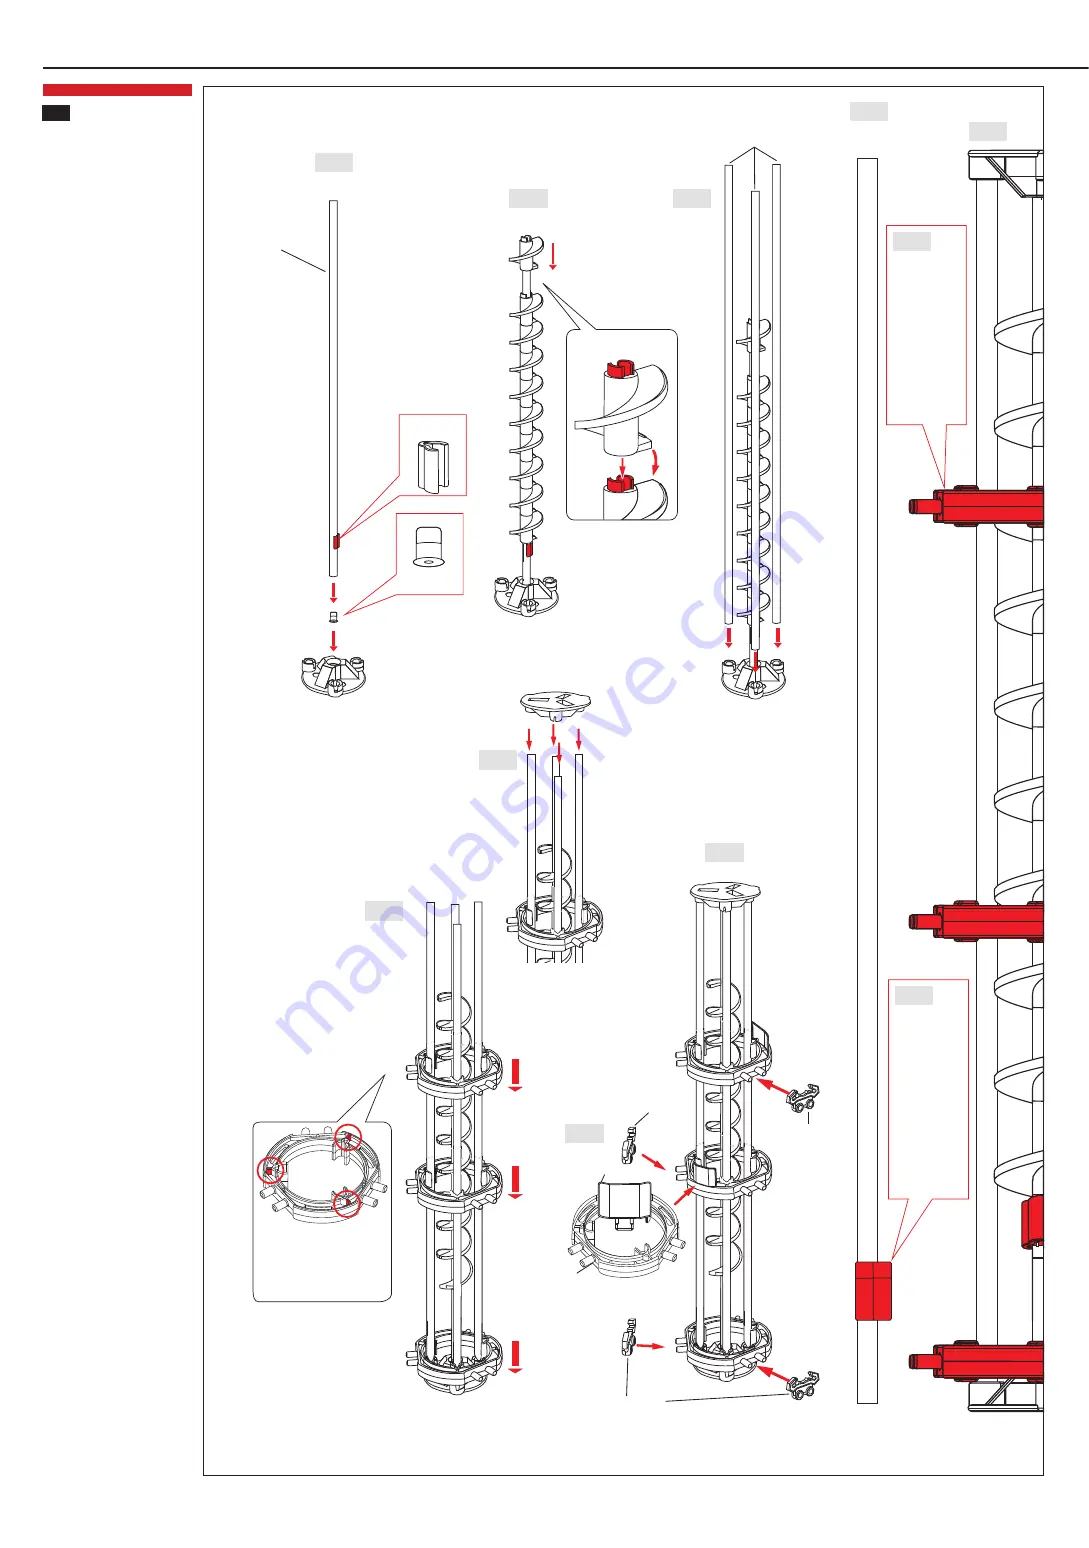
Aufbau der Freifall-Spirale
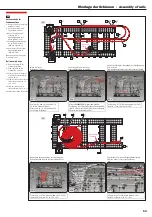
1. Abstandhalter [C3] mit Achse
verbinden (Abb. 12-1 und
Abb. 12-8). Anschließend die
Achse mit Abstandhalter und
Achsenkappe [C4] in die dafür
vorgesehenen Positionen im
Aufzugdeckel stecken
(Abb. 12-1)
2. Die 10-teilige Aufzugspirale auf
die Achse setzen (Abb. 12-2)
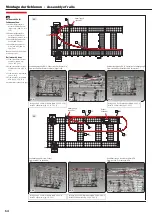
3. Stecken Sie 3 weitere
300mm-Achsen in die dafür
vorgesehenen Positionen im
Antrieb (Abb. 12-3)
4. Lassen Sie die 3 Achsen
einrasten (Abb. 12-4).
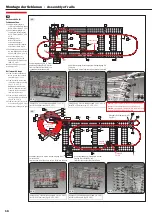
Beachten Sie beim
Zusammenbau die genaue
Position der 3 Aufzugringe.
Abb. 12-9 zeigt die exakten
Positionen der Aufzugringe
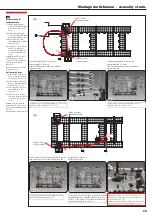
5. Verbinden Sie die 4 Achsen
nun mit dem Aufzugdeckel
(Abb. 12-5). Auf richtigen Sitz
achten
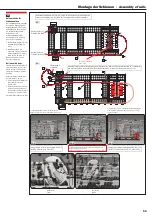
6. Nun die Schienenhalterungen
[A6] befestigen (Abb. 12-6)
7. Besfestigen Sie den Halter für
den Aufzug (E4) im Aufzugring
(Abb. 12-7)
Installation of the free
fall helix
1. Attach spacer [C3] to the shaft
(fig. 12-1, 12-8). Insert the
shaft incl. spacer and shaft
cap [C4] into the elevator
cover (fig. 12-1)
2. Slide the elevator (10 pcs)
onto the shaft (fig. 12-2)
3. Insert 3 further 300mm shafts
into the exact pre-defined
positions on the gearbox
(fig. 12-3)
4. Allow the 3 shafts to snap into
place (pic. 12-4). Take care
that the elevator rings are
properly located. See fig. 12-9
for the proper locations of the
elevator rings
5. Insert the 4 shafts into the
elevator cover (fig. 12-5).
Take care that the shafts are
properly located
6. Now attach rail stands [A6] to
the elevator ring (fig. 12-6)
7. Insert the elevator stand (E4)
into the ring (fig. 12-7)
[S3] Shaft 300mm
[S3] Achse 300mm
[S3] Shaft 300mm
[S3] Achse 300mm
[C3]
Abstandshalter
[C3] Spacer
Richtige Drehrichtung beachten
Please note the correct direction
of rotation
Beachten Sie beim
Zusammenbau die
genaue Position
der 3 Aufzugringe
(Abb. 12-9, Maßstab
ist 1:1)
Take care that the
elevator rings are
properly located
(fig. 12-9, picture
shows a scale
of 1:1)
Konvex gewölbtes, rotes Teil zeigt
nach oben. Unbedingt auf richtigen
Sitz achten
Make sure convex red parts point up
and everything is correctly seated
[C4]
Achsenkappe
[C4] Shaft cap
[S3] Shaft 300mm
[S3] Achse 300mm
Montage der Freifall-Spirale -
Assembly of the free fall helix
[A6] Schienenhalterung
[A6] Rail stand
[E4] Halter für Aufzug
[E4] Elevator stand
[E2] Aufzugring
[E2] Elevator ring
[A6] Schienen-
halterung
[A6] Rail stand
[A6] Schienen-
halterung
[A6] Rail stand
Beachten Sie beim
Zusammenbau die
genaue Position des
Abstandhalter [C3]
(Abb. 12-8, Maßstab
ist 1:1)
Take care that
the spacer [C3] is
properly located
(fig. 12-8, picture
shows a scale
of 1:1)


