background image


2.4


Door

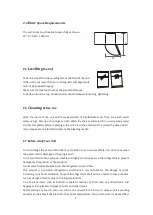
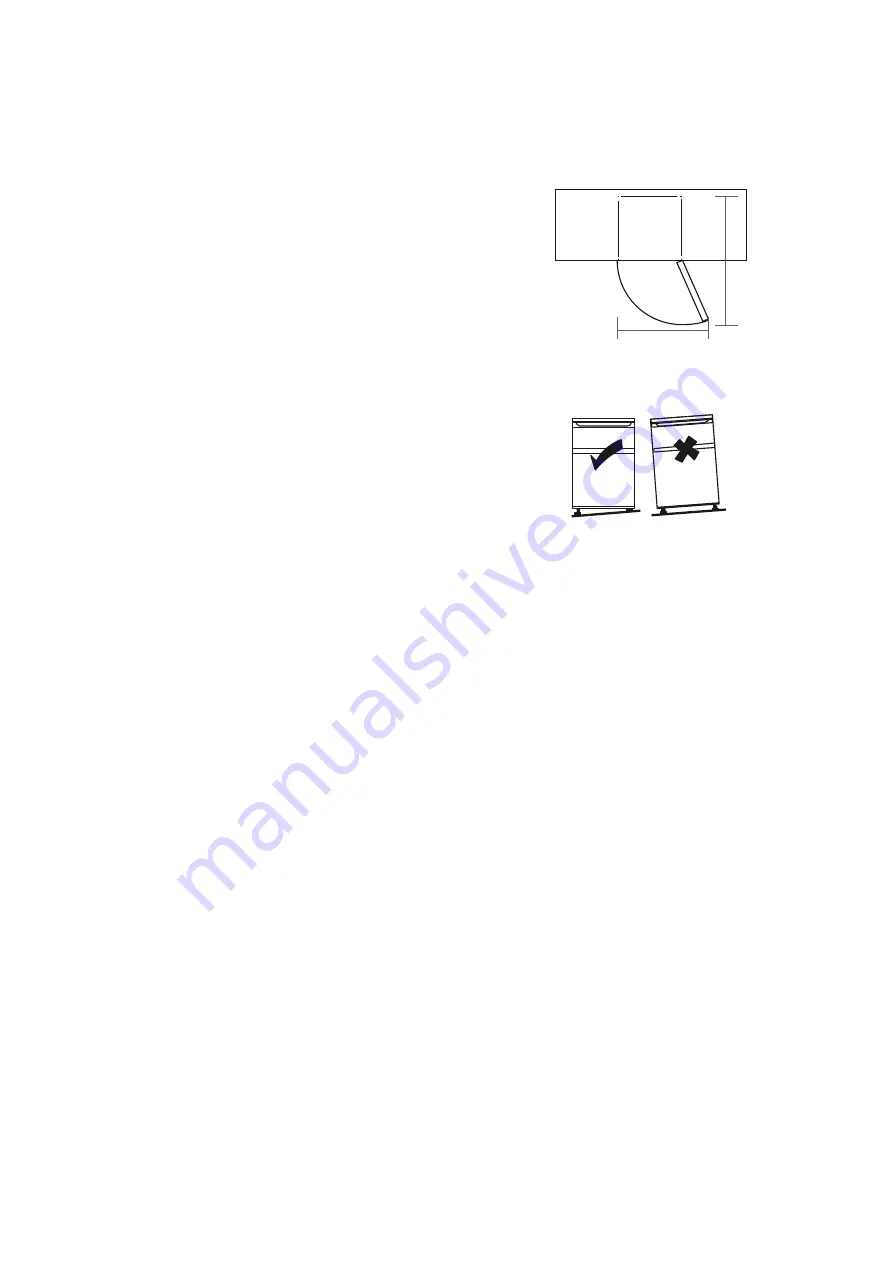
 Space Requirements       

The unit's door must be able to open fully as shown.   
W

×

D

902

×

1052mm 


2.5


Levelling

 the Unit 

To do this adjust the two levelling feet at the front of the unit.   
If the unit is not level, the door and magnetic seal alignments 
will not be covered properly. 
Make sure that the foot touches the ground before use. 
Look down from the top, clockwise and counterclockwise loosening, tightening. 
 

2.6


Cleaning

 Before Use 

Wipe  the  inside  of  the  unit  with  a  weak  solution  of  bicarbonate  soda.  Then  rinse  with  warm 
water using a 'Wrung-out' sponge or cloth. Wash the shelves and salad bin in warm soapy water 
and dry completely before replacing in the unit. Clean the exterior of the unit with a damp cloth. 
If you require more information refer to the Cleaning section. 
 

2.7


Before Using Your Unit 

Do not damage the power cord under any condition so as to ensure safety use, do not use when 
the power cord is damaged or the plug is worn. 
Do not put flammable, explosive, volatile and highly corrosive items in the refrigerator to prevent 
damages to the product or fire accidents. 
Do not place flammable items near the refrigerator to avoid fires. 
This  product  is  household  refrigerators  and  shall  be  only  suitable  for  the  storage  of  foods. 
According to national standards, household refrigerators shall not be used for other purposes, 
such as storage of blood, drugs or biological products. 
Do  not  place  items  such  as  bottled  or  sealed  container  of  fluid  such  as  bottled  beers  and 
beverages in the freezer to prevent bursts and other losses. 
Before placing any food in your unit, turn it on and wait for 24 hours, to make sure it is working 
properly and to allow it time to fall to the correct temperature. Your unit should not be overfilled. 

W

D

Summary of Contents for DP1440W

Page 1: ...DP1444IN DP1440W DOUBLE DOOR...

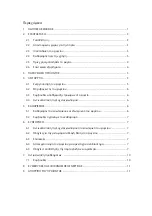
Page 2: ...VERVIEW 9 4 OPERATION 10 4 1 Switching On Your Unit 10 4 2 Noise Inside the Unit 10 4 3 Tips for Keeping Food in the Unit 10 4 4 Change the Light Bulb 10 5 CLEANING 11 5 1 Defrosting 11 5 2 Cleaning t...

Page 3: ...ubstances such as aerosol cans with a ammable propellant in this appliance THEappliance has to be unplugged after use and before carrying out user maintenance on the appliance WARNING Keep ventilation...

Page 4: ...revent children from being locked inside TOavoid contamination of food please respect the following instructions Opening the door for long periods can cause a signi cant increase of the temperature in...

Page 5: ...it not to perform properly This unit is not designed for use in a garage or outdoor installation Do not drape the unit with any covering When installing the unit ensure that 10 cm of free space is lef...

Page 6: ...to the other side A Remove the nut with sleeve Take o the washer then remove the axes to the other side and xed B Remove the door limit block C Please taking out another door limit block with screw m...

Page 7: ...5 Replace the bottom door bearing bush and the limit block 6 Replace the bottom hinge to the other side then x it with screws 7 Replace the mid hinge 8 Set the bottom door right position x the mid hin...

Page 8: ...n Ensure the Appliance is unplugged and empty Adjust the two leveling feet to their highest position We recommend you have someone to assist you 12 replace the leveler to the other side and adjust it...

Page 9: ...rce of electrical supply before attempting the installation of accessory Step 1 take out two plug pins from the door Side of door open Step 2 Install the door handle to the door and fasten it with scr...

Page 10: ...g section 2 7 Before Using Your Unit Do not damage the power cord under any condition so as to ensure safety use do not use when the power cord is damaged or the plug is worn Do not put ammable explos...

Page 11: ...keep it in this position To do this pull the storage shelf forward until it can be swivelled upwards or downwards and removed Please do the same in reverse to insert the shelf at a different height In...

Page 12: ...refrigerant liquid in the cooling system It has become more pronounced since the introduction of CFC free gases This is not a fault and will not affect the performance of your unit This is the compres...

Page 13: ...and when necessary combined with some auxiliary tools such as thin sticks to ensure no contaminants or bacterials accumulation in these areas u Do not use soap detergent scrub powder spray cleaner et...

Page 14: ...pped Whether foods are rotten Whether the interior shall be cleaned Long term operation of compressor It is normal that refrigerator operates for longer time in summer when the ambient temperature is...

Page 15: ...cleaning could shorten the storage life 9 DISPOSAL Old units still have some residual value An environmentally friendly method of disposal will ensure that valuable raw materials can be recovered and...

Page 16: ...INVENTOR...

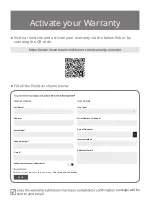
Page 17: ...nditioner com warranty inventor essage will be sent to your email Full Name Address Postal Code Phone Number E mail Unit Type Serial Number of the unit Date of Purchase Invoice Number Additional Detai...

Page 18: ...1 1 2 3 2 1 3 2 2 3 2 3 3 2 4 3 2 5 4 2 6 4 3 5 4 5 4 1 5 4 2 6 4 3 6 4 4 6 5 6 5 1 6 5 2 7 6 7 6 1 7 6 2 7 6 3 7 6 4 7 6 5 7 7 10 7 1 10 8 11 9 11...

Page 19: ......

Page 20: ...2...

Page 21: ...3 2 2 1 2 2 2 3 2 4 16 C 43 C 10cm 2 10cm 30cm x 1180 x 1150mm...

Page 22: ...4 2 5 2 6 24 2...

Page 23: ...5...

Page 24: ...6 4 2 4 3 4 4 5 5 1 Med 24 OFF CFC...

Page 25: ...1 2 2 2 3 7 6 5 5 2 6 6 1 6 2 6 3 6 4...

Page 26: ...4 2 5 6 7 8 8...

Page 27: ...9 9 10 11 12...

Page 28: ...10 7 7 1...

Page 29: ...8 Med 3 5mm 9 11...

Page 30: ......

Page 31: ...email newsletter Inventor QR code https www inventoraircondition gr egiisi inventor ema A...

Page 32: ...carea de alimente 4 4 Schimbarea lampei interioare 5 Cur area 5 1 Decongelarea 5 2 Cur area la interior i exterior 5 3 Instruc iuni suplimentare 6 Mentenan a 6 1 Schimbarea l mpii interioare 6 2 Trans...

Page 33: ...sau mijloace de a accelera procesul de dezghetare altele decat cele recomandate de producator ATENTIE ATENTIE Nu folositi aparate electrice in interiorul compartimentelor de stocare a alimentelor alt...

Page 34: ...utilizate timp de 48 de ore goli i sistemul de ap conectat la alimentarea cu ap dac apa nu a fost extras timp de 5 zile nota 1 Depozita i carnea crud i pe tele n recipiente adecvate n frigider astfel...

Page 35: ...30 cm n partea superioar a frigiderului Acest lucru va de r cire U a aparatului trebuie s se poat deschide W D 1180 1150mm terge i interiorul unit ii cu o solu ie slab de ap cu bicarbonat Apoi se cl t...

Page 36: ...ta i 24 de ore pentru a v asigura c frigiderul func ioneaz corespunz tor i pentru a permite timp pentru a ajunge la temperatura corect Fr Diverse rafturi de depozitare din sticl sau plastic sunt inclu...

Page 37: ...5...

Page 38: ...tele ntr un recipient su cient de mare pentru a colecta zeama i acoperit n mod corespunz tor Vasul se pune pe raftul cel mai de jos L sa i spa iu n jurul alimentelor pentru a permite aerului s circule...

Page 39: ...terge i orice reziduu de umiditate n cazul n care ine i frigiderul de p r ile laterale sau de baz n timpul manipul rii n niciun caz nu ar trebui nu trebuie s ncerca i s repara i singuri frigiderul Re...

Page 40: ...ul balamalei din Scoate i balama i re pozi iona i o n loca ia pe partea opus Scoate i uruburile i piciorul reglabil din partea opus 6 Va veni sub prag o schimbare de la o parte n cealalt parte gaura d...

Page 41: ...9 9 Instala i balamaua n partea de jos str ng nd uruburile 11 Instala i u a i balamaua cu uruburi 12 Instala i capacul...

Page 42: ...cur a i aparatul apoi l sa i u a deschis pentru a preveni producerea mirosurilor nepl cute Compresorul func ioneaz pe perio ade lungi de timp Lumina interioar nu func ioneaz U a frigiderului nu se nch...

Page 43: ...pentru a reduce timpul pentru c ut ri n interiorul timp Scoate i din frigider mai multe din cele de care ave i nevoie printr o singur deschidere a u ii iar apoi nchide i c t mai repede posibil 9 Reci...

Page 44: ...termostate senzori de temperatura...

Page 45: ...ii unitate Pentru a activa garantia va rugam sa completati urmatoarele campuri Activati va garantia Accesati link ul de mai jos sau scanati codul QR pentru a va activa garantia pe site ul nostru nvent...

Page 46: ......

Page 47: ......

Page 48: ...DOUBLE DOOR REFRIGERATOR...

Page 49: ...DOUBLE DOOR REFRIGERATOR DP1444IN DP1440W...

Page 50: ......

Page 51: ...Contents English 4 5 Romanian 6...

Page 52: ...204 204 163 204 163 45 45 45 8 8 35 39 8 163 DP1440W DP1444IN F E 0 482 176 0 482 176 E 0 605 221...

Page 53: ...8 8 8 204 204 163 204 163 163 DP1440W DP1444IN 0 482 176 0 605 221 0 482 176 F E E 45 45 45...

Page 54: ...8 8 8 204 204 163 204 163 163 DP1440W DP1444IN 0 482 176 0 605 221 0 482 176 F E E 45 45 45...

Page 55: ...NOTES...

Page 56: ...IGERATOR Scan here to download the latest version of this manual Importer Manufacturer INVENTOR A G S A 24th km National Road Athens Lamia 2 Thoukididou Str Ag Stefanos 145 65 Tel 30 211 300 3300 Fax...

Reviews: