background image

30

GR

10. ΑΠΟΘΗΚΕΥΣΗ ΣΥΣΚΕΥΗΣ

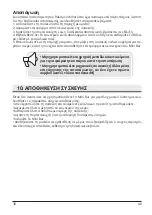
Όταν δεν σκοπεύετε να χρησιμοποιήσετε το Mini Bar για μεγάλο χρονικό διάστημα, ακο-

λουθήστε τις παρακάτω οδηγίες αποθήκευσης:

• Απενεργοποιήστε τη συσκευή και αναμείνετε ένα 24ωρο προτού την αποθηκεύσετε.

• Αφαιρέστε όλα τα μέρη από το εσωτερικό της μέρος. 

• Καθαρίστε όλα τα αποσπώμενα μέρη της συσκευής.

• Αφήστε τη πόρτα ανοιχτή για την αποφυγή δυσάρεστων οσμών.

• Καλύψτε το Mini Bar.

• Αποθηκεύστε τη μονάδα σε όρθια θέση σε μέρος που εξασφαλίζεται ο συχνός αερισμός 

και δεν υπάρχει απευθείας έκθεση στην ηλιακή ακτινοβολία.

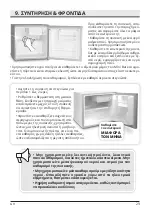
Αποπάγωση

Συνιστάται η αποπάγωση του θαλάμου chiller όταν έχει συσσωρευτεί πάγος πάχους 3-4mm. 

Για την διαδικασία αποπάγωσης, ακολουθήστε τα παρακάτω βήματα:

1. Αποσυνδέστε τη συσκευή από τη παροχή ρεύματος

2. Αφαιρέστε τα τρόφιμα από το εσωτερικό της συσκευής

3. Κρατήστε την πόρτα ανοιχτή ενώ η διαδικασία αποπάγωσης βρίσκεται σε εξέλιξη

4. Βεβαιωθείτε ότι το εσωτερικό είναι απαλλαγμένο από τον πάγο και καθαρίστε το θάλα-

μο chiller με ένα μαλακό πανί.

5. Επανασυνδέστε με τη παροχή ρεύματος, επιτρέψτε στη συσκευή να λειτουργήσει για πε-

ρίπου 4 ώρες και στη συνέχεια επανατοποθετήστε τα τρόφιμα στο εσωτερικό του Mini Bar.


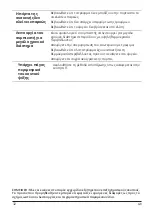
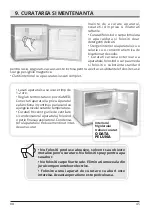
• Μην χρησιμοποιείτε αιχμηρά ή μεταλλικά αντικείμενα 

για την αφαίρεση του πάγου κατά την αποπάγωση
• Μην χρησιμοποιείτε μηχανικές συσκευές ή άλλα μέσα 

επιτάχυνσης της αποπάγωσης, αν δεν έχετε πρώτα 

συμβουλευτεί τον κατασκευαστή

Summary of Contents for INVMS42A2EC

Page 1: ...MB42 A2B INVMS42A2EC...

Page 2: ...LANGUAGES ENGLISH 3 18 ROMANA 34 DEUTSCH 50 FRAN AIS 66 ITALIANO 82 ESPA OL 98...

Page 3: ...11 TIPS 15 12 TROUBLESHOOTING 15 Dear Consumer Congratulations on your choice Inventor Mini Bars cover multiple needs and demands not limited only to small student s apartments but also accommodating...

Page 4: ...chanical devices or other means of accelerated defrosting should not be used only methods recommended from the manufacturer should be applied l As this device is heavy always be cautious when relocati...

Page 5: ...ce Power off the refrigerator before removing the plug Do not disconnect the plug from the wall socket by pulling on the cord 3 SOCIABLE REMARKS ENVIRONMENTAL PROTECTION Disposal of equipment no longe...

Page 6: ...note the SN serial number The SN is labeled opposite the device Please refer to the electronic warranty instructions in the last page English section of this manual 4 STEPS BEFORE USE Mini Bar User s...

Page 7: ...7 EN 5 GETTING TO KNOW YOUR MINI BAR 1 Thermostat 2 Plate 3 Shelf 4 Door Compartments 5 Bottle Rack 6 Reversible Door 7 Adjustable Feet 8 Power Cord 6 7 8 1 2 3 4 5...

Page 8: ...MB42 A2B...

Page 9: ...st sides 2 Wait at least 4 hours before connecting the appliance to the power supply thus allowing all fluids to settle in the compressor 3 Upon initial use operate continuously for 24 hours thus ensu...

Page 10: ...ght or left depending on initial door installation side of the door hinge and unscrew the two screws with the stabilizing pin 3 Slightly tilt so that you may have access to the front bottom bracket Un...

Page 11: ...its upright position Screw the top two screws of the door hinge Slightly tilt for better positioning and screw the bottom hinge into place and also screw the removed foot on the other side Once comple...

Page 12: ...sted when the storage quantity is very small Thermostat adjustment between 3 4 Normal cooling When installing the appliance for the first time be sure to set the thermostat to the Normal cooling and w...

Page 13: ...mately 1 to 2 hours Set thermostat to middle position Plug into a power source The appliance will chill continuously until set temperature has been reached Frequently the air vents and the condenser m...

Page 14: ...and avoid direct sunlight Defrosting It is recommended to defrost the chill box when 3 4mm frost has been accumulated To implement the defrosting process consider the following steps 1 Unplug the appl...

Page 15: ...t Put the plug in the socket Temperature in refrigerator is too high or too low Thermostat has been set incorrectly Set the thermostat correctly Condensation appears on the outside surface of the unit...

Page 16: ...ns for a long time during high ambient temperatures Avoid overfilling Allow warm and hot goods to chill prior to placing them in the unit Avoid the frequent opening of the door There is ice all around...

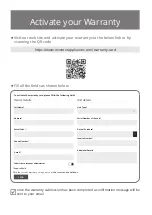
Page 17: ...ard please fill in the following fields Activate your Warranty l Fill all the fields as shown below once the warranty submission has been completed a confirmation message will be sent to your email Re...

Page 18: ...18 GR Inventor Mini Bar Mini Bar Inventor Mini Bar...

Page 19: ...19 GR 1 20 2 21 3 21 4 22 5 MINI BAR 23 6 MINI BAR 24 7 25 8 28 9 29 10 30 11 31 12 31...

Page 20: ...20 GR 1 l 8 l l Mini Bar 1 2 l l l l l l l l l l l l l l l l l...

Page 21: ...21 GR 2 l l l l l l l l Mini Bar 3 Mini Bar Mini Bar l 2002 96 EC 27 2003 l A B...

Page 22: ...22 GR SN 4 SN D2002255780115715200209 Mini Bar...

Page 23: ...23 GR 5 MINI BAR 1 2 3 4 5 6 7 8 6 7 8 1 2 3 4 5...

Page 24: ...MB42 A2B...

Page 25: ...25 GR 7 1 20cm 15cm 40cm 2 4 3 24 Mini Bar o Mini Bar...

Page 26: ...26 GR Philips 2 3 1...

Page 27: ...27 GR 4 5 6 7 Mini Bar...

Page 28: ...28 GR Mini Bar Mini Bar 1 6 OFF 1 2 3 4 24 5 6 Mini Bar 8 x...

Page 29: ...29 GR Mini Bar 1 2 9...

Page 30: ...30 GR 10 Mini Bar 24 Mini Bar chiller 3 4mm 1 2 3 4 chiller 5 4 Mini Bar...

Page 31: ...31 GR 11 chiller 12 1 2 3 4 5 1 2 3...

Page 32: ...32 GR 9...

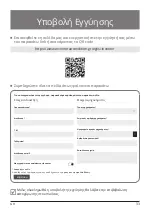
Page 33: ...33 GR email newsletter Inventor l link QR code https www inventoraircondition gr egiisi inventor l email A...

Page 34: ...esc dar si pentru camerele unui hotel Clasa energetica A consumul scazut de energie electrica si design ul modern sunt motivele pentru care mini barul Inventor reprezinta cea mai buna alegere pe care...

Page 35: ...LA SPECIFICATIILE ELECTRICE 37 3 OBSERVATII CU PRIVIRE LA PROTECTIA MEDIULUI 37 4 INAINTE DE PRIMA UTILIZARE 38 5 PREZENTAREA PRODUSULUI 39 6 CARACTERISTICI TEHNICE 40 7 SFATURI DE INSTALARE 41 8 REGL...

Page 36: ...ti va masuri de siguranta atunci cand mutate aparatul si intotdeauna purtati manusi de protectie l Nu impingeti aparatul pe podea Intotdeauna ridicati usor pentru a evita deteriorarea podelei l Nu rep...

Page 37: ...i aparatul de la buton inainte de a l scoate din priza Nu scoateti din priza tragand de cablu 3 OBSERVATII CU PRIVIRE LA PROTECTIA MEDIULUI Eliminarea produsului Urmati instructiunile de mai jos daca...

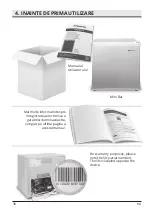
Page 38: ...mber The SN is labeled opposite the device Mai multe informatii despre inregistrarea electronica a garantiei dumneavoastra veti gasi pe ultima pagina a acestui manual 4 INAINTE DE PRIMA UTILIZARE Mini...

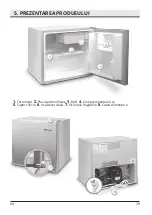
Page 39: ...39 RO 5 PREZENTAREA PRODUSULUI 1 Termostat 2 Placuta Identificare 3 Raft 4 Compartimentele Usii 5 Suport Sticle 6 Usa Reversibila 7 Picioruse Reglabile 8 Cablu Alimentare 6 7 8 1 2 3 4 5...

Page 40: ...MB42 A2B...

Page 41: ...in spate 40cm in lateral 2 Inainte de a conecta aparatul la priza asteptati 4 ore pentru ca toate lichidele din compresor sa se stabilizeze 3 La prima utilizare folositi aparatul continuu timp de 24h...

Page 42: ...de plastic al balamalei localizat in partea de sus stanga sau dreapta in functie de pozitia initiala a usii Desurubati cele 3 suruburi 3 Aplecati usor pe spate pentru a avea acces la balamaua inferio...

Page 43: ...aratul usor pe spate pentru a fixa balamaua inferioara correct De asemenea in timp ce aparatul este aplecat spre spate montati piciorul in partea opusa Dupa ce ati terminat montati capacul de plastic...

Page 44: ...ate mica de alimente Reglarea termostatului in drepte 3 4 aparatul va functiona la nivelul normal de racire Dupa ce ati instalat aparatul mutati termostatul la treptele 3 sau 4 si lasati frigiderul sa...

Page 45: ...jurul componenteleor electrice Folosirea unui aparat de curatare cu aburi este interzisa Aceasta operatiune este periculoasa Inainte de a curate aparatul scoateti l din priza si inlaturati rafturile...

Page 46: ...de lumina directa a soarelui Decongelarea Daca stratul de gheata atinge 3 4 mm este recomandat sa decongelati aparatul In timpul operatiunii de decongelare respectati instructiunile de mai jos 1 Scoat...

Page 47: ...ugam sa introduceti stecherul in priza Temperatura este prea mare sau prea mica in interiorul frigiderului Termostatul nu este reglat correct Ajustati corect termostatul Condens depus pe exteriorul ap...

Page 48: ...a compresorului este normal in perioade cu temperaturi crescute Nu aglomerati interiorul frigiderului Nu depozitati alimente calde sau fierbinti Permiteti racirea alimentelor inainte de a le depozita...

Page 49: ...letati urmatoarele campuri Activati va garantia l Accesati link ul de mai jos sau scanati codul QR pentru a va activa garantia pe site ul nostru https www inventoraerconditionat ro certificatul de gar...

Page 50: ...ntenwohnungen geeignet sondern auch f r Hotel zimmer Seine Energieklasse A der geringe Energieverbrauch und sein modernes Design bilden eine ideale Kombina tion die den Inventor Mini K hlschrank zur b...

Page 51: ...53 3 WICHTIGE HINWEISE ZUR SICHERHEIT UND UMWELT 53 4 VOR DER ERSTEN BENUTZUNG 54 5 LERNEN SIE IHREN MINI K HLSCHRANK KENNEN 55 6 EIGENSCHAFTEN DES MINI K HLSCHRANKS 56 7 INSTALLATIONSANLEITUNG 57 8 E...

Page 52: ...ur die vom Hersteller empfohlenen Methoden angewendet werden l Der K hlschrank ist schwer bitte seien Sie immer vorsichtig bei einem Standortwechsel Die Verwendung von Schutzhandschuhen wird empfohlen...

Page 53: ...etzstecker von der Steckdose Drehen Sie den Thermostaten im K hlschrank auf OFF bevor Sie den Netzstecker aus der Steckdose entfernen Ziehen Sie nie am Netzkabel sondern nur am Stecker 3 WICHTIGE HINW...

Page 54: ...len Dieses finden Sie auf der R ckseite des Ger tes Finden Sie bitte die elektronischen Garantieanweisungen auf der letzten Seite im DeutschsprachigenTeil dieser Bedienungsanleitung 4 VOR DER ERSTEN B...

Page 55: ...55 DE 5 LERNEN SIE IHREN MINI K HLSCHRANK KENNEN 1 Thermostat 2 Platte 3 Regal 4 T rf cher 5 Flaschenhalter 6 Wechselbarer T ranschlag 7 Verstellbare Standf e 8 Netzkabel 6 7 8 1 2 3 4 5...

Page 56: ...MB42 A2B...

Page 57: ...ens 4 Stunden bevor Sie das Ger t an die Stromversorgung anschlie en damit sich alle Fl ssigkeiten im Kompressor absetzen k nnen 3 Bei der ersten Inbetriebnahme 24 Stunden lang kontinuierlich arbeiten...

Page 58: ...nks abh ngig von der ersten T rinstallationsseite des T rscharniers Entfernen Sie die zwei Schrauben und den Stabilisierungsstift 3 Leicht kippen um Zugang auf den front Bodenhalter zu bekommen Schrau...

Page 59: ...K hlschrank muss leicht gekippt werden um eine bessere Positionierung zu erreichen und um anschlie end das untere Scharnier festzuschrauben Anschlie end schrauben Sie den entfernten Standfu auf die ge...

Page 60: ...Lagermenge sehr gering ist Thermostateinstellung zwischen 3 4 Normale K hlung Wenn Sie den K hlschrank das erste Mal in Betrieb nehmen stellen Sie sicher dass der Thermostat auf Normale K hlung einges...

Page 61: ...en trocknen lassen Stellen Sie den Thermostat auf die mittlere Einstellung Stecken Sie den Netzstecker in die Steckdose Das Ger t k hlt sich kontinuierlich ab bis die eingestellte Temperatur erreicht...

Page 62: ...en die K hlbox abzutauen wenn 3 4mm Frost angesammelt wurden Um den Abtauvorgang durchzuf hren sollten Sie folgende Schritte durchf hren 1 Netzstecker ziehen 2 Ger t entleeren 3 Halten Sie die T r off...

Page 63: ...iert nicht Der Netzstecker ist nicht in der Steckdose Stecken Sie den Netzstecker in die Steckdose Die Temperatur im K hlschrank ist zu hoch oder zu niedrig Thermostat wurde falsch eingestellt Stellen...

Page 64: ...rank keine Neigung hat Langzeitbetrieb des Kompressors Es ist normal wenn der Kompressor bei hohen Umgebungstemperaturen lange l uft Vermeiden Sie berf llung Lassen Sie warme und hei e Produkte erst a...

Page 65: ...ie eingereicht wird und der Prozess abgeschlossen ist wird eine Best tigungsnachricht an Ihre E Mail gesendet Pflichtfeld Mit der Garantiekarte akzeptieren Sie unsere Gesch ftsbedingungen SENDEN Vor u...

Page 66: ...ment d un h tel Sa Classe nerg tique A sa faible consommation d nergie et son design moderne expliquent bien pourquoi le Mini R frig rateur Inventor est la solution id ale Veuillez vous reporter ce ma...

Page 67: ...TRIQUE 69 3 CONSIGNES IMPORTANTES EN MATI RE D ENVIRONNEMENT 69 4 TAPES AVANT L UTILISATION 70 5 VOTRE MINI R FRIG RATEUR 71 6 CARACT RISTIQUES DU MINI R FRIG RATEUR 72 7 GUIDE D INSTALLATION 73 8 R G...

Page 68: ...givrage acc l r ne doivent pas tre utilis s seules les m thodes recommand es par le fabricant doivent tre appliqu es l tant donn que cet appareil est lourd soyez toujours prudents lors de la relocali...

Page 69: ...nance Mettez le r frig rateur hors tension avant de retirer la fiche Ne d branchez pas la fiche de la prise murale en tirant sur le cordon 3 CONSIGNES IMPORTANTES EN MATI RE D ENVIRONNEMENT Mise au re...

Page 70: ...le champ num ro SN Trouvez le l arri re de l appareil Veuillez trouver les instructions de garantie lectronique sur la derni re page section fran aise de ce manuel 4 TAPES AVANT L UTILISATION Manuel d...

Page 71: ...71 FR 5 VOTRE MINI R FRIG RATEUR 1 Thermostat 2 Bac de R cup ration 3 Clayette 4 Compartiments de Porte 5 Porte bouteille 6 Porte R versible 7 Pieds R glables 8 Cordon d Alimentation 6 7 8 1 2 3 4 5...

Page 72: ...MB42 A2B...

Page 73: ...ant de brancher l appareil l alimentation lectrique ce qui permet tous les fluides de se stabiliser dans le compresseur 3 Lors de l utilisation initiale laisser l appareil op rer en continu pendant 24...

Page 74: ...n initiale de la porte de la charni re de la porte et d vissez les deux vis avec la goupille de stabilisation 3 Inclinez l g rement afin que vous puissiez avoir acc s au support inf rieur du r frig ra...

Page 75: ...a charni re de la porte Inclinez l g rement pour un meilleur positionnement vissez la charni re inf rieure en place et le pied enlev de l autre c t Une fois termin e la proc dure d inversion du sens d...

Page 76: ...de stoc kage est tr s faible R glage du thermostat entre 3 4 refroidissement normal Lors de l installation de l appareil pour la pre mi re fois assurez vous de r gler le thermos tat sur le refroidiss...

Page 77: ...n 1 2 heures R glez le thermostat sur la position moyenne Branchez l appareil dans une prise lectrique L appareil refroi dit en continu jusqu ce que la tem p rature r gl e soit atteinte Souvent les fe...

Page 78: ...soleil D givrage Il est recommand de d givrer la bo te de refroidissement lorsque le givre accumul est de 3 4mm Pour le processus de d givrage suivez les tapes suivantes 1 D branchez l appareil 2 Vid...

Page 79: ...n est pas branch Branchez le sur une prise La temp rature dans le r frig rateur est trop lev e ou trop basse Le thermostat a t configur de mani re incorrecte R glez correctement le thermostat Il appar...

Page 80: ...s des temp ratures ambiantes lev es viter le d bordement Laisser refroidir les aliments chauds et les boissons chaudes avant de les placer dans l appareil vitez l ouverture fr quente de la porte Il y...

Page 81: ...e garantie veuillez remplir les champs suivants Activez votre Garantie l Visitez notre site Web et activez votre garantie via le lien ci dessous ou en scannant le code QR https www inventorappliances...

Page 82: ...La classe energetica A il basso consumo energetico e il design assolutamente moderno sono caratteristiche fondamentali che rendono il Mini Frigo Inventor la soluzione ideale per qualsiasi tipo di spaz...

Page 83: ...EZIONE AMBIENTALE 85 4 AZIONI PRIMA DELL USO 86 5 CONOSCERE IL VOSTRO MINI FRIGO 87 6 CARATTERISTICHE DEL MINI FRIGO 88 7 LINEE GUIDA PER L NSTALLAZIONE 89 8 IMPOSTAZIONI 92 9 MANUTENZIONE E PULIZIA 9...

Page 84: ...elerare lo sbrinamento ma servirsi unicamente di quelli consigliati dal produttore l Poich questo dispositivo pesante sempre consigliabile procedere con cautela durante il suo trasferimento Si consigl...

Page 85: ...pina dalla presa di corrente Non tirare o trascinare il cavo di alimentazione per staccare la spina di alimentazione 3 OSSERVAZIONI GENERALI E PROTEZIONE AMBIENTALE Smaltimento di componenti non pi ut...

Page 86: ...il numero seriale SN Suddetto numero pu essere individuato sul retro del dispositivo Troverete le istruzioni inerenti alla garanzia elettronica nell ultima pagina sezione italiano di questo manuale 4...

Page 87: ...ERE IL VOSTRO MINI FRIGO 1 Termostato 2 Piattino di Scongelamento 3 Ripiano 4 Compartimenti nello sportello laterale 5 Portabottiglie 6 Porta Reversibile 7 Piedini Regolabili 8 Cavo di Alimentazione 6...

Page 88: ...MB42 A2B...

Page 89: ...ore prima di collegare l apparecchio all alimentazione consentendo a tutti i fluidi di fluire nuovamente verso il compressore 3 Al primo utilizzo operare continuamente per 24 ore al fine di garantire...

Page 90: ...ne della porta e svitare le due viti dalla cerniera rimuovendo al contempo il perno di supporto 3 Inclinare leggermente in modo che si possa avere accesso alla cerniera di fondo anteriore Svitare le d...

Page 91: ...nte il perno di supporto Inclinare leggermente per un migliore posizionamento e avvitare sia la cerniera inferiore in posizione che il piedino rimosso sull altro lato Una volta completata la procedura...

Page 92: ...rvare ridotta Impostare il termostato tra 3 4 Raffredda mento normale Quando si installa l apparecchio per la prima vol ta accertarsi di impostare il termostato sull impo stazione raffreddamento nor m...

Page 93: ...presa la spina di alimentazione L apparecchio continuer la funzione di refrigerazio ne fino al raggiungimento della tem peratura impostata Le prese d aria e il condensatore si tuati sulla parte poste...

Page 94: ...Sbrinamento Si consiglia di sbrinare il vano di congelamento ogniqualvolta le formazioni di ghiaccio superino i 3 4 mm Per attuare il processo di sbrinamento procedere come sotto riportato 1 Scollegar...

Page 95: ...alimenti che non siano sigillati o confezionati in modo appropriato sotto il vano congelatore 12 DOMANDE FREQUENTI E SUGGERIMENTI PER LA RISOLUZIONE DEI PROBLEMI PIU COMMUNI PROBLEMI POSSIBILI CAUSE R...

Page 96: ...e Assicurarsi che nessun oggetto o alimento blocchi la porta Assicurarsi che il frigorifero non sia troppo pieno Assicurarsi che il frigorifero non sia inclinato Funzionamento continuo del compressore...

Page 97: ...verr inviato un messaggio di conferma alla tua email Campo obbligatorio Con la presente garanzia elettronica l utente accetta i termini e le condizioni INVIARE Nome Completo Tipo di Unit Indirizzo di...

Page 98: ...n a los hoteles que buscan el equipamiento adecuado Su clase energ tica A su bajo consumo energ tico y su dise o absolutamente moderno explican muy bien porqu las Mini Neveras Inventor son la soluci...

Page 99: ...N DEL MEDIO AMBIENTE 101 4 ANTES DE USAR LA MINI NEVERA 102 5 FAMILIARIZ NDOSE CON SU MINI NEVERA 103 6 CARACTER STICAS DE LA MINI NEVERA 104 7 GU A DE INSTALACI N 105 7 CONSEJOS DE INSTALACI N 105 8...

Page 100: ...ino solo los m todos recomendados por el fabricante l Como el aparato es pesado tenga siempre cuidado al moverlo se recomienda usar guantes de seguridad l Cuando mueva este aparato levante ligeramente...

Page 101: ...el frigor fico antes de desconectar el enchufe No desconecte el enchufe de la toma de corriente tirando del cable 3 CONSIDERACIONES EN MATERIA DE PROTECCI N DEL MEDIO AMBIENTE Eliminaci n de equipos...

Page 102: ...po num rico SN n mero de serie Lo encontrar en la parte posterior del aparato Encontrar las instrucciones de la garant a electr nica en la ltima p gina secci n en espa ol de este manual 4 ANTES DE USA...

Page 103: ...ES 5 FAMILIARIZ NDOSE CON SU MINI NEVERA 1 Termostato 2 Bandeja 3 Estante 4 Compartimentos de la Puerta 5 Estante Botellero 6 Puerta Reversible 7 Patas Niveladoras 8 Cable de Alimentaci n 6 7 8 1 2 3...

Page 104: ...MB42 A2B...

Page 105: ...r s 40 cm desde el resto de los lados 2 Espere al menos 4 horas hasta conectar el aparato a la toma de red para permitir que todos los l quidos se depositen en el compresor 3 Tras el primer uso d jelo...

Page 106: ...uperior a la derecha o la izquierda seg n el lado en que se instal inicialmente de la bisagra de la puerta y afloje los tres tornillos 3 Incline ligeramente para que usted pueda llegar al soporte infe...

Page 107: ...los tres tornillos de arriba de la bisagra Incl nelo ligeramente para un mejor posicionamiento y atornille la bisagra de arriba en su sitio y tambi n enrosque la pata que sac en el otro lado Una vez...

Page 108: ...de ar t culos almacenados es muy peque a Ajuste del termostato entre 3 4 Refrige raci n normal Al instalar el aparato por primera vez aseg rese de seleccionar el termostato en este modo de refrigeraci...

Page 109: ...para que el aparato se seque Seleccione el termostato en la posi ci n media Enchufe la nevera a la red El aparato refrigerar constantemen te hasta que alcance la temperatura seleccionada Limpie con f...

Page 110: ...ex posici n directa al sol Descongelar Se recomienda descongelar la nevera cuando se haya acumulado 3 4 mm de escarcha Para realizar el proceso de descongelaci n tenga en cuenta los siguientes pasos...

Page 111: ...ades equipadas con condensador externo No ponga en la nevera alimentos que no est n embalados o bien envueltos 12 SOLUCI N DE PROBLEMAS PROBLEMA CAUSA SOLUCI N El aparato no funciona El enchufe no est...

Page 112: ...que no haya productos obstaculizando la puerta Aseg rese de que el frigor fico no est demasiado lleno Aseg rese de que el frigor fico no est inclinado El compresor funciona durante mucho tiempo Es nor...

Page 113: ...recibir un mensaje de confirmaci n en su correo electr nico Nombre completo Direcci n C digo Postal N mero de Tel fono Correo Electr nico Tipo de Unidad N mero de Serie de la unidad Fecha de compra N...

Page 114: ...NOTES...

Page 115: ......

Page 116: ...V 03 Scan here to download the latest version of this manual REFRIGERATOR MINI BAR...

Reviews: