7
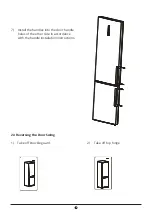
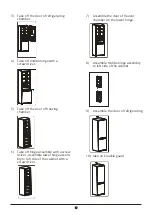
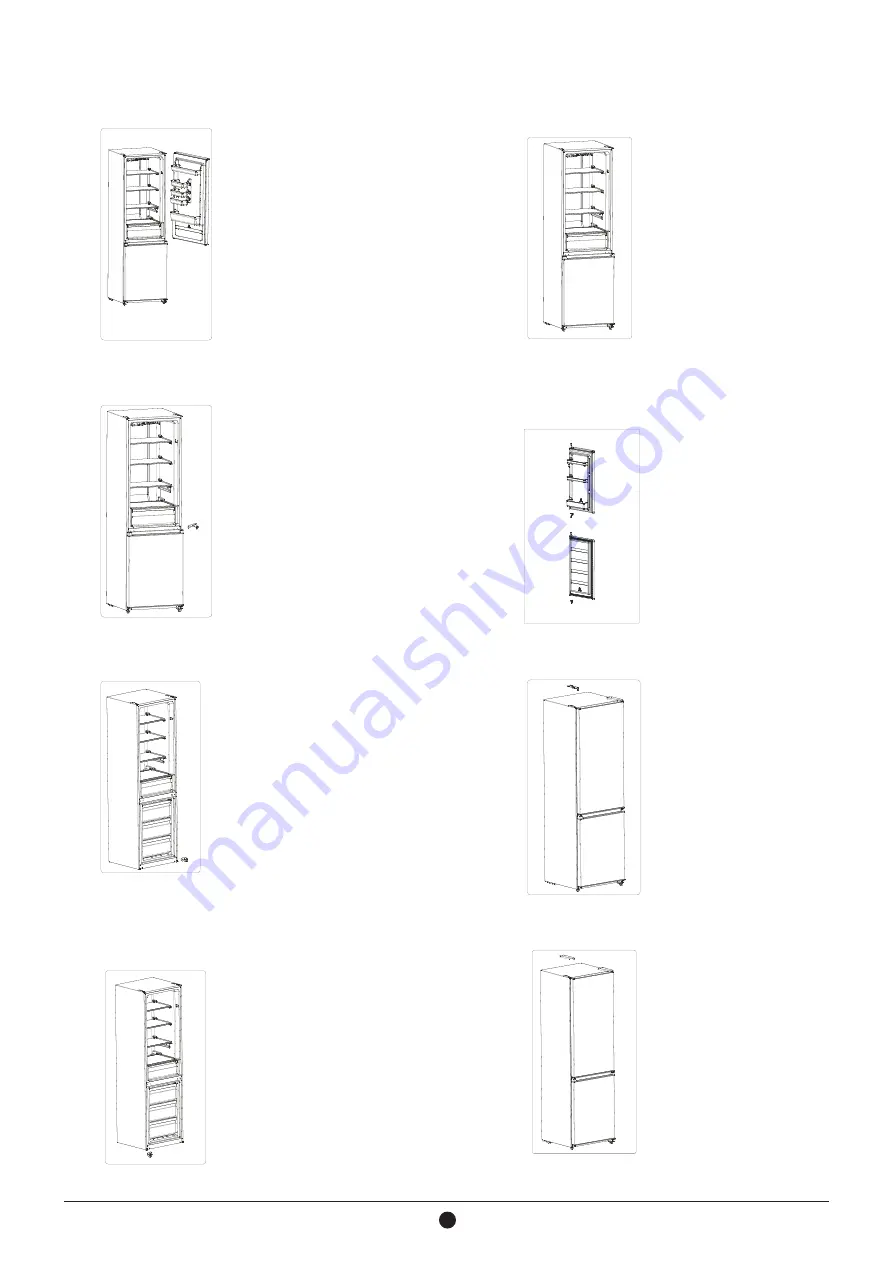
3) Take off the door of refrigerating
chamber.
4) Take off middle hinge with a
screw driver.
8) Assemble middle hinge assembly
to left side of the cabinet.
5) Take off the door of freezing
chamber.
9) Assemble the door of refrigerating.
6) Take off hinge assembly with a screw
driver , Assemble lower hinge assem-
bly to left side of the cabinet with a
screw driver.
10) lake on knuckle guard.
7) Assemble the door of freezer
chamber on the lower hinge.
Summary of Contents for PS18860LIN
Page 1: ...PS18860LIN PS18860LW...
Page 17: ......
Page 19: ...1 1 1 2 3 4 5 6 8 7 8 9 10 Bed and breakfast 11...
Page 20: ...2 2 2 1 10 cm 10 cm 30 cm 2 2 1 2...
Page 21: ...3 3 4 5 6...
Page 22: ...4 7 2 3 1 2...
Page 23: ...5 3 4 8 5 9 6 10 7...
Page 24: ...6 2 4 x 990 x 1025mm 2 5 2 6 2 7 220 240V 50Hz AC 187 264V 24 W D...
Page 25: ...7 24 u u 2 8...
Page 26: ...8 3 4 4 1 2 c 3 c 4 c 6 c 8 c TEMPERATURE FASTCOOL A fast cool...
Page 27: ...9 A fast cool A SET 1 1 2 2 3 3 4 4 5 5 3 L D L D 5 15 1 2 3 4 5...
Page 28: ...10 2 0 1 150 2 COLDER COLD R L COLD 35 COLD NORMAL COLDER 10 0 COLDER 4 2 CFC 4 3 u u u u u...
Page 30: ...12 6 5 6 6 6 7 7 0 7 1 u u u 8...
Page 31: ...13 3 5 mm u u u u u 9...
Page 33: ......
Page 34: ...NOTES...
Page 35: ......
Page 36: ...TOP BOTTOM REFRIGERATOR Scan here to download the latest version of this manual...

