17
l
l
Fill all the fields as shown below
þ
once the warranty submission has been completed a confirmation message will be
Full Name*
Address*
Unit Type*
Serial Number of the unit*
Owner details
Unit details
To activate the warranty card, please fill in the following fields
* Required field
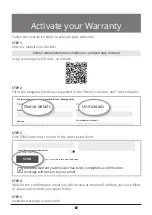
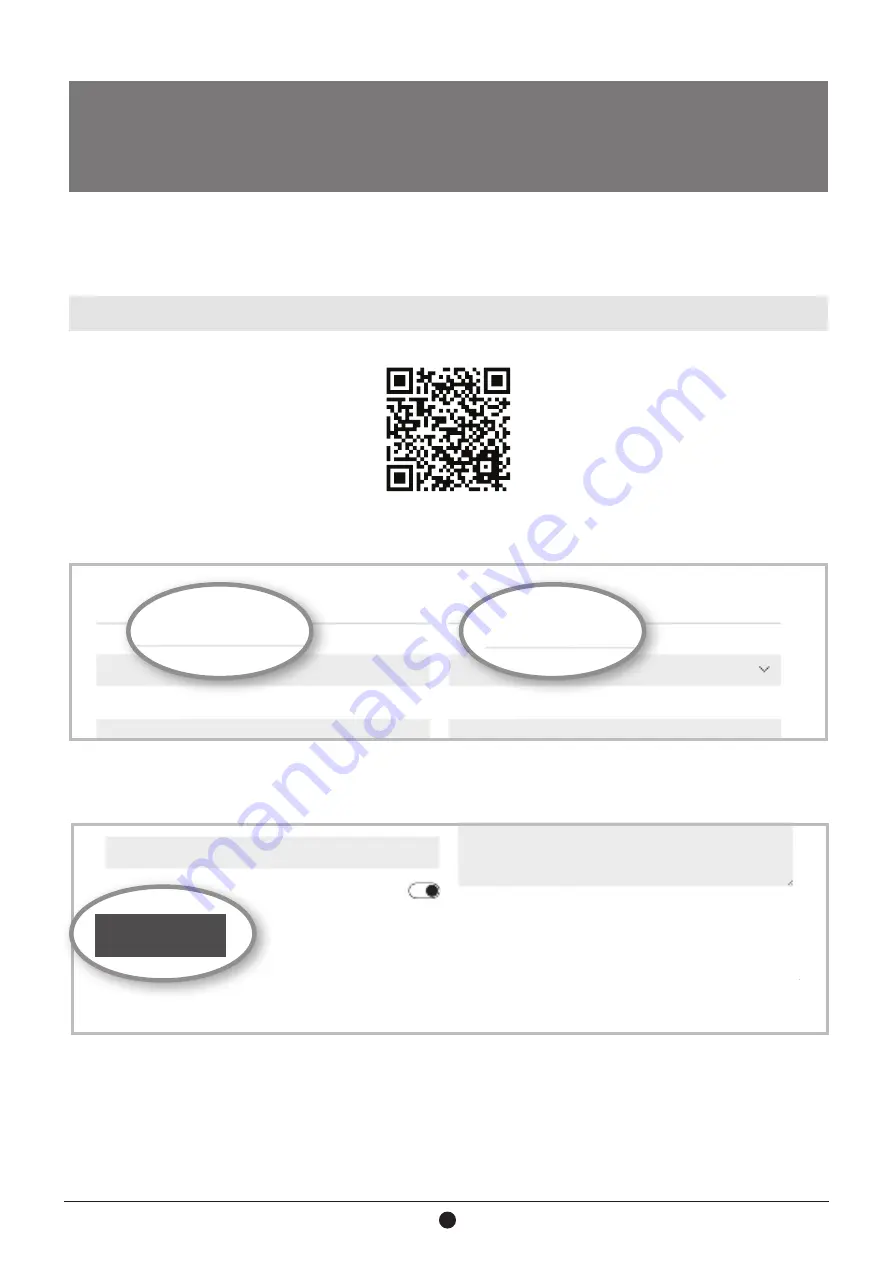
Follow the next quick steps to activate your warranty:
STEP 1
Visit our website via the link:
https://www.inventorairconditioner.com/warranty-inventor
or by scanning the QR code, as follows:
STEP 2
Fill in the obligatory fields as requested in the “Owner’s details” and “Unit’s details”:
STEP 4
Wait for the confirmation email you will receive at the email address you have filled
in - please also check your spam folder.
STEP 5
Inventor warranty is now valid!
STEP 3
Click SEND button at the end of the submission form:
þ
once the warranty submission has been completed a confirmation
message will be sent to your email
l
l
Fill all the fields as shown below
þ
once the warranty submission has been completed a confirmation message will be
E-mail*
Subscribe to Inventor's Newsletter
To activate the warranty card, please fill in the following fields
* Required field
With the current warranty card you accept
the terms and conditions.
SEND
l
l
Fill all the fields as shown below
þ
once the warranty submission has been completed a confirmation message will be
To activate the warranty card, please fill in the following fields
* Required field
With the current warranty card you accept
SEND
l
l
Fill all the fields as shown below
þ
once the warranty submission has been completed a confirmation message will be
Owner details
To activate the warranty card, please fill in the following fields
* Required field
l
l
Fill all the fields as shown below
þ
once the warranty submission has been completed a confirmation message will be
Unit details
To activate the warranty card, please fill in the following fields
* Required field
Activate your Warranty
Summary of Contents for PS18861LIN
Page 19: ...1 1 1 1 2 3 4 5 6 8 7 8 9 10 Bed and breakfast 11...
Page 20: ...2 2 2 2 1 10 cm 10 cm 30 cm 2 2 1 2...
Page 21: ...3 3 3 4 5 6...
Page 22: ...4 4 7 2 3 1 2...
Page 23: ...5 5 3 4 8 5 9 6 10 7...
Page 24: ...6 6 2 4 x 991 x 975mm 2 5 2 6 2 7 220 240V 50Hz AC 187 264V 24 W D...
Page 25: ...7 7 24 u u 2 8...
Page 26: ...8 8 3 LED 4 4 1...
Page 27: ...9 9 A fast cool A SET 1 1 2 2 3 3 4 4 5 5 3 L D L D 5 15 1 2 3 4 5 2 0 1 150 2...
Page 28: ...10 10 4 2 CFC 4 3 4 4 LED1 LED2 LED1 LED3 LED1 LED4...
Page 29: ...11 11 5 5 1 5 2 5 3 6 6 1 6 2 6 3 6 4 LED 1 3 4 2...
Page 30: ...12 12 6 5 6 6 6 7 7 0 7 1 u u u 8...
Page 31: ...13 13 3 5 mm u u u u u 9...
Page 32: ...14 14 211 300 3300 www inventoraircondition gr media library...
Page 50: ......


