•
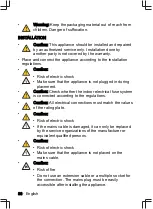
Caution: For safety reasons, make sure that you disconnect the mains plug when a program has
finished. Do not disconnect the mains plug when your hands are wet. This can result in electric
shock.
•
Caution: Always pull the mains plug when you disconnect the appliance. Do not pull the mains cable.
•
Warning: The appliance is set to operate at 220-240V. Connect a 110/220V and 3000W transformer
between the electrical connection if the mains supply is 110V.
INSTALLING THE APPLIANCE UNDER A WORKTOP
Warning:
The worktop must be stable.
Caution:
Make sure that the wiring and plumbing is suitable for installing the appliance under a worktop.
Caution:
Make sure that there is enough space under the worktop to install the appliance.
Preparing the appliance
In order to install the appliance under a worktop, the top panel must be removed.
1. Remove the screws at the rear of the top panel.
2. Push the panel rearwards for approximately 1 cm.
3. Lift the panel to remove it.
Installing the appliance
1. Adjust the feet to align the appliance with the worktop.
Make sure that the appliance is level.
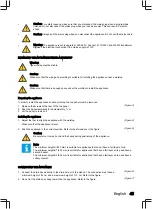
2. Push the appliance in the correct position. Refer to the dimensions in the figure.
Caution:
Be careful not to crush or bend the hoses during positioning of the appliance.
Note:
The minimum height A (820 mm) is suitable for appliances that do not have a felt layer on top.
The minimum height B1 (830 mm) is suitable for appliances that have a felt layer on top and have a
second basket.
The minimum height B2 (835 mm) is suitable for appliances that have a felt layer on top and have a
cutlery drawer.
CONNECTING THE APPLIANCE
1. Connect the drain hose directly to the drain hole or to the siphon. The connection must have a
minimum height of 50 cm and a maximum height of 110 cm. Refer to the figure.
2. Do not let the drain hose hang lower than the appliance. Refer to the figure.
(Figure 3)
(Figure 4)
(Figure 5)
(Figure 6)
(Figure 7)
English
•
45
Summary of Contents for VVW6035AS
Page 2: ......
Page 3: ...B F D C E G H L K J I A 1 ...
Page 4: ...A B C D E F G H I J K 2 1 2 3 4 Min 570 Min 600 H 570 H1 min A H2 B1 H3 B2 598 5 ...
Page 5: ...min 50 cm min Ø 4 cm max 110 cm 6 0 5 1 1 m 7 A 8 9 10 A 11 B 12 A 13 B 14 15 16 17 ...
Page 6: ...18 19 A 20 1 2 A 21 C B C B 22 23 1 A 2 24 A 25 A B 26 C 27 A 28 A B C 29 ...
Page 7: ...A B C 30 ...

