background image

Specifications

* InWin’s products comply with RoHS regulations.

* Specifications may vary based on different regions.

InWin Luna AL120 Fan

Model

Luna AL120

Colors


Black

Fan Size

120 x 120 x 25 mm

Materials

PC, PBT

Rated Voltage

DC 12V

Rated Power

3.96W

Rated Current

0.33A

ADD RGB Rated Voltage

DC 5V

ADD RGB Rated Power

1.5W

ADD RGB Rated Current

0.3A

Speed Mode

PWM 400-1800 +/-10% RPM

Air Flow

82.96 CFM

Air Pressure

2.31 mm / H2O

LED

Addressable RGB

Connector (Fan to Fan)

Non-Modular Cables

Connector to M/B

4-Pin (PWM, 12V), 3-Pin (ARGB, 5V)

Noise Level

25 dB(A) (Normal)

Bearing Type

Long Lifespan Sleeve Bearing

06

Summary of Contents for 127

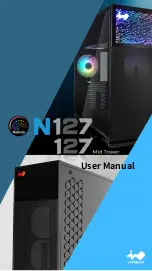
Page 1: ...User Manual ...

Page 2: ...127 N127 Product Video 02 Product Video Information ...

Page 3: ...Product Story 04 Specifications 05 Package Contents 06 Case Structure 08 Cable Information 10 Installation Guide 11 Notices and Warranty 19 content 03 ...

Page 4: ...g stars creating a dazzling display while the 127 has a subtle ARGB logo greeting users with a modest pop of color The steel mesh front panel ensures plenty of airflow is distributed throughout the enclosure and the screwless tempered glass window will protect and showcase your components 04 ...

Page 5: ...5 Thermal Solution Compatibility Air Cooling Fans Front 2 x 120 mm Rear 1 x 120 mm Bottom 3 x 120 mm N127 has one pre installed Luna AL120 Fan Water Cooling Radiator Front 1 x 240 mm Rear 1 x 120 mm Bottom 1 x 360 mm Power Supply Compatibility PSII ATX12V Length up to 200 mm Product Dimensions L x W x H 476 x 210 x 445 mm 18 7 x 8 3 x 17 5 Package Dimensions L x W x H 532 x 282 x 506 mm 20 9 x 11 ...

Page 6: ...s PC PBT Rated Voltage DC 12V Rated Power 3 96W Rated Current 0 33A ADD RGB Rated Voltage DC 5V ADD RGB Rated Power 1 5W ADD RGB Rated Current 0 3A Speed Mode PWM 400 1800 10 RPM Air Flow 82 96 CFM Air Pressure 2 31 mm H2O LED Addressable RGB Connector Fan to Fan Non Modular Cables Connector to M B 4 Pin PWM 12V 3 Pin ARGB 5V Noise Level 25 dB A Normal Bearing Type Long Lifespan Sleeve Bearing 06 ...
Page 7: ...and Offs Motherboard Stand off Socket 2 5 HDD Screws Washer Cable Ties Graphics Card Anti Sag Support ARGB One Click Controller 127 Chassis N127 Chassis QR Code Card Accessories Bag x 10 x 1 x 1 x 8 x 12 x 7 x 18 x 1 Package Contents 07 ...

Page 8: ...Earphone and Microphone 4 USB 3 2 Gen 2x2 Type C 5 3 5 2 5 Drive Bays 6 Rear Fan Radiator Mounting Area 7 Bottom Fan Radiator Mounting Area 8 Front Fan Radiator Mounting Area 9 Motherboard Mounting Area 10 PCI E Expansion Slots 11 Extra PCI E Supporting Mounting Hole 12 Shock Proof Stands 08 ...

Page 9: ...Case Structure 1 5 1 4 13 Fan Dust Filter 14 2 5 Drive Bays 15 Power Supply Mounting Area 1 3 09 ...

Page 10: ...Power Switch HD Audio USB 3 2 Gen 1 ARGB Cable USB 3 2 Gen 2x2 Type C x1 x1 x1 x1 x1 Cable Information 10 ...

Page 11: ...ible sudden releases of the glass panel when opening it You can also use this feature as a locker Keep hardware safe by adding a lock Power Supply can be mounted to the top bracket Installation Guide Please follow the related chapters to assemble Please use original provided accessories to avoid damage to the product Parts Required Hexagon Head Screws 1 2 11 ...

Page 12: ...raphics Card Holder Motherboard Installation It is recommended to remove the Graphics Card Holder when installing removing your motherboard or graphics card 3 4 Parts Required Motherboard Stand Offs Motherboard Stand Off Socket Hexagon Head Screws 12 ...

Page 13: ...acket may affect the placement of the bottom fans radiator and other components of your build Use the adjustable GPU Anti Sag Rubber Pad to eliminate friction between your Expansion Card and the bracket Installation Guide Expansion Card Installation 5 Parts required Hexagon Head Screws GPU Anti Sag Support 13 ...

Page 14: ...e I O Wires Installation 6 HD Audio Header PORT2_L PORT2_R PORT1_R PORT1_L BLUE PURPLE YELLOW 10 8 6 4 2 KEY WHITE BLACK 9 7 5 3 1 USB 3 2 Gen 1 USB 3 2 Gen 2x2 Type C 1 2 3 4 5 6 7 8 9 10 19 18 17 16 15 14 13 12 11 14 ...

Page 15: ...If your motherboard does not support ARGB effects please use the included ARGB One Click Controller ARGB Cable Header Front Panel ARGB Cable PSU s SATA Cable ARGB One Click Controller 2 5 3 5 Drive Bays Installation 7 15 ...

Page 16: ...Installation Guide 2 5 Drive Bays Installation 8 Parts required 2 5 HDD Screws 16 ...

Page 17: ...ation Guide Removing the Front Fans Mounting Bracket 9 Remove the screws Gently lift the bracket and slide it out 17 Attach the fans radiator to the mounting bracket and secure the bracket back in the chassis ...

Page 18: ...Installation Guide Fan Liquid Cooling Radiator Installation 10 Parts required Water cooling System Washers 18 ...

Page 19: ... insertions and extractions to the addressable cable as it may damage the pins 6 To avoid any damages please do not use this product for any other purpose than its intended use 7 Any modifications may damage the product 8 Please remove all internal devices before shipping or moving Including power supply hard drives motherboard CPU etc 9 Keep this product away from areas with high temperatures suc...

Page 20: ...Copyright 2022 In Win Development Inc All Rights Reserved ...

Reviews: