9
2
Hardware
Installation
2.1
Removing
and
Installing
a
Hard
Drive
IW
‐
RJ460
‐
05
JBOD
features
tool
‐
less
trays.
Users
no
longer
need
to
use
screws
to
mount
disks
and
can
swap
drives
faster.
The
HDD
drawer
features
a
two
‐
level
sliding
design
for
easy
maintenance.
2.1.1
Installing
a
Hard
Drive
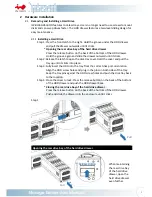
Step
1:
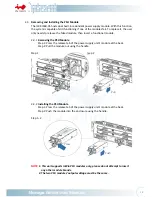
Press
the
front
latch
to
the
right.
Hold
the
groove
under
the
HDD
drawer
and
pull
the
drawer
outwards
until
it
clicks.
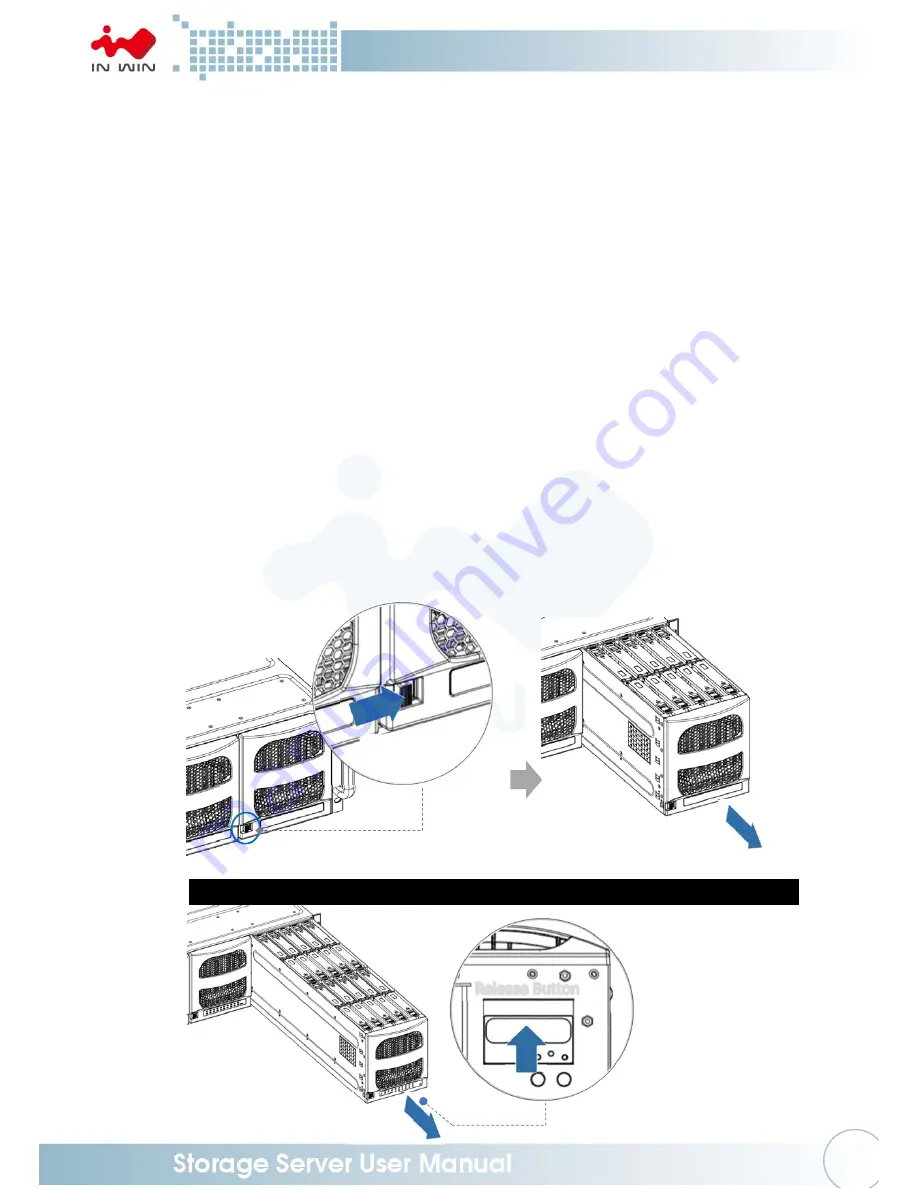
*
Opening
the
rear
drive
bay
of
the
hard
drive
drawer
Press
the
release
button
on
the
back
of
the
bottom
of
the
HDD
drawer.
Hold
the
groove
again
and
slide
the
drawer
outward
until
it
clicks.
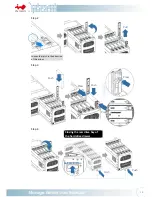
Step
2:
Release
the
latch
to
open
the
disk
tray
cover.
Hold
the
cover
and
pull
the
tray
up
until
it
clicks
into
place.
Step
3:
Fully
insert
the
HDD
into
the
tray
from
the
correct
disk
port
orientation.
Align
the
HDD
screw
holes
and
plug
in
the
pins
on
both
sides
of
the
tray.
Keep
the
tray
pins
against
the
HDD
screw
holes
and
push
the
disk
tray
back
to
the
location.
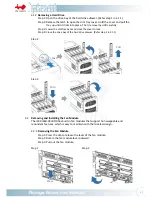
Step
4:
Close
the
cover
to
lock.
Press
the
release
button
on
the
back
of
the
bottom
of
the
HDD
drawer
and
push
the
HDD
drawer
back.
*
Closing
the
rear
drive
bay
of
the
hard
drive
drawer
Press
the
release
button
on
the
back
of
the
bottom
of
the
HDD
drawer.
Push
and
slide
the
drawer
into
the
enclosure
until
it
clicks.
Step
1
Opening
the
rear
drive
bay
of
the
hard
drive
drawer
When
maintaining
the
rear
drive
bay
of
the
hard
drive
drawer,
open
the
hard
drive
drawer
even
further.
Pull
Press
Pull
Release
Button
Summary of Contents for IW-RJ460-05
Page 1: ...IW RJ460 05 User s Manual...
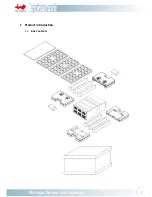
Page 7: ...4 1 Product Introduction 1 1 Box Contents...
Page 29: ...26...


