background image

HDTV SETUP WIZARD

,

Continued

Important Notice

:

Leaving your television on, and tuned to, any screen with non-moving

images including the iO Main Menu, Channel Guide or Side Bars (displayed when
watching a (4:3) standard definition image on a (16:9) wide screen) for extended periods
may damage your television screen. Please check the owner’s manual for your television
for specific warnings, or consult with your television manufacturer to learn more about the
properties and sensitivities of your television set. 

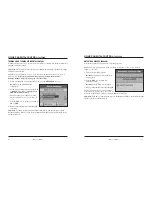
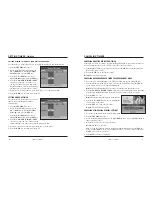
CHANGING THE BORDER COLOR

On some channels, the setup may be displaying a border either on the right and left of the
screen or on the top and bottom. To adjust the display, see 

Adjusting the Size of Your

Picture 

on the previous page. To change the color of the border, follow the steps below:

1.  Press 

SETTINGS

twice to access the General Settings menu.

2.  Scroll to 

Set

TV Borders

.

3.  Press 

RIGHT

arrow key to access the 

Light, Med,

and 

Dark

options.

4.  Scroll through the options and select the border color of your choice.

5.  Press 

A

to accept the changes.

Visit www.iO.tv to find out more about HDTV.

iO User’s Guide

51 

50

iO User’s Guide

HDTV SETUP WIZARD

,

Continued

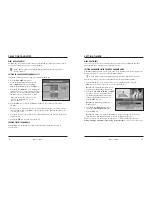
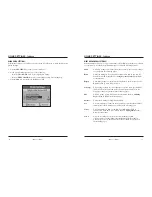
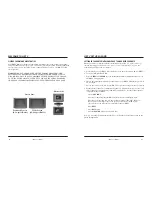
ADJUSTING THE SIZE OF YOUR PICTURE

After the installation of your HDTV cable 
box, your standard definition channels 
(non-HD) may appear smaller than your 
TV screen, with bars on the left and right 
of the picture (see Diagram A). This is
NORMAL, and is the intended format of 
non-HD broadcasts. If you would like to view
the picture without the bars, you can “stretch” 
the picture by performing the following steps:

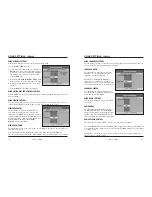
1. While watching any standard definition 

channel, press the 

SETTINGS

key on your 

iO remote control (Diagram B). The Quick 
Settings menu should be displayed.

2.  At the Quick Settings menu, use the 

UP

or 

DOWN

arrow keys on your iO remote 

(Diagram B) to highlight Picture Size 
(Diagram C). Press 

SEL

on your iO remote 

to see the menu of picture formats available 
(Diagram B).

3.  Scroll through the options until your 

television screen appears in the format 
of your choice.

4. Press the 

EXIT

key on your iO remote to exit

the Quick Settings menu and return to your 
television viewing (Diagram B).

Note:

To avoid conflicting settings, adjust 

picture size through your Digital Cable Box 
and not through the settings on your TV. 
See your User’s Guide for additional info 
about HDTV.

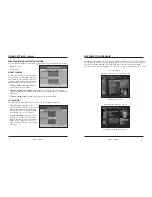
Diagram A

Diagram C

Quick Settings

Highlight an option, then press SELECT.

Block this Channel (ATH42)
Picture Size
Choose SAP Language

More Settings                         Return to TV

English

EDIT

T

Picture Size

SEL

Navigation keys

Diagram B

Summary of Contents for Standard and High Definition Digital Cable Boxes

Page 1: ...supply to your residence consult your local power company POWER CORD POLARIZATION This Digital Cable Box has a two prong plug Properly ground earth this Digital Cable Box by inserting the plug into a...

Page 2: ...llite can t deliver ON DEMAND Choose from over a thousand On Demand movies and shows whenever you want No trips to the video store or late fees just great entertainment on your schedule As an iO Custo...

Page 3: ...mer 30 Canceling Timers 31 Canceling an Active REC Record Timer 31 Canceling a Reminder or VCR Timer from the Channel Guide 31 Canceling a Timer Using General Settings 31 Listening to Music Choice 32...

Page 4: ...per left corner of your screen indicates that your request is being processed Note To exit the Main Menu press the EXIT key or tune to a channel PARENTAL CONTROL In addition to the Parental Control fe...

Page 5: ...eminder Timers help you keep track of upcoming programs by giving you a reminder on the screen before the program starts VCR Timers tune your Digital Cable Box to a particular channel at the proper ti...

Page 6: ...the Channel Banner Press the SEL key to tune to the selected channel Press the EXIT key to exit Browse BROWSING TO SEE WHAT S ON TV Continued BROWSING BY TITLE Use the Browse By Title feature to list...

Page 7: ...or DOWN arrow keys to move through the themes Press the RIGHT arrow key or the SEL key to move back to the list of programs for that theme 6 Press the SEL key to watch the highlighted program if it is...

Page 8: ...ctions on the screen If the event is about to be broadcast the purchase screen appears with the event information Press the B key to buy the event or follow the instructions on the screen Result If yo...

Page 9: ...keys to highlight Change 5 Press the SEL key 6 Enter your CURRENT PIN 7 Enter your NEW PIN 8 Reenter your new PIN for confirmation 9 Press the EXIT key to return to watching TV 16 iO User s Guide ORDE...

Page 10: ...highlight Block PIN then press the SEL key 3 Press the UP or DOWN arrow keys to highlight Change then press the SEL key 4 Enter your CURRENT PIN 5 Enter your NEW PIN 6 Reenter your new PIN for confir...

Page 11: ...ccept 7 Press the EXIT key to return to watching TV Note To clear a blocked time highlight the Block Time the symbol represents the number of the time period you want to clear then press the C key 20...

Page 12: ...ontrol is on the blocks set up earlier are enabled The blocked channels or programs cannot be viewed Important When you turn off Parental Control using Quick Settings all channels ratings and times ar...

Page 13: ...Refer to Setting or Editing a Reminder Timer Using General Settings on page 26 for instructions 24 iO User s Guide SELECTING FAVORITES WHAT ARE FAVORITES The FAV key on the remote control lets you su...

Page 14: ...r No additional service fees apply The VCR Commander is a feature that allows your Digital Cable Box to automatically program your VCR for recording Just tune your Digital Cable Box to the channel you...

Page 15: ...r channel on a regular recurring schedule or record individual programs You can also edit existing VCR timers 1 Press the SETTINGS key twice 2 At the General Settings menu press the UP or DOWN arrow k...

Page 16: ...C key to clear or cancel the timer Result The timer is canceled Note You can also cancel a timer by highlighting Timer All and pressing the SEL key Using the UP or DOWN arrow keys highlight the timer...

Page 17: ...atching Set Sleep Timer Use this setting to set a sleep timer This setting indicates OFF when the sleep timer is OFF or the number of minutes before the Digital Cable Box turns off Turn ON OFF Use thi...

Page 18: ...fer to Ordering Pay Per View in this Guide for instructions Purchase Use Purchase setting to change Purchase PIN Set Use these settings to control the basic operation of your Digital Cable Box Instruc...

Page 19: ...rate your TV 36 iO User s Guide USING SETTINGS Continued USING GENERAL SETTINGS Perform the following steps to use the General Settings menu 1 Press the SETTINGS key twice 2 At the General Settings me...

Page 20: ...the display for the front panel of the Digital Cable Box when turned on The following options are available settings for the front panel display while the Digital Cable Box is turned on The Show Time...

Page 21: ...like traditional pay per view On Demand allows you to start a program whenever you want without waiting for specific viewing times Do you want VCR like control when watching your favorite programs Wit...

Page 22: ...a brief description of the highlighted program Sub Category Catalog 42 iO User s Guide TO ORDER SUBSCRIPTION ON DEMAND You can order Subscription On Demand four different ways 1 Tune to Channel 900 a...

Page 23: ...hildren or others from accessing a program from the Active Rentals list you must remove the program from the list To watch that program again you must order it again For detailed instructions on using...

Page 24: ...y not always be available for renewed viewing WANT THE CONVENIENCE OF A VCR OR DVD You can use the dedicated keys on your remote control to make your TV function similarly to a VCR or DVD PAUSE A PROG...

Page 25: ...Normal display mode Press A to cycle through and test the resolution options 720p 480i 1080i etc If your TV does not support one of the options you will see a blank screen save only those scan rates t...

Page 26: ...G THE SIZE OF YOUR PICTURE After the installation of your HDTV cable box your standard definition channels non HD may appear smaller than your TV screen with bars on the left and right of the picture...

Page 27: ...eshooting in the future 3 Digital Audio Out Connects to external digital inputs of surround sound receiver or other digital services 4 Audio Out Connects to left right L R audio inputs of a stereo rec...

Page 28: ...ABDQXTL N0006246618 Cable Input T8730 Back of TV S VIDEO VIDEO L AUDIO R VIDEO IN 1 3 Back of VCR VIDEO CABLE ANT CABLE ANT AUDIO LINE IN LINE OUT IN OUT RIGHT LEFT 120 VAC 60Hz 40W 120 VAC 60Hz 400W...

Page 29: ...10 6 3 8 13 12 S VIDEO OUT 1394 1394 2 HDTV DIGITAL AUDIO OUT VIDEO OUT 7 9 14 15 DVI 1 Firewire 1394 Outputs audio and video signals to the IEEE 1394 Firewire input of your HDTV 2 USB Reserved for f...

Page 30: ...of service to remove the same from the premises Cablevision s failure to remove its property shall not be deemed an abandonment thereof 12 Assignment or Transfer This Agreement and the equipment suppl...

Page 31: ...data features services and functionalities Neither Cablevision nor its distribution affiliates will have any liability for any such responsive actions The above described actions are not Cablevision...

Page 32: ...ic Atlanta could void the user s authority to operate the equipment Important The information shown in the FCC Declaration of Conformity paragraph below is a requirement of the FCC and is intended to...

Reviews: