background image

30

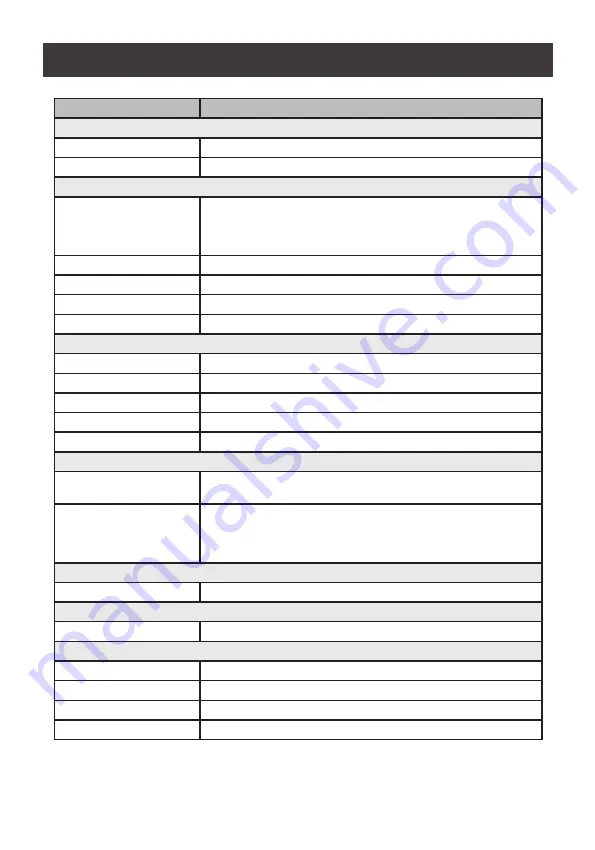
Function

GCL1900W

Computer Connections

Direct

1

Console Selection

Hotkey

Connectors

External Console Ports

1 x HDB-15 Female (Blue)

2 x USB Type-A Female

1 x 3.5mm Audio Jack Female (Green)

KVM Ports

2 x USB Type-A Female

USB Port

1 x 3.5mm Audio Jack Female (Green)

Firmware Upgrade

1

Power

1 x 3.5mm Audio Jack Female (Green)

Switches

Reset

1 x Semi-recessed pushbutton

Firmware Upgrade

1 x Slide

Power

1 x Rocker

LCD Power

1 x Pushbutton

LCD Adjustment

4 x Pushbutton

LEDs

Power

1 x KVM Console (Dark Green)

1 x LCD (Orange)

Lock

1 x Num Lock (Green)

1 x Caps Lock (Green)

1 x Scroll Lock (Green)

Emulation

Keyboard/Mouse

USB

Video

Input Video Resolution

1366 x 768 @60Hz

Panel Spec

LCD Module

18.5” TFT-LCD

Resolution

1366 x 768 @60Hz

Response Time

5ms

Viewing Angle

170° (H), 160° (V)

Specifications Chart

Summary of Contents for GCL1900W

Page 1: ...www iogear com User Manual 18 5 Widescreen Short Depth VGA LCD KVM Console GCL1900W PART NO M1602 ...

Page 2: ...rademarks of Microsoft Corporation IOGEAR makes no warranty of any kind with regards to the information presented in this document All information furnished here is for informational purposes only and is subject to change without notice IOGEAR assumes no responsibility for any inaccuracies or errors that may appear in this document ...

Page 3: ...ions 6 Introduction 7 Package Contents 7 Features 8 Requirements 9 Operating Systems 9 Overview 10 Hardware Setup 13 Hotkey Operation 22 The Firmware Upgrade Utility 26 Specifications Chart 30 Trouble Shooting 32 FCC Information 33 Table of Contents ...

Page 4: ...r IT power distribution systems with 100 240V single phase voltage To prevent damage to your installation it is important that all devices are properly grounded The device is equipped with a 3 wire grounding type plug This is a safety feature If you are unable to insert the plug into the outlet contact your electrician to replace your obsolete outlet Do not attempt to defeat the purpose of the gro...

Page 5: ...by the manufacturer Do not step on or stand on any device when servicing other devices in a rack Caution Slide rail LCD KVM mounted equipment is not to be used as a shelf or a work space If the following conditions occur unplug the device from the wall outlet and and replace with new power cord o The power cord or plug has become damaged or frayed o Liquid has been spilled into the device o The de...

Page 6: ...ans to press the Enter key 1 Numbered lists represent procedures with sequential steps Bullet lists provide information but do not involve sequential steps Indicates selecting the option on a menu or dialog box for example that comes next For example Start Run means to open the Start menu then select Run Indicates critical information Conventions ...

Page 7: ...ers one in the CPU section and the other in the external Console section on the rear panel The GCL1900W also features a port for an external USB mouse located on the unit s front panel to be used with the built in keyboard The GCL1900W LCD monitor supports resolution up to 1366 x 768 and aimed not just to achieve but to exceed the requirements for space utility optimization adaptive deployment and...

Page 8: ... console with USB VGA connectors Built in USB Type A port on front panel for peripheral sharing Supports 2 1 audio Console lock design enables the console drawer to remain securely locked away in position when not in use Console selection via hotkey Multilingual keyboard mapping supports English US English UK French German German Swiss Greek Hungarian Italian Japanese Korean Russian Spanish Swedis...

Page 9: ...andard 104 key wired USB keyboard Speaker optional Cables For optimum signal integrity we recommend using high quality custom KVM cables sets that may be purchased separately Please refer to the table below Length Part Number 2m G2L5202U G2L5302U 3m G2L5203U G2L5303U 5m G2L5205U G2L5305U Requirements Operating Systems Supported Operating Systems include Windows Mac Linux and Sun ...

Page 10: ...10 GCL1900W Front View Diagram Overview 1 2 3 4 6 5 7 8 9 10 11 12 13 ...

Page 11: ... upgrade recovery See Firmware Upgrade Recovery for details 6 Firmware Upgrade Port The firmware upgrade cable will be connected to this 3 5mm audio jack to perform Firmware Upgrade 7 Reset Switch Located to the right of the Lock LEDs Press this recessed switch in with a thin object to perform a system reset 8 Lock LEDs The Num Lock Caps Lock Scroll Lock LEDs are located here 9 Rack Mounting Tabs ...

Page 12: ...he KVM cables to this port Note the shape of these SPHD connectors have been specifically modified so that only KVM cables designed to work with this switch can be connected see Cables for details Do not attempt to use ordinary 15 pin VGA connector cables to link these ports to the computers 4 KVM Port Section Connect the included KVM cable to this port and the other end of the cable to the comput...

Page 13: ...0W are powered OFF Power cords of any computers that have the Keyboard Power On function must be unplugged Packing material may be inserted from factory to protect GCL1900W during shipping Slide the LCD module out see Opening Closing the Console until packing material is visible Remove the packing material before installing the unit as shown in diagram below ...

Page 14: ...n the module Standard Rack Mounting Please use the included standard rack mounting kit to mount the GCL1900W in a rack with a depth of 16 5 28 3 Note 1 We highly recommend two people to mount the module one to hold it in place and the other person to screw the module in 2 The included standard rack mounting kit does not include screws or cage nuts Please contact your sales representative for addit...

Page 15: ...kets in place 2 While one per son inserts the GCL1900W into place by sliding its left and right side bars into the mounting brackets on the rack have the second person install four screws in the front tabs to secure the module to the front of the rack Note Please allow at least 2 on each side for proper ventilation and at least 5 at the back for the power cord and cable clearance ...

Page 16: ...peaker jack green to the GCL1900W s audio port 2 Connect the USB VGA and audio connectors of the KVM cable into their respective ports of a computer 3 If an external console is needed connect the keyboard mouse VGA monitor and speakers microphone not supported into their respective ports on the Console Section of the GCL1900W 4 Connect the GCL1900W to an AC power source using the included power co...

Page 17: ...nsole 1 Pull on the Release Bar on the upper handle Slide the console module out until it clicks in place then raise the LCD Module lid 2 To close the console lower the LCD Module until it lies flat then slide the entire console in Operating Precautions The maximum load bearing capacity of the keyboard module is 66lbs Failure to heed below information can result in damage to the keyboard module 17...

Page 18: ...18 Right Rest your hands and arms lightly on the keyboard module as you work Wrong DO NOT lean your body weight on the keyboard module DO NOT place heavy objects on the keyboard module ...

Page 19: ... button moves you Right or Up When making an adjustment it increases the value When navigating through the menus this button moves you Left or Down When making an adjustment it decreases the value EXIT Press this button to perform an auto adjustment if you have not already entered the LCD OSD Menu function An auto adjustment automatically configures all the settings for the LCD panel to what the O...

Page 20: ...the display area on the LED panel horizontally moves the display area left or right V Position Positions the display area on the LED panel vertically moves the display area up or down Color Temperature Adjusts the color quality of the display You can adjust the warmth value color balance etc The Adjust Color selection has a further submenu that lets you fine tune the RGB values Language Selects th...

Page 21: ...essary to Power Off the GCL1900W to upgrade the firmware for exam ple simply turn off the power to the unit using the rear panel power switch To restart the GCL1900W turn the rear panel power switch back on Port ID Numbering and Port Selection If a KVM switch is connected to the GCL1900W Port ID numbering and Port selection will follow the method used by the connected KVM Switch Please refer to th...

Page 22: ...ble 2nd console or external console video 2 None Ctrl Alt Shift R Enter Enable 2nd console or external video Disable Local LCD console 2 None Ctrl Alt Shift L R Enter Or Ctrl Alt Shift R L Enter Enable both consoles default 2 None Ctrl Alt Shift U M Enter Configures the front USB port to mouse mode Mouse functionality is immediate upon switching to USB mouse mode USB mouse mode U M is the default ...

Page 23: ...ence one key at a time First Ctrl then Alt then Shift etc 2 When activating hotkey combinations Ctrl Alt Shift make sure you are using the keys on the same side of the keyboard 3 Console selections are not saved If the GCL1900W is powered off it will revert to the default setting when it is powered on again 4 If a KVM switch connected to the GCL1900W uses the Ctrl Alt Shift combination to invoke i...

Page 24: ... The emulation mapping are listed in table below PC Keyboard Mac Keyboard Shift Shift Ctrl Ctrl Ctrl 1 Ctrl 2 Ctrl 3 Ctrl 4 Alt Alt Print Screen F13 Scroll Lock F14 Enter Return Backspace Delete Insert Help Ctrl F15 Note When using key combinations press and release the first key Ctrl then press and release the activation key ...

Page 25: ...orresponding functions are shown in the table below PC Keyboard Sun Keyboard Ctrl T Stop Ctrl F2 Again Ctrl F2 Props Ctrl F4 Undo Ctrl F5 Front Ctrl F6 Copy Ctrl F7 Open Ctrl F8 Paste Ctrl F9 Find Ctrl F10 Cut Ctrl F1 Ctrl F2 Ctrl F3 Ctrl F4 Ctrl H Help Compose Note When using key combinations press and release the first key Ctrl then press and release the activation key ...

Page 26: ...perform a firmware upgrade using a computer that is not connected to the GCL1900W setup is recommended To set GCL1900W to Firmware Upgrade Mode 1 From a computer that is not part of the KVM installation go to www iogear com product GCL1900W to get a list of available Firmware Upgrade Packages 2 Choose the Firmware Upgrade Package usually the most recent one and download the file to a computer that...

Page 27: ...d Firmware Upgrade Package file from your computer either by double clicking the file icon or by opening a command line and keying the full path and filename 2 Read and Agree to the License Agreement enable the I Agree radio button 3 Click Next The Firmware Upgrade Utility main screen appears ...

Page 28: ...the upgrade files If it finds that the device s version is higher than the upgrade version it brings up a dialog box informing you of the situation and gives the option to continue with the upgrade b If Check Firmware Version is disabled the Utility installs the upgrade files without checking whether they are at higher level or not c As the Upgrade proceeds status messages appear in the Status Mes...

Page 29: ...mware becomes corrupted for some reason and unable to be operated When a firmware upgrade procedure is interrupted To recover a failed firmware upgrade do the following 1 Power OFF the GCL1900W 2 Connect the Firmware Upgrade Cable to the Firmware Upgrade Port 3 Slide the Firmware Upgrade Switch to the Recover position 4 Power ON the GCL1900W and repeat the Firmware Upgrade Procedure 5 After the GC...

Page 30: ... 3 5mm Audio Jack Female Green Switches Reset 1 x Semi recessed pushbutton Firmware Upgrade 1 x Slide Power 1 x Rocker LCD Power 1 x Pushbutton LCD Adjustment 4 x Pushbutton LEDs Power 1 x KVM Console Dark Green 1 x LCD Orange Lock 1 x Num Lock Green 1 x Caps Lock Green 1 x Scroll Lock Green Emulation Keyboard Mouse USB Video Input Video Resolution 1366 x 768 60Hz Panel Spec LCD Module 18 5 TFT LC...

Page 31: ... Storage Temperature 20 60 C Humidity 0 80 RH Non condensing Physical Properties Housing Metal Plastic Weight 4 13lb Dimensions L x W x H 122 x 121 x 10 88 Body Dimension L x W x H 114 x 109 22 x 10 87 Note 1 For some rack mount products please note that the standard physical dimensions of W x D x H are expressed using a L x W x D format 2 Body Dimensions exclude I O ports handles and mounting bra...

Page 32: ... match the keyboard you are using On your switch please change the keyboard layout setting for the port to match the layout of the keyboard you are using Cannot use the special keys on Sun external keyboard to control Sun computers Please use the Sun keyboard emulation keystrokes to achieve all Sun keyboard functions Trouble Shooting ...

Page 33: ...ny changes or modifications not expressly approved by the party responsible for compliance could void the user s authority to operate this equipment Warning Operation of this equipment in a residential environment could cause radio interference This device complies with Part 15 of the FCC Rules Operation is subject to the following two conditions 1 this device may not cause harmful interference an...

Page 34: ......

Reviews: