background image

Compliance Information

FCC Statement

This equipment has been tested and found to comply with the limits for a 

Class B digital device, pursuant to Part 15 of the FCC Rules. These limits 

are designed to provide reasonable protection against harmful interference 

in a residential setting. This product generates, uses, and can radiate radio 

frequency energy and, if not installed and used as directed, it may cause 

harmful interference to radio communications.  

CE Compliance


This device has been tested and found to comply with the following 

European Union directives: Electromagnetic Capability (2004/108/EC), 

Low Voltage (2006/95/EC) and R&TTED (1999/5/EC).

IC Statement

Canada, Industry Canada (IC) Notices 

Complies with the Canadian ICES-003 Class B specifications.

Declaration of Conformity and related documents can be downloaded 

directly from our website:

http://www.iogear.com/product/GUD310/certifications

Summary of Contents for met(AL) GUD310

Page 1: ...Quick Start Guide GUD310 PART NO Q1345 www iogear com met AL Vault Dock USB 3 0 Docking Station with Built In HDD Enclosure...

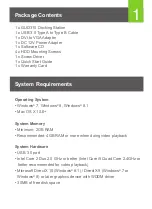
Page 2: ...Requirements Operating System Windows 7 Windows 8 Windows 8 1 Mac OS X 10 6 System Memory Minimum 2GB RAM Recommended 4GB RAM or more when doing video playback System Hardware USB 3 0 port Intel Core...

Page 3: ...6 HDD Indicator 7 2 5 HDD Tray 8 Power Switch Back 1 Gigabit LAN Port 2 DVI Port 3 HDMI Port 4 USB 2 0 Ports 5 DC In Port 6 USB 3 0 Upstream Port 7 USB 3 0 Ports Overview 2 USB 3 0 USB 3 0 IN DC 12V U...

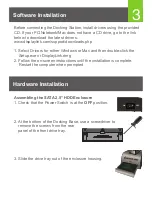
Page 4: ...n Hardware Installation 3 Before connecting the Docking Station install drivers using the provided CD If your PC Notebook Mac does not have a CD drive go to the link below to download the latest drive...

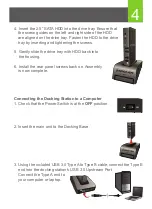
Page 5: ...e rear panel screws back on Assembly is now complete Connecting the Docking Station to a Computer 1 Check that the Power Switch is at the OFF position 2 Insert the main unit to the Docking Base 3 Usin...

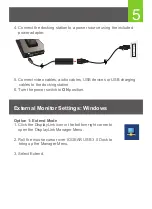
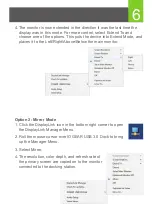
Page 6: ...USB charging cables to the docking station 6 Turn the power switch to ON position Option 1 Extend Mode 1 Click the DisplayLink icon in the bottom right corner to open the DisplayLink Manager Menu 2 R...

Page 7: ...and places it to the Left Right Above Below the main monitor Option 2 Mirror Mode 1 Click the DisplayLink icon in the bottom right corner to open the DisplayLink Manager Menu 2 Roll the mouse cursor...

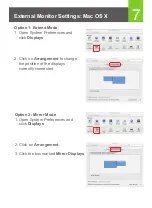
Page 8: ...e 1 Open System Preferences and click Displays Option 1 Extend Mode 1 Open System Preferences and click Displays 2 Click on Arrangement 3 Click the box marked Mirror Displays 2 Click on Arrangement to...

Page 9: ...nergy and if not installed and used as directed it may cause harmful interference to radio communications CE Compliance This device has been tested and found to comply with the following European Unio...

Page 10: ...ve help and product support iogear custhelp com support iogear com www iogear com 19641 Da Vinci Foothill Ranch CA 92610 Warranty Information This product carries a 3 Year Limited Warranty For the ter...

Reviews: