6-4
Installation Guide
Mirror Drive
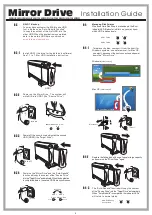
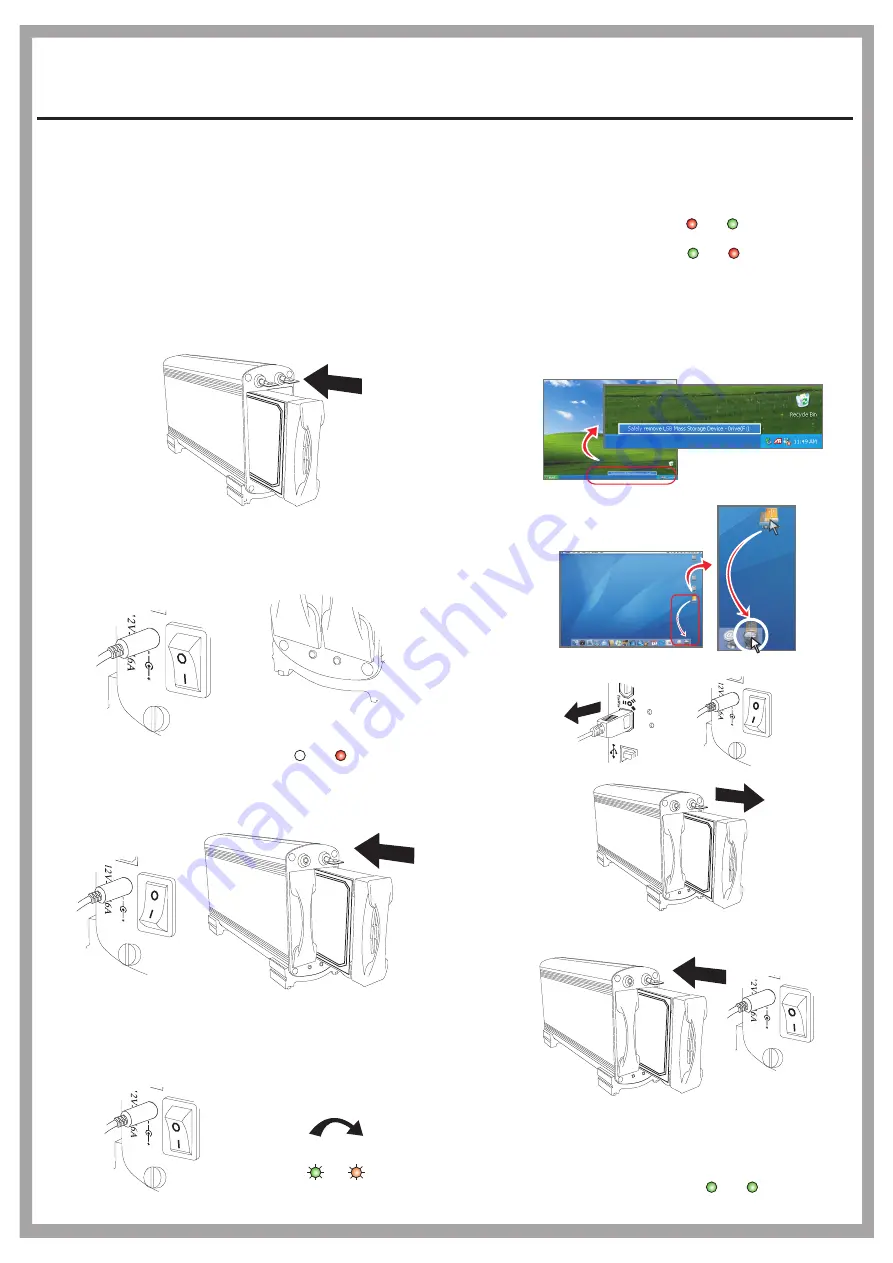
Managing Disk Failures
When one Hard Disk Drive is broken-down, the Error
indicator LED (Red color) will turn on, you may know
which HDD is broken down.
6-4-1
To replace the disk, unmount it from the host (for
Windows systems, use safe removal; for Mac OS,
use eject), disconnect the host connection and power
down the "Mirror Drive".
6-4-2
Replace the failing disk with one of equal or large capacity
and power up the "Mirror Drive" again
6-4-3
The "Auto-Rebuild" function will copy the content
of the "Source Drive" into the "Target Drive" automatically.
When "Auto-Rebuild" is completed, the indicator LEDs
will return to normal status.
HDD 1 Failed
HDD 2 Failed
Green
Red
Red
Green
HDD Duplicating
is completed
Green
Green
6-3-1
Install HDD1 (the drive for the data and software).
See 1.1 to 1.4 for HDD installation instruction.
6-3-2
6-3-3
Power off the mirror drive and install the second
HDD (HDD2) (the "Target Drive").
Power on the "Mirror Drive" and the "Auto-Rebuild"
function will copy the content of the "Source Drive"
into the "Target Drive" automatically. When the duplication
is completed, data in these two HDDs are synchronous.
6-3-4
Note:
HDD2 LED is red
Red
Power on the Mirror Drive. The system will
write RIB into HDD1 (the "Source Drive").
6-3
RAID 1 Backup
You may have system write RIB into one HDD
first, and then use "Auto-Rebuild Function"
to copy the content of the first HDD into the
other HDD. When the duplication is completed,
data in these two HDDs are synchronous.
HDD 1
HDD 2
rebuilding
Green Orange/Red
Blinking
Blinking
Turn off
Note: RIB =RAID Information Block.
Windows (
safe removal
)
Mac OS (
safe removal
)
HDD1
HDD2
Disconnect
Turn on
Turn on
Turn on
Turn off
4
FWBU2SATA35DMR/UF2SATA35DMR/UFISATA35DMR/U2SATA35DMR


