background image

Questions? 
Need Some Help? 

This manual should help you 
understand your new product. 

If you still have questions, 
visit our website: 
www.iontheaction.com


Link Us: 

www.facebook.com/iontheaction  


Tweet Us: 

www.twitter.com/iontheaction 

User Manual 

Summary of Contents for AIR PRO PLUS

Page 1: ...e Help This manual should help you understand your new product If you still have questions visit our website www iontheaction com Link Us www facebook com iontheaction Tweet Us www twitter com ionthea...

Page 2: ...nsible for compliance could void the user s authority to operate the equipment Changes or modifications not expressly approved by the party responsible for compliance could void the user s authority t...

Page 3: ...n be determined by turning the equipment off and on the user is encouraged to try to correct the interference by one or more of the following measures Reorient or relocate the receiving antenna Increa...

Page 4: ...This includes primary product specifications software and user s manual This User Manual is a general reference guide for the product The product and accessories that come with your ion camera may be...

Page 5: ...________________________________________ If the camera has been dropped or its case has been damaged turn the power off Continued use may cause an injury Please call our friendly customer service for...

Page 6: ...__________________________________ Do not leave the camera in places where the temperature may rise significantly such as inside a car This may adversely affect the case or the parts inside __________...

Page 7: ...RTING YOUR WIRELESS EXPERIENCE 21 Install WiFi PODZ 21 Connect The Camera to Your PC 21 Connect The Camera To Your Smart Device Browser 22 Connect The Camera To Your Smart Device APP 22 CONNECTING CAM...

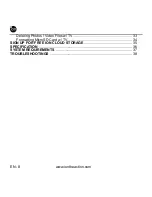
Page 8: ...EN 8 www iontheaction com Deleting Photos Video Files w TV 33 Formatting MicroSD Card w TV 34 SIGN UP FOR FREE ION CLOUD STORAGE 35 SPECIFICATION 36 SYSTEM REQUIREMENTS 37 TROUBLESHOOTINGS 38...

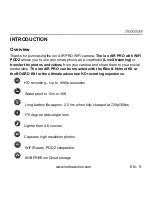
Page 9: ...camera and share them to your social media sites The ion AIR PRO can be mounted with the Bike Helmet Kit or the BOARD Kit for the ultimate adventure HD recording experience HD recording Up to 1080p r...

Page 10: ...you have the following items AIR PRO AIR PRO PLUS AIR PRO WIFI AIR PRO USB Cable and Adapter AV Cable Software CD ROM Quick User Guide Pouch Tripod Secure Strap CamLOCK Helmet Bike Kit WIFI PODZ Comm...

Page 11: ...UR CAMERA 1 Power 2 LED Indicator 3 Recording Slide Switch 4 Lens 5 MicroSD Card Slot 6 AV Port 7 HDMI Port 8 Video Resolution Switch 9 USB Port 10 Reset Button 11 PODZ Socket 12 WiFi PODZ 13 WiFi LED...

Page 12: ...y is fully charged It takes about 3 hours to initially charge the camera Subsequent charges take approximately 3 hours as well When the battery power is low the camera will vibrate three times to indi...

Page 13: ...D card Insert a MicroSD card not included before using your camera Assure that the camera power is turned OFF before inserting the card to the slot The MicroSD card will click into the slot once it is...

Page 14: ...the correct date time information To set up the camera clock 1 Connect your camera to a computer with the USB cable Run ion exe at your MicroSD card folder 2 Find the Date and Time and click SET 3 Adj...

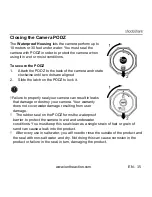
Page 15: ...ure to properly seal your camera can result in leaks that damage or destroy your camera Your warranty does not cover water damage resulting from user damage The rubber seal on the PODZ forms the water...

Page 16: ...r Off To power ON the camera Press and hold the Power button The camera will vibrate and the Green LED will turn on To power OFF the camera Press and hold the Power button The camera will vibrate two...

Page 17: ...ding 2 When your camera is OFF and the Recording Slide is at REC location press and hold the Power button to turn the camera ON and it will start recording Move the Recording Slide Switch from REC to...

Page 18: ...amera by pressing the Power button Move the Recording Slide Switch to STOP if the camera is in video recording 2 After the camera power has been turned on press the Power button to take a photo A shor...

Page 19: ...de the wireless capability to your camera Remote PODZ Control your camera via the remote Battery PODZ Extended battery time of your camera Using CamLOCK Mount System ion s versatile CamLOCK Mount Syst...

Page 20: ...t orientation without recording a rotated or inverted view The video resolution will be adjusted for 90 o and 270 o Video Resolution 0 o or 180 o 90 o or 270 o 1080P 1920x1080 608x1088 960P 1280x960 7...

Page 21: ...onds for the WiFi to warm up and become connectable The LED will flash when the Wi Fi function is active or connected 5 Press WiFi power button to turn off the WiFi anytime WiFi will drain your camera...

Page 22: ...he Camera To Your Smart Device APP 1 Search the iontheaction app at the App store 2 Download and install the app to your smart device 3 Turn on your WiFi PODZ 4 Go to network setting of your PC and ch...

Page 23: ...mera on and off once and connect the PC again If you are a Mac user visit the ion website www iontheaction com to download the software in Mac version Browsing the Files Transferring Them To A PC 1 Cl...

Page 24: ...ftware Simply click on the options in the Photo Video or General menus Set up on Photo menu Click Photo menu to select the desired photo resolution and mode The active mode will be highlighted Mode Op...

Page 25: ...u to select the desired video resolution The active mode will be highlighted Mode Options FHD Resolution 1080p 1920x1080 pixels 16 9 30 fps default 960p 1280X960 pixels 4 3 30 fps HD Resolution 720p 1...

Page 26: ...ode will be highlighted Mode Option TV Type PAL NTSC Language English Italian German Spanish French Japanese Korean Chinese Simplified and Traditional Auto Power Off Off 1 3 Minutes Auto Rotation On O...

Page 27: ...ure you connect your camera to an internet accessible computer To perform a firmware check and update 1 Before doing a firmware check or update put the MicroSD which has at least 15MB free space in th...

Page 28: ...roximately 20 seconds 8 The Green LED will turn off once the installation of the new firmware is completed 9 The camera will turn off when the upgrade is done You can power on the camera and the new f...

Page 29: ...the picture below will pop up You can preview files playback delete files and format the MicroSD card thru your TV screen In order to turn off the AIR PRO camera you will first need to disconnect the...

Page 30: ...to take photos Recording Video w TV 1 Press and hold the Power button until the TV menu appears 2 Press the Power button shortly to select the Preview mode 3 Slide the Recording Slide Switch to REC 4...

Page 31: ...Photo mode 3 Press button twice to enter the Play Photo mode 4 Select the desired photo file you want to view a Slide to REC and press button shortly to the previous file b Slide to STOP and press bu...

Page 32: ...press button shortly to the next file 5 Press button twice to start playing the video 6 When the video is playing press button shortly one time to pause and press button twice again to continue 7 Pre...

Page 33: ...n until the TV menu appears 2 Press button shortly to select Play Photo or Video mode 3 Press button twice to enter the Photo or Video Playback mode 4 Select the desired photo or video file to be dele...

Page 34: ...Play Photo or Video mode 3 Press button twice to enter either the Photo or Video Playback mode 4 Press and hold button to enter to Edit menu 5 Press button shortly to select Format 6 Press button twic...

Page 35: ...on com EN 35 SIGN UP FOR FREE ION CLOUD STORAGE 8GB of free Cloud storage will be provided for storing and sharing of video and photo content You can visit www iontheaction com ioncloud and sign up as...

Page 36: ...e Burst Time lapse Audio Built in high quality microphone AAC Compression Automatic Gain Control Storage MicroSD MicroSDHC in min class 6 up to 32GB Average Recording Times about 4 hours using 32GB mS...

Page 37: ...www iontheaction com EN 37 SYSTEM REQUIREMENTS Operating system Windows 7 XP SP3 Vista and Mac 10 5 or above CPU Pentium III or above RAM At least 64MB Interface USB port CD 4x speed CD ROM or above...

Page 38: ...mory full Replace with a memory card with space available for contents Cannot take photos or video Green and Red LED flashes alternatively 1 MicroSD card is not inserted 2 MicroSD card has not been fo...

Reviews: